

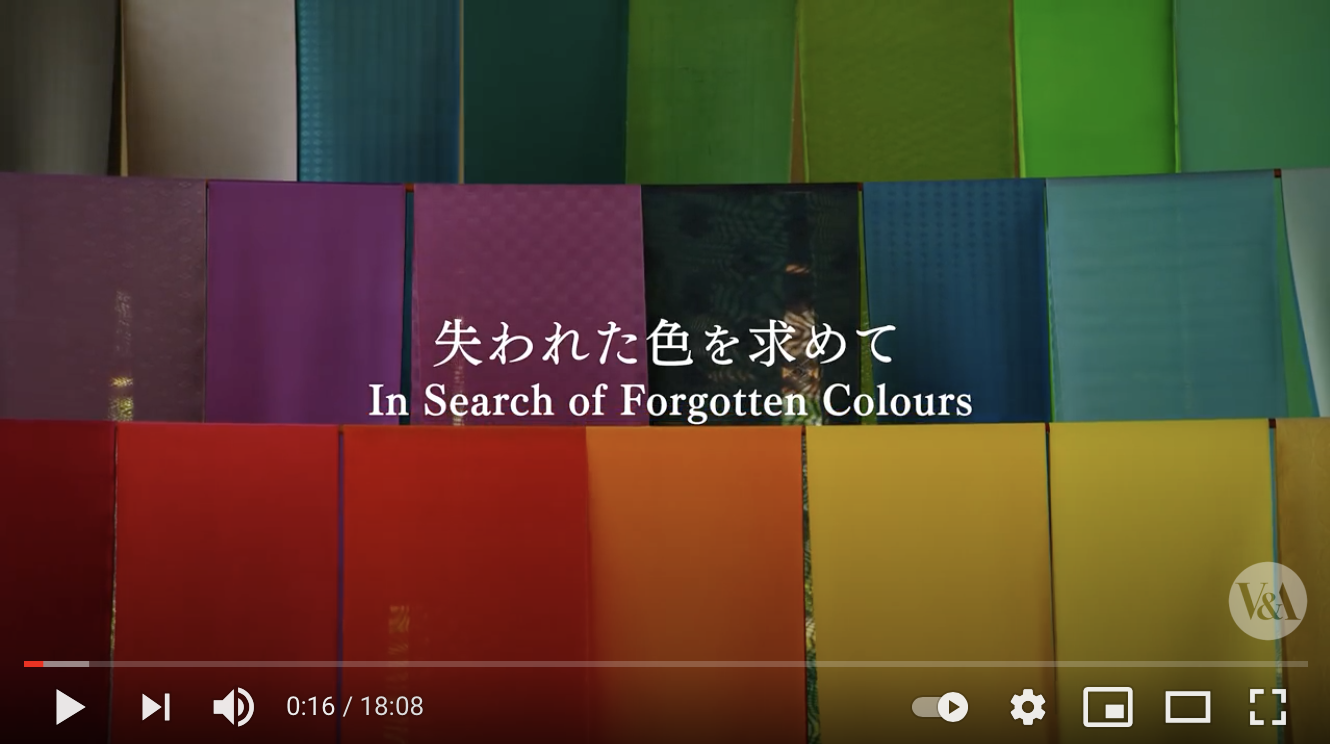
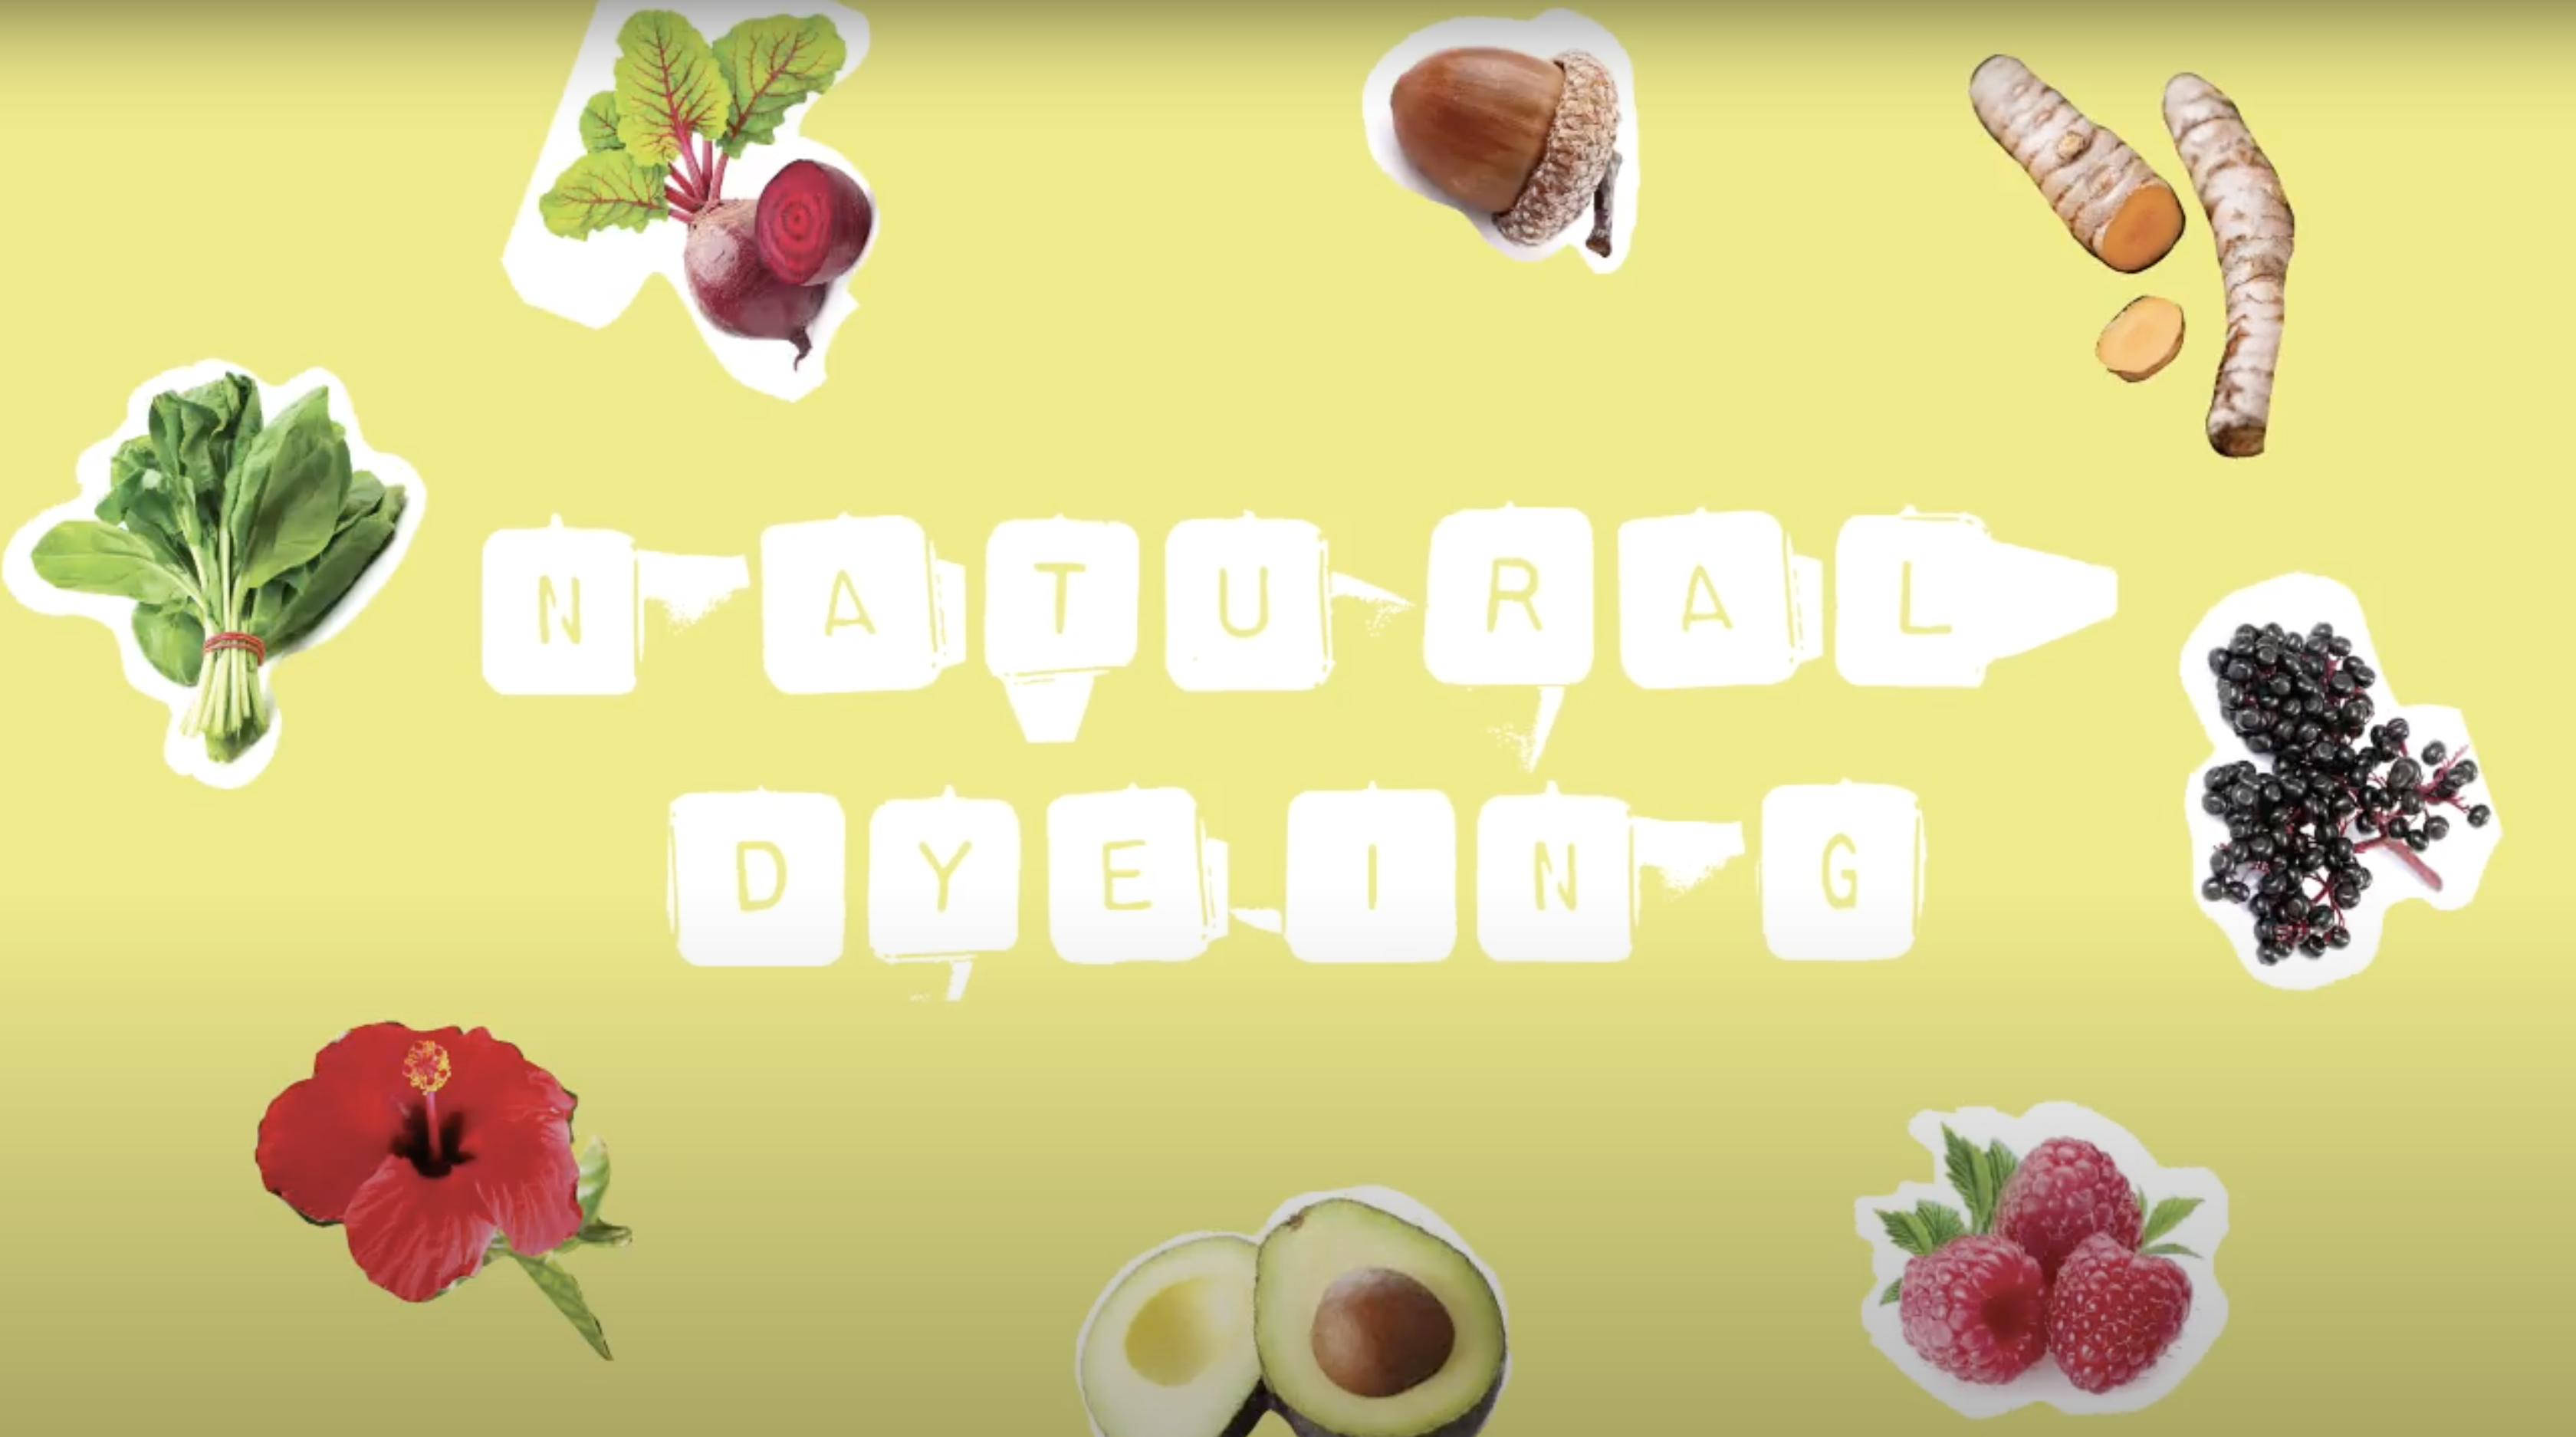
History
Pigments and dyes have been used since prehistoric times 5000 B.C. Natural Pigments were derived from plants, animals, or minerals, and used for:
Bases for oil paints
Printmaking
Dyeing
Food coloring
Weaving
Wax crayons
Silk painting
It is hard to pinpoint exactly when and where natural dyes started to be used however many traces were found in China and Egypt, as well as other countries throughout Africa dating back to 2600 B.C.
Artists began with natural pigments until synthetic materials were introduced, however we are slowly reverting back to the natural process in hopes of becoming more environmentally-friendly.
Colors & Pigments
Ochre (Hematite) - a natural pigment that comes in warm shades of yellow, red, orange and brown. It is said to be the first pigment used 70,000 years ago in the Middle Stone Age of Africa.
Tyrian Purple - was considered a luxury because it was harder to come by, symbolized royalty and luxury in result
The color of high achievement, ostentatious wealth, symbolized sovereignty, and the highest offices in the legal system.
Purple was the color of Cleopatra’s barge and Julius Caesar decreed that the color could only be worn by the emperor and his household.
Purple: royalty.
Cochineal - dye derived from cactus insects, crimson color, originated in Mexico.
Madder Red - plant dye stemming from the roots of over 30 species of plants, first dye to be used as camouflage.
Indigo Blue - most intricate process; a shrub plant that was soaked in water and beaten with bamboo to speed up the oxidation process, providing a bright blue pigment.
Egyptians are credited with their extensive use of color in hieroglyphics and tombs.
Blue - azurite, lapis - heavens, the dominion of the gods, as well as the color of water, the yearly inundation and the primeval flood.
Green - papyrus stem, turqoise - growth, vegetation, new life, well-being, and resurrection.
Yellow - ochre - color of the sun and, along with gold, could represent perfection.
Gold - eternal or indestructible.
Red - red ochre, hermit ibis - color of chaos and disorder; the color of the desert’s destructive fire and fury and was used to represent something dangerous, as well as death or protection.
Bai people, an Indiginous community in China, solely dyes their traditional attire using natural dyes.
Artwork created throughout African countries integrate the three elements of the universe: nature, human, and the divine, through natural materials.
Certain natural objects are used in ritualistic and traditional practices.

Practicing Artists
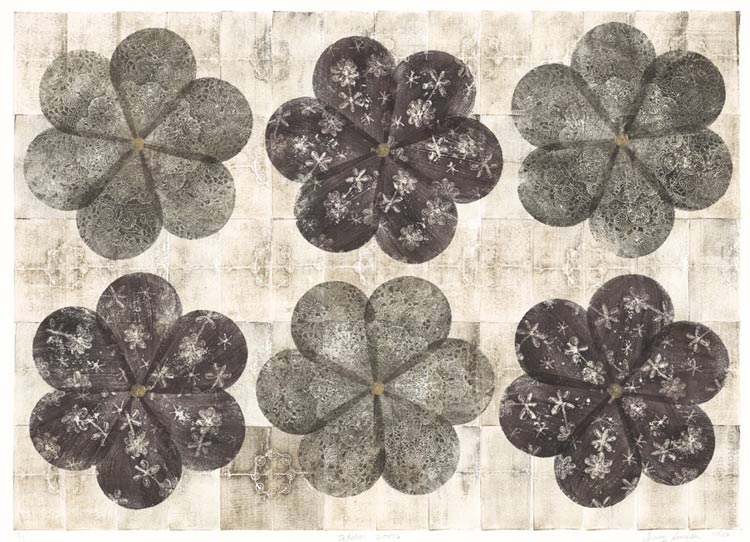
Kiva Motnyk
Brece Honeycutt


Relevance
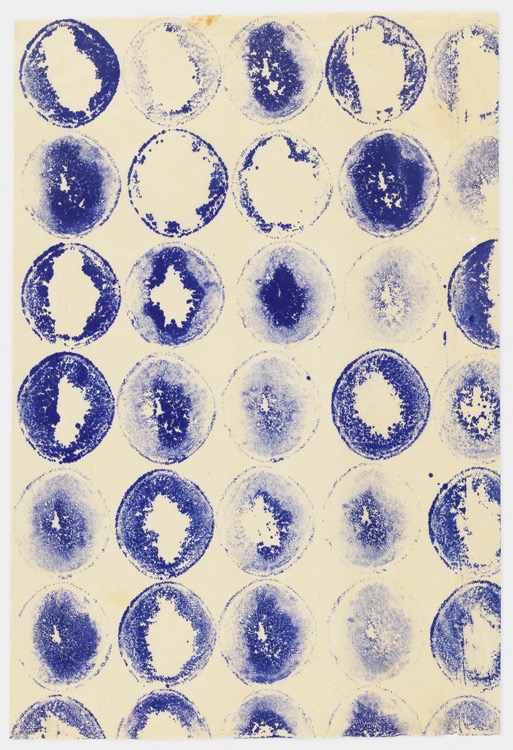
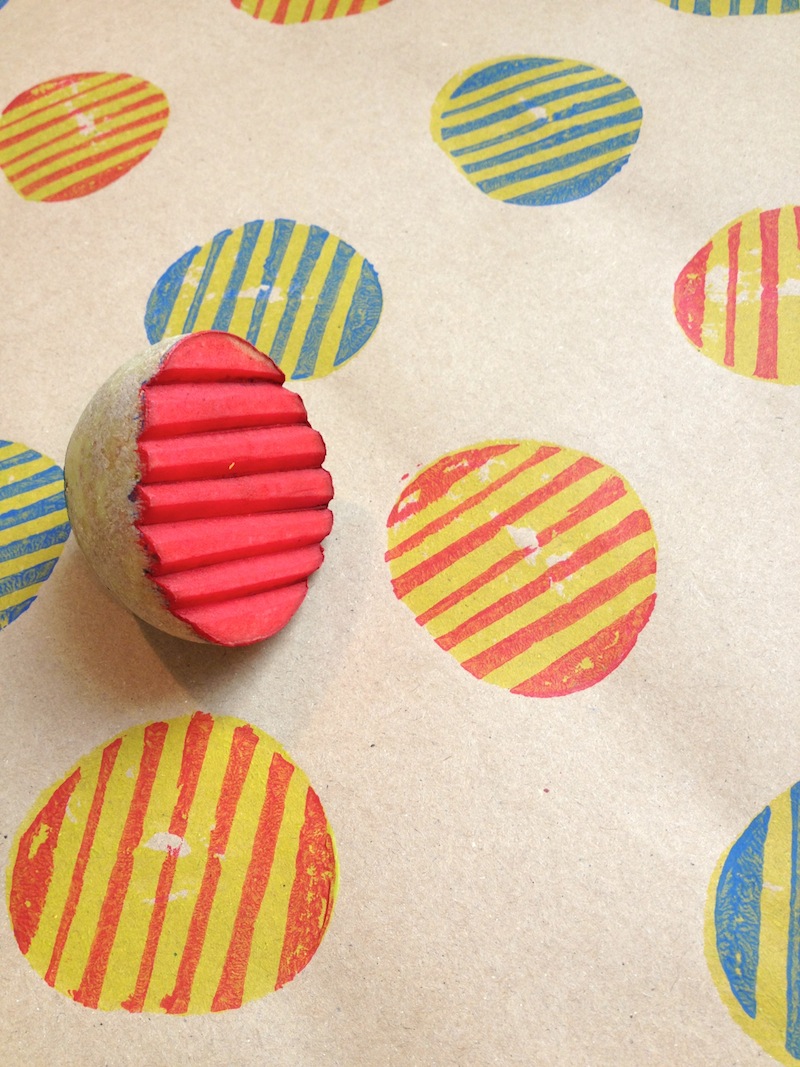
Potato printing has no singular definite origin, but the process has been apparent in Northeastern Woodland Indigenous American basket design.

Potato stamps have been utilized over the years as a precedent of wood stamps, a resource when other art materials are not as accessible, and a hands-on craft technique for young children and adults alike.
Practicing Artists
Ruth Asawa


Tracy Simpson
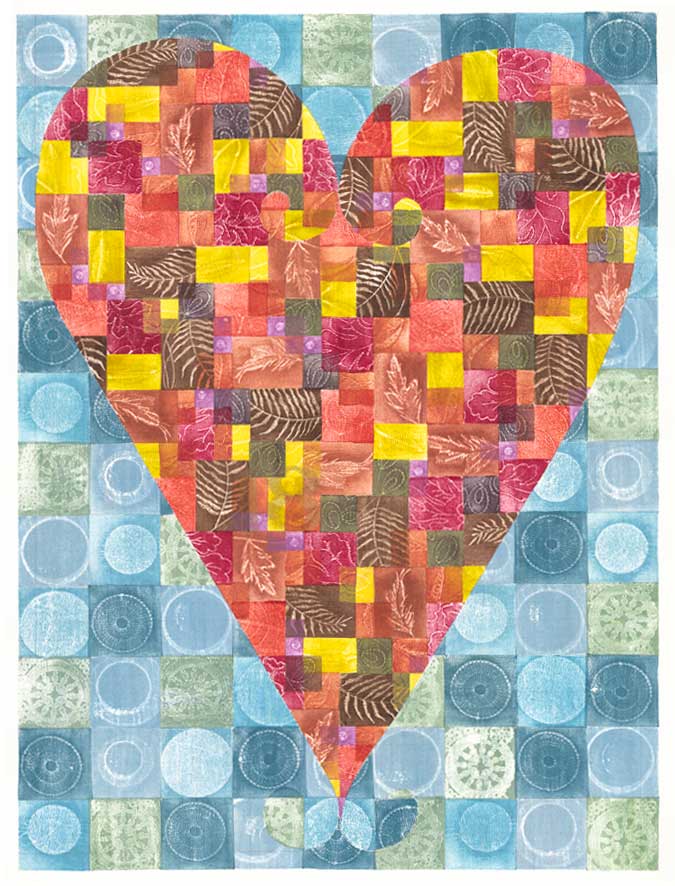
Nick Morley (Linocut Boy)


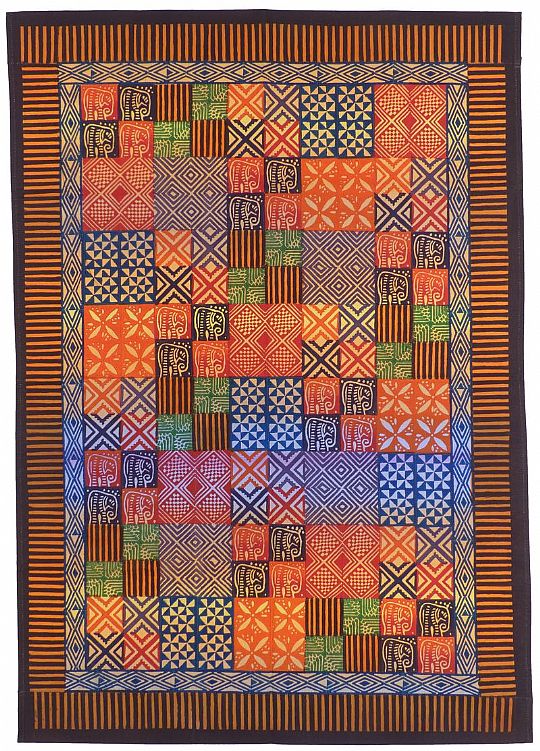
Kudhinda Potato Print Wallhangings - Ros Byrne, Zimbabwe


History
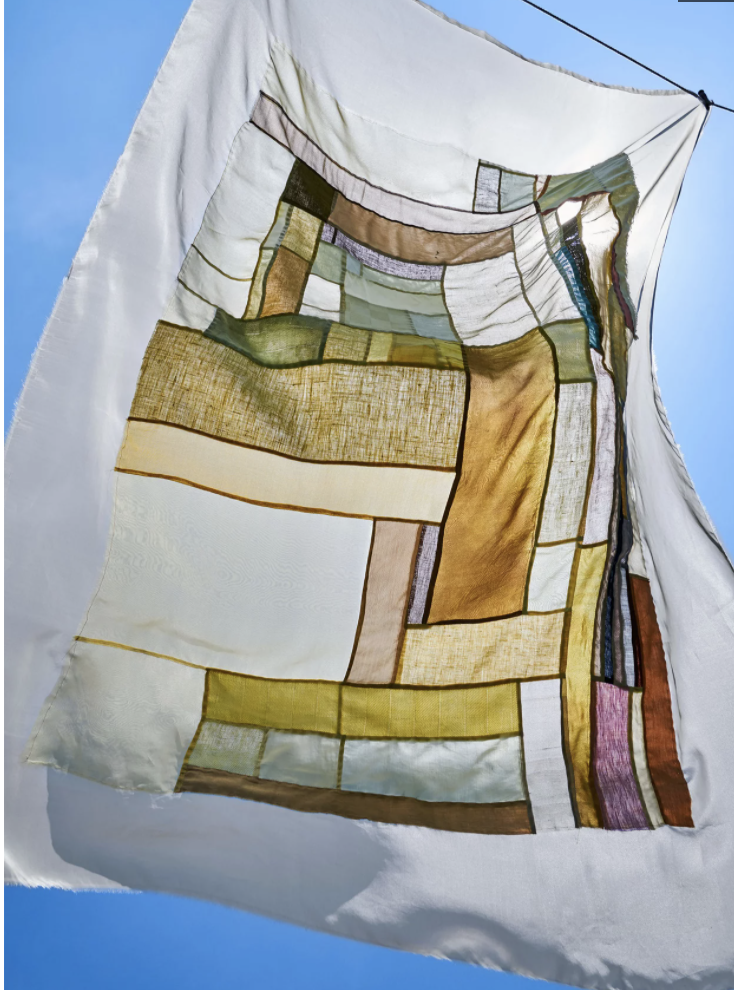
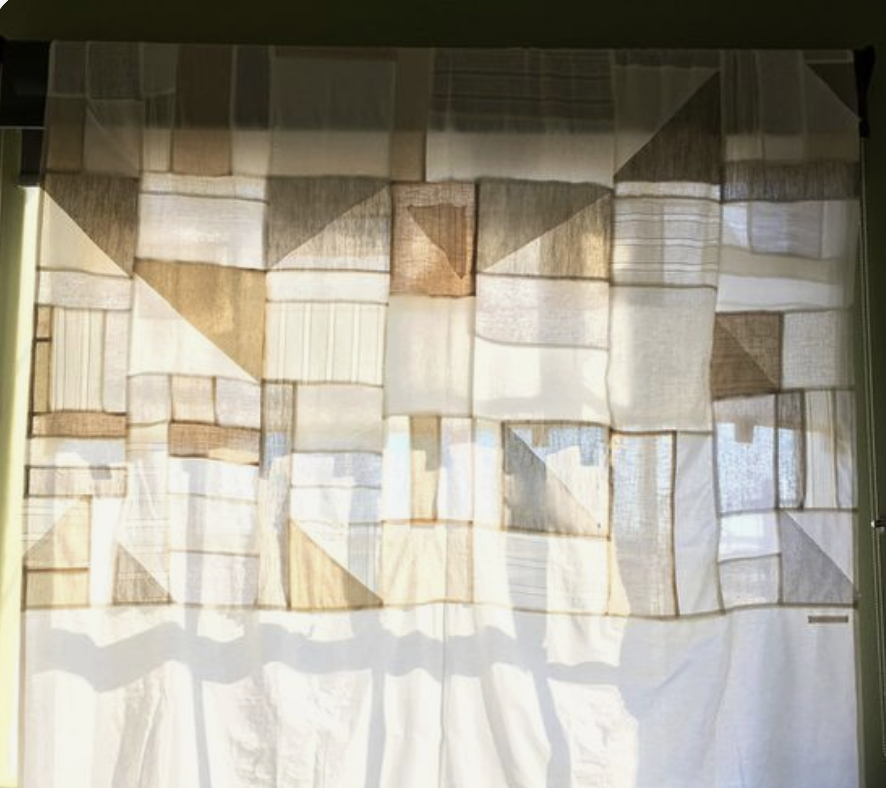
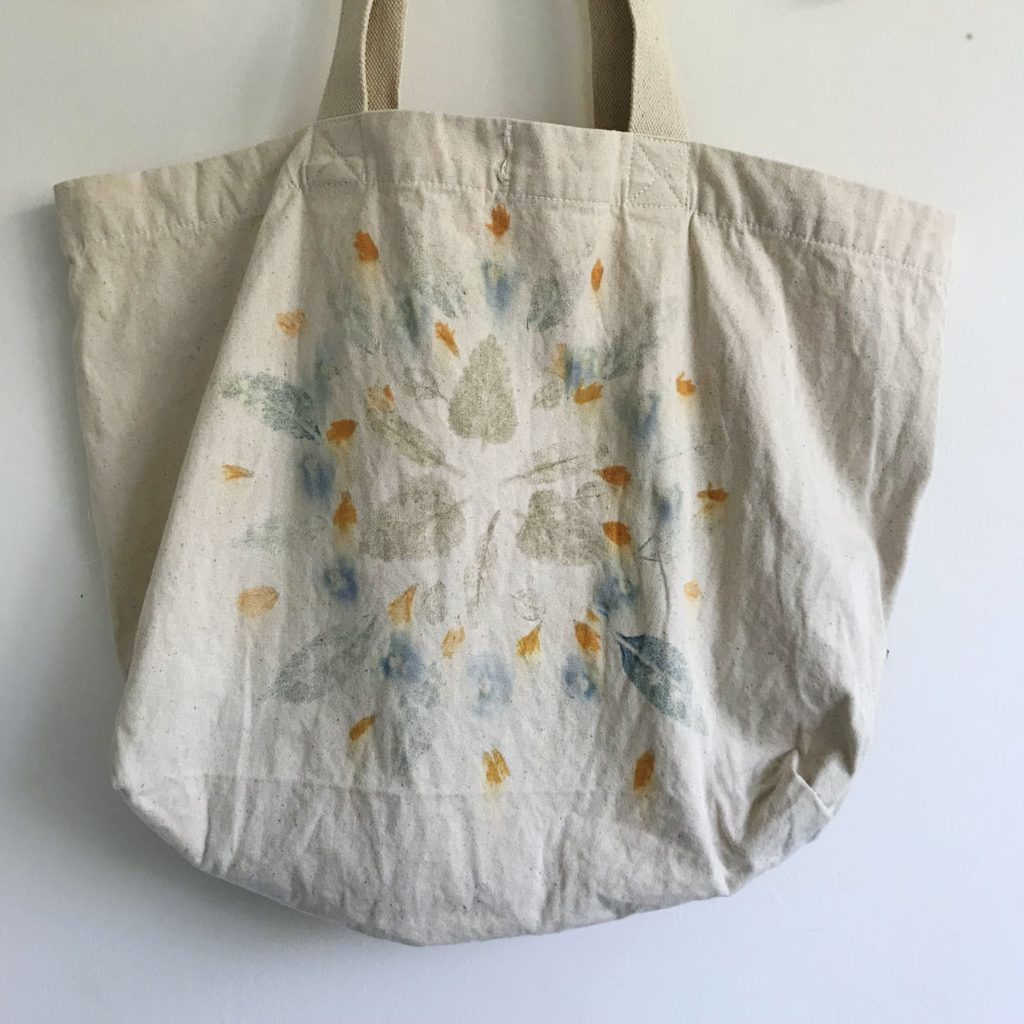
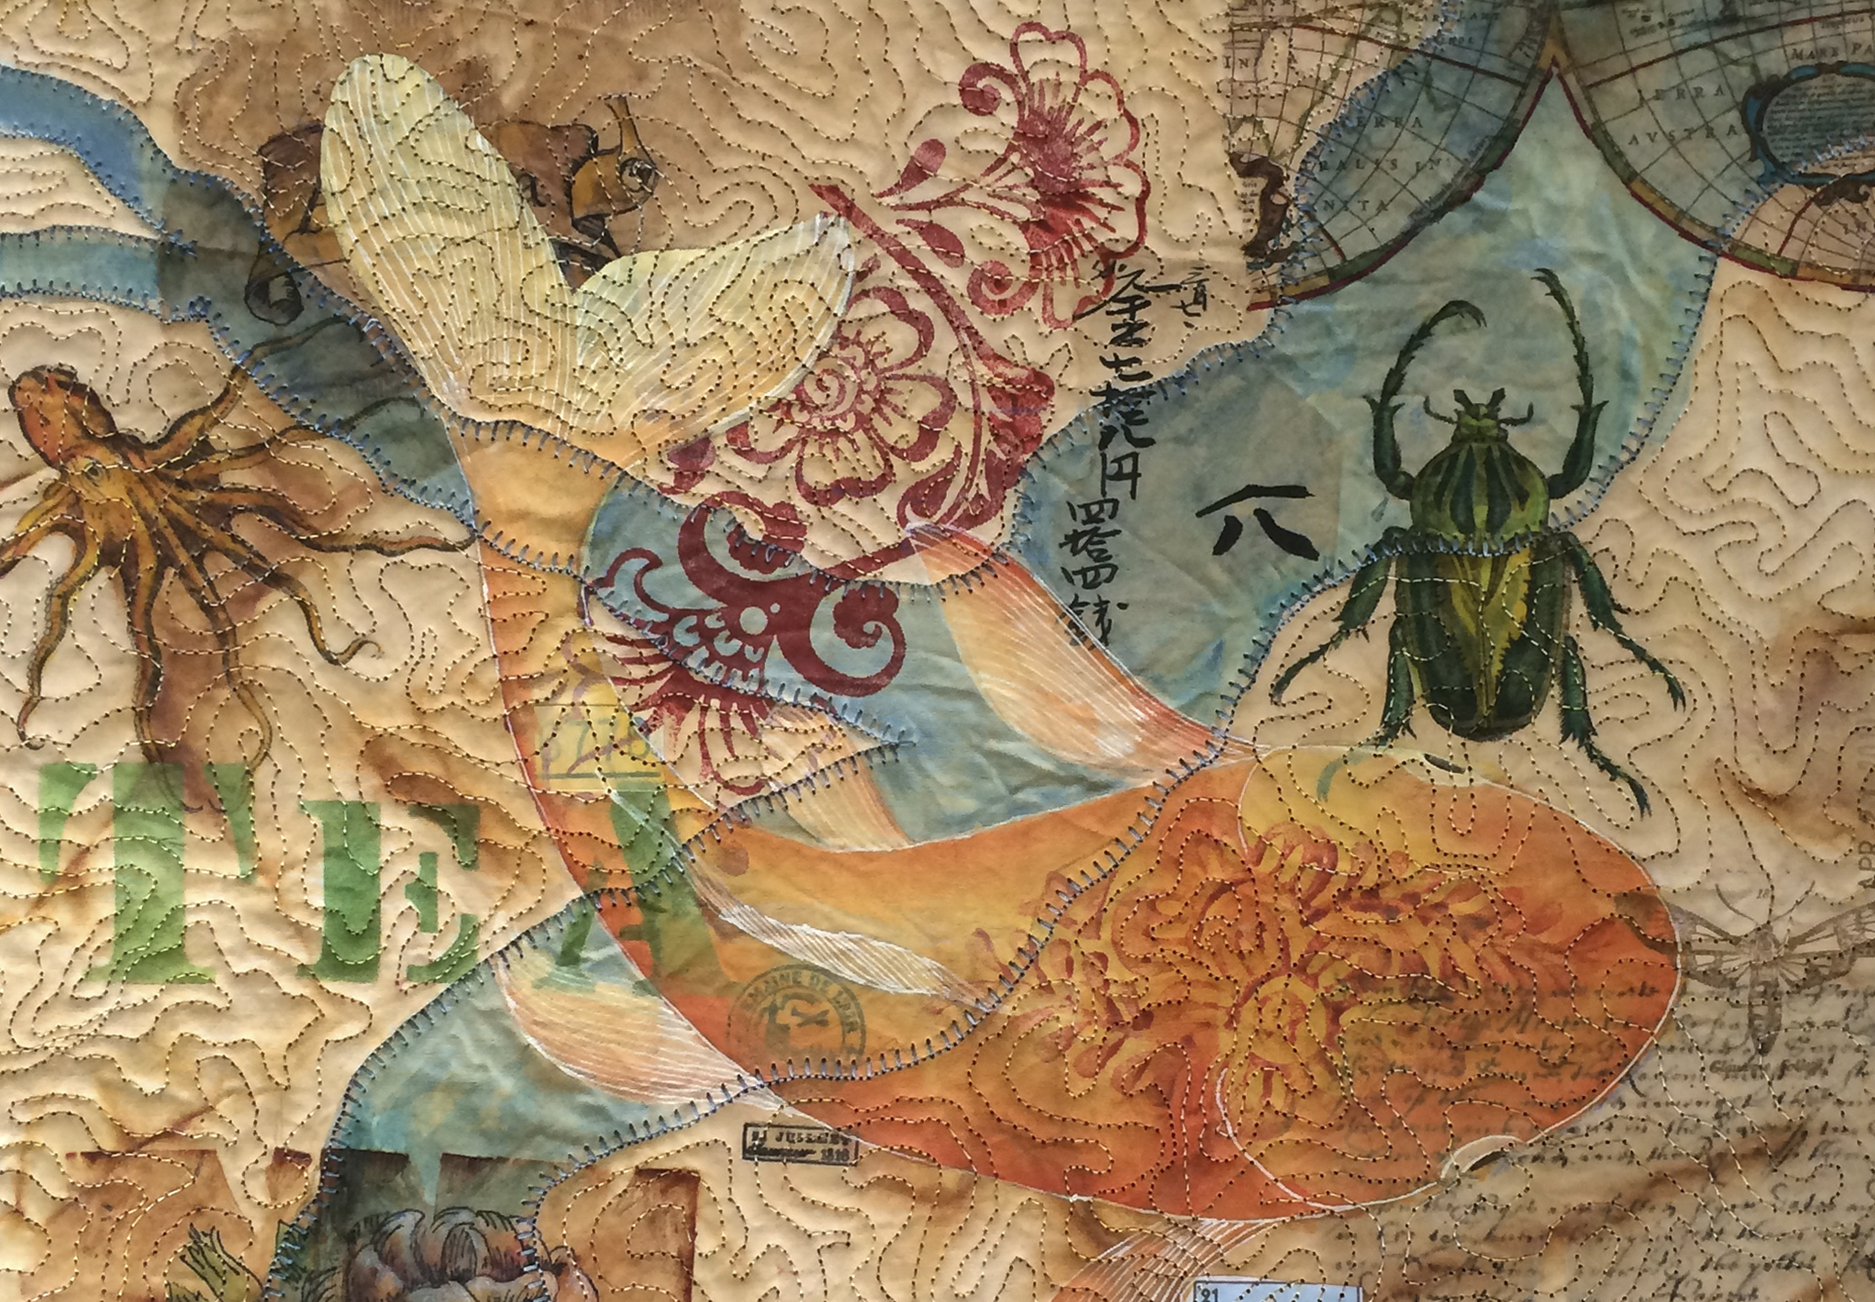
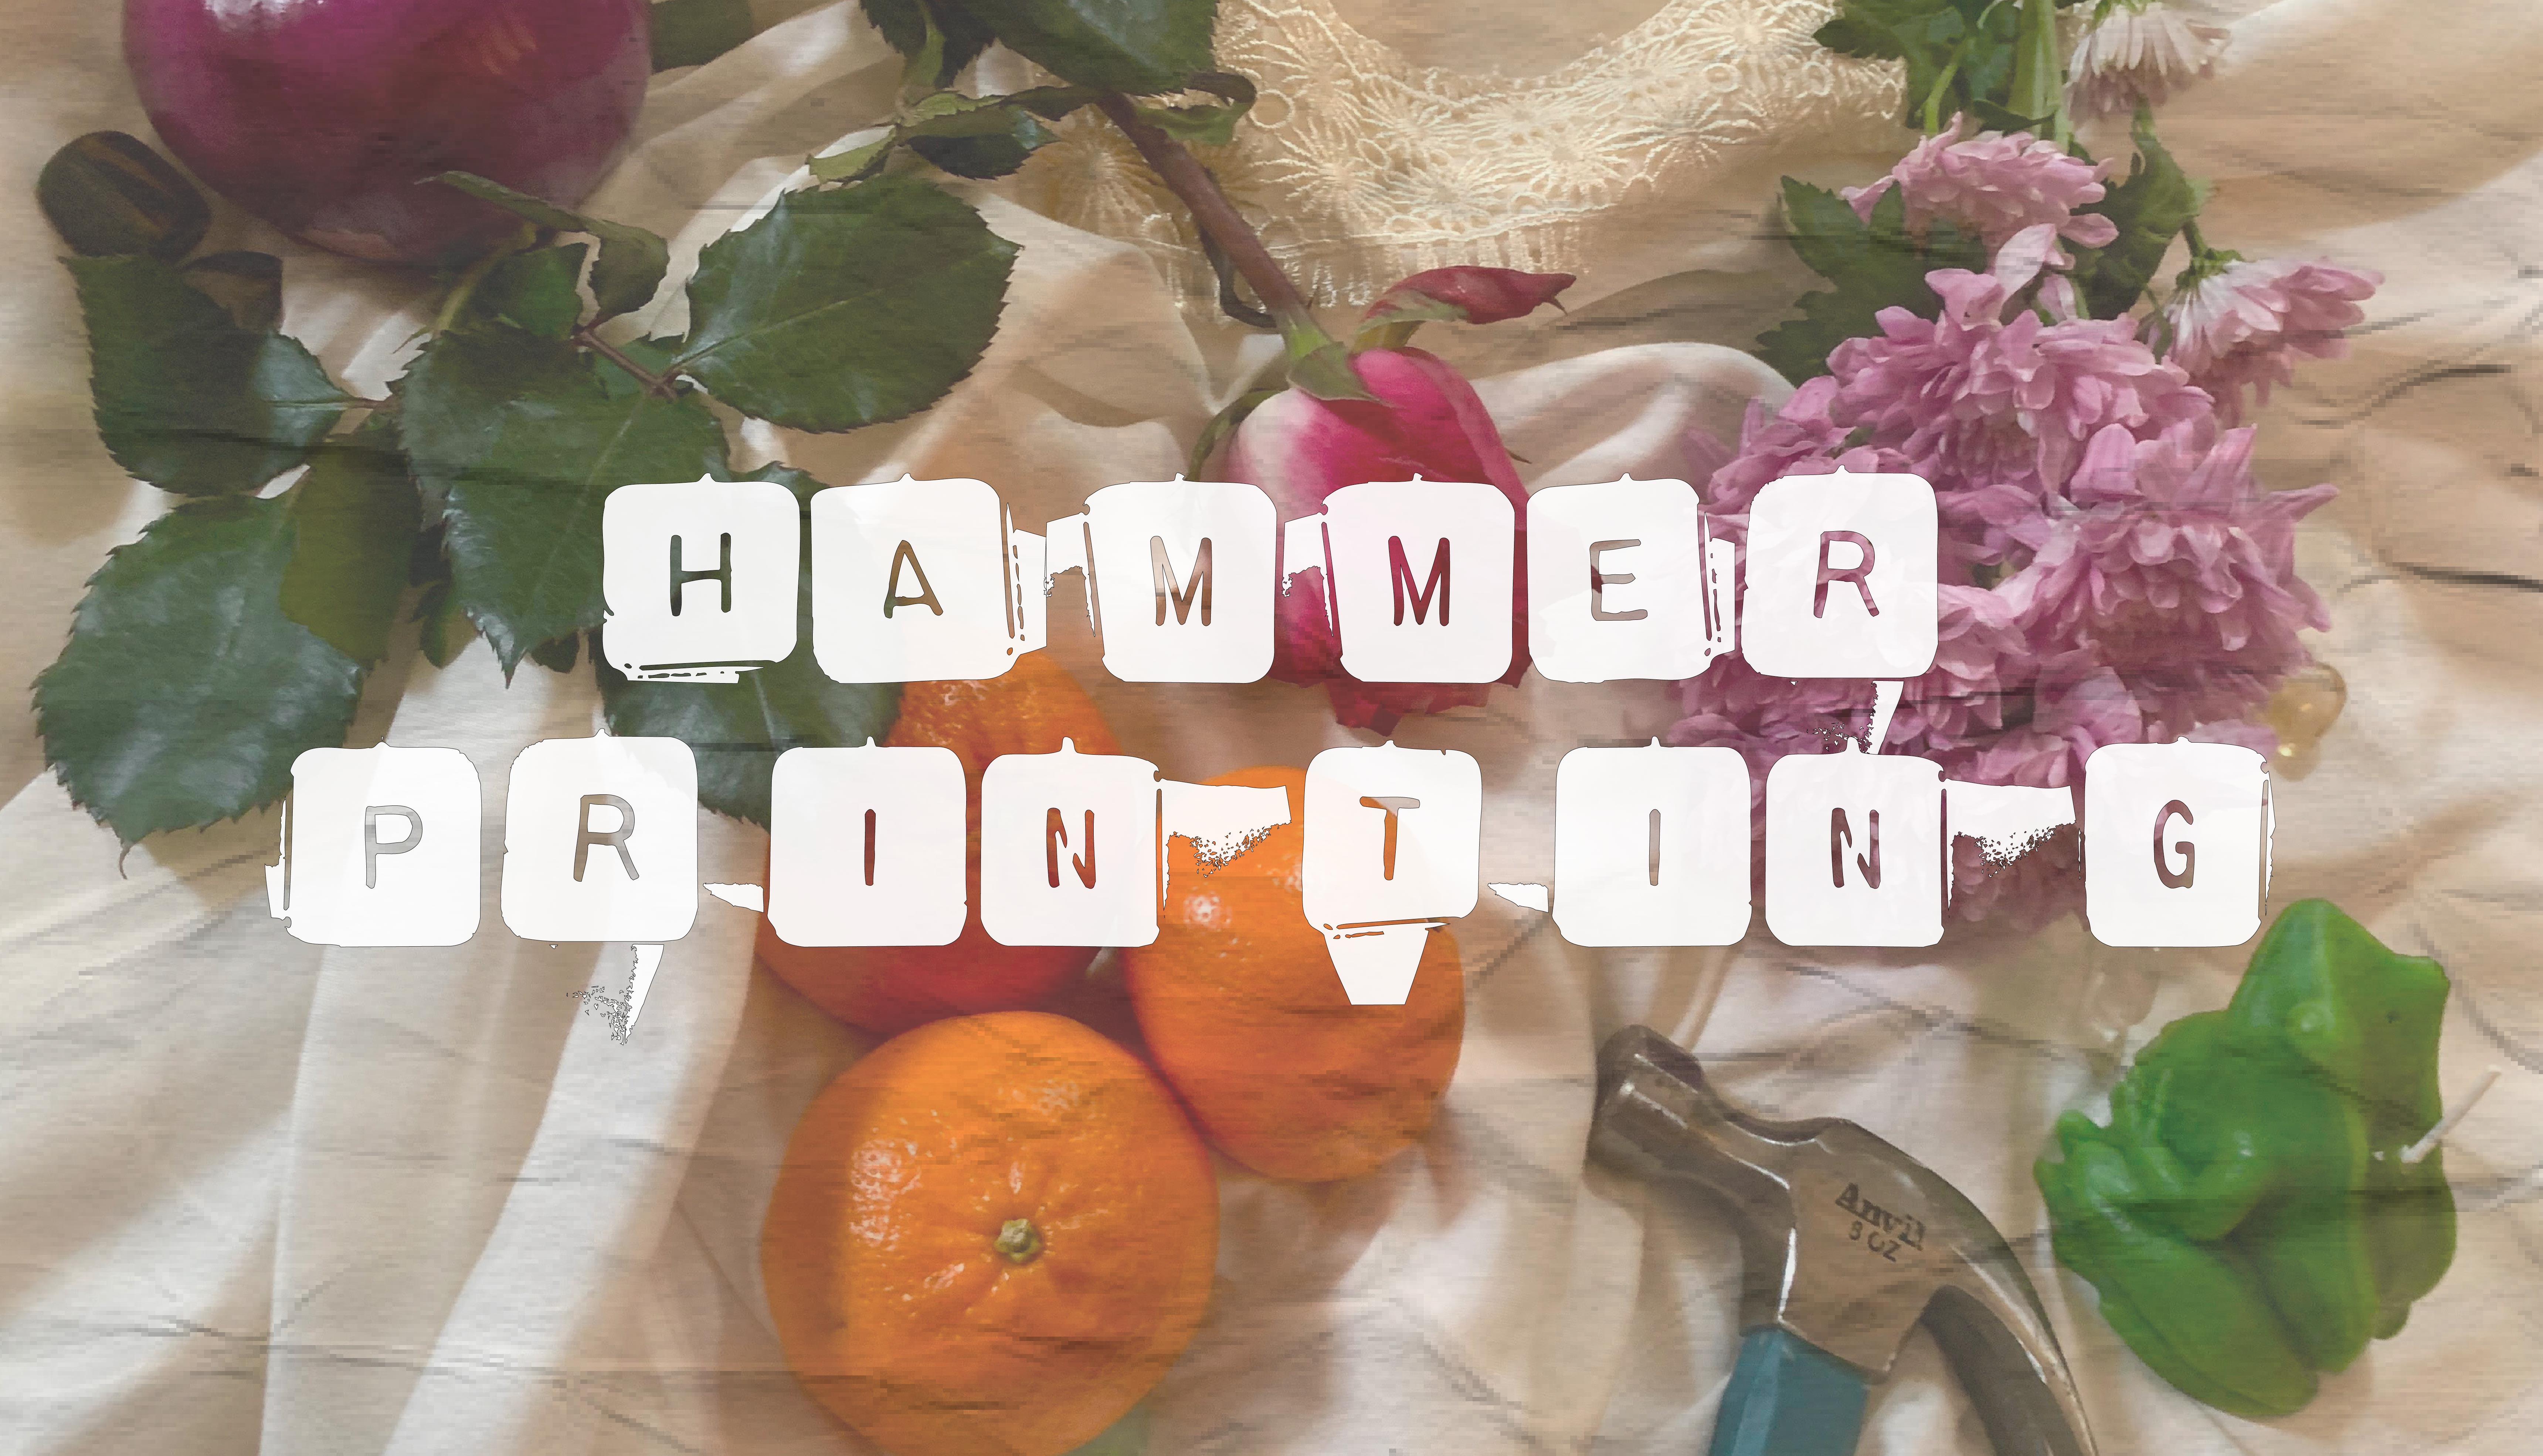
For thousands of years, flowers were used to dye fibers because of their availibility. Over 5,000 years ago, China began dyeing their fabrics and textiles with plants, bark, insects, etc. The pounding of plants directly onto fabric has long been practiced and known by the Japanese and Native Americans. Roughly translating to “leaf-dyeing” in Japanese, the methods original Japanese name is “Tataki Zome.” Tataki zome is a Japanese technique also known as flower pounding, leaf bashing, and is sometimes called Hapa Zome. The term “Hapa Zome” was coined by the artist India Flint. The hammer printing technique introduces new textures, lines, and forms because it involves a direct transfer of a printed image from plant to fabric and paper.
Practicing Artists
India Flint
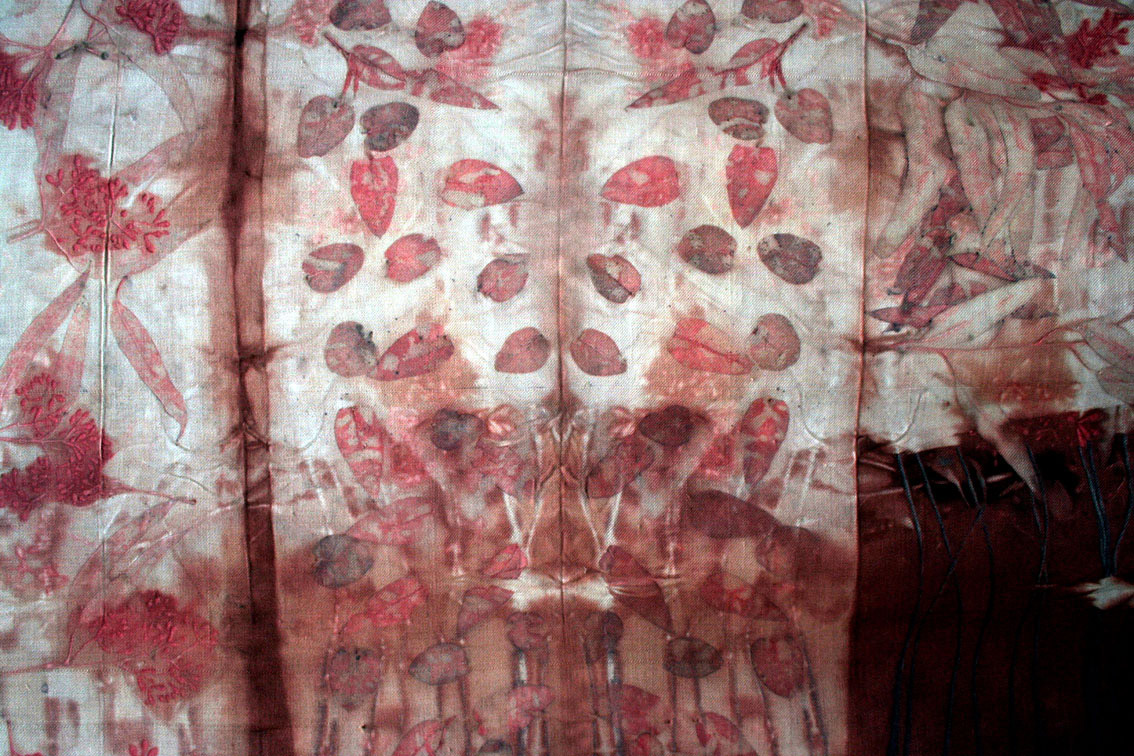
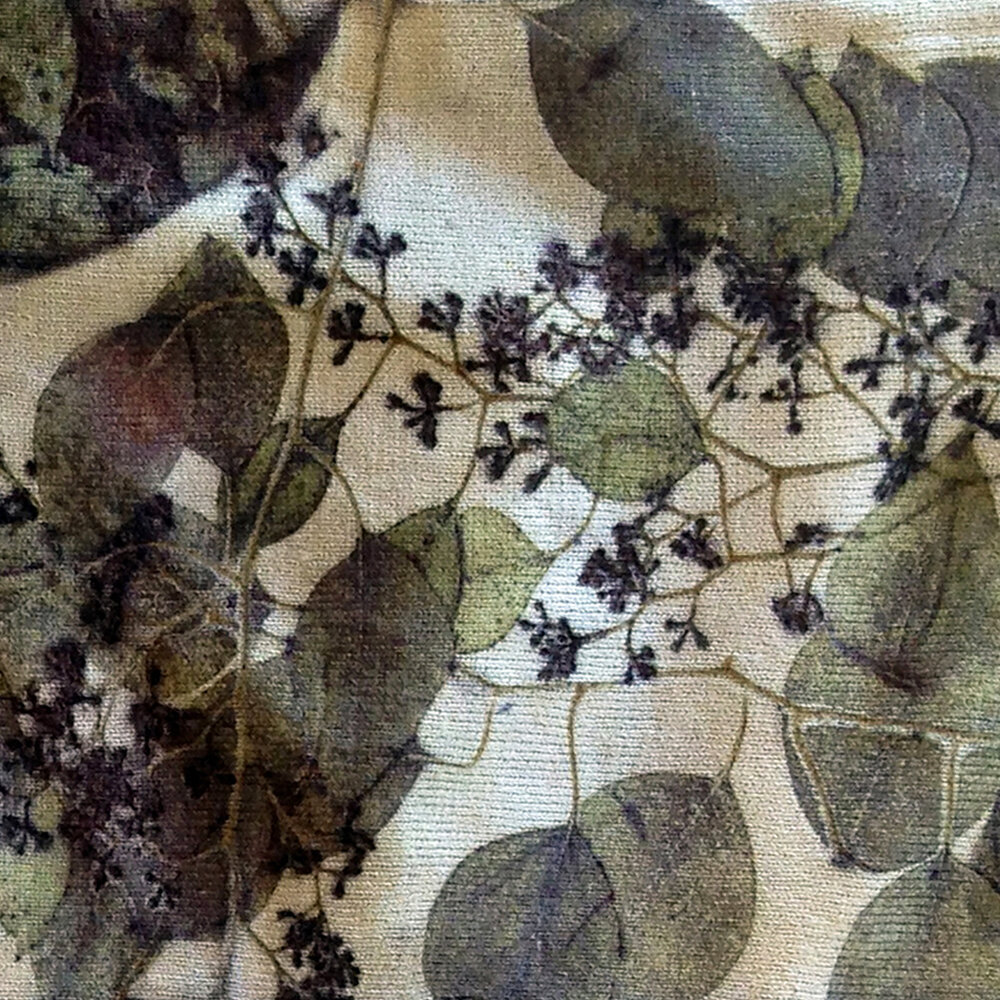
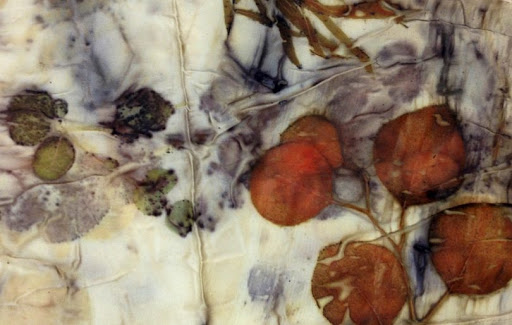
Liz Spencer
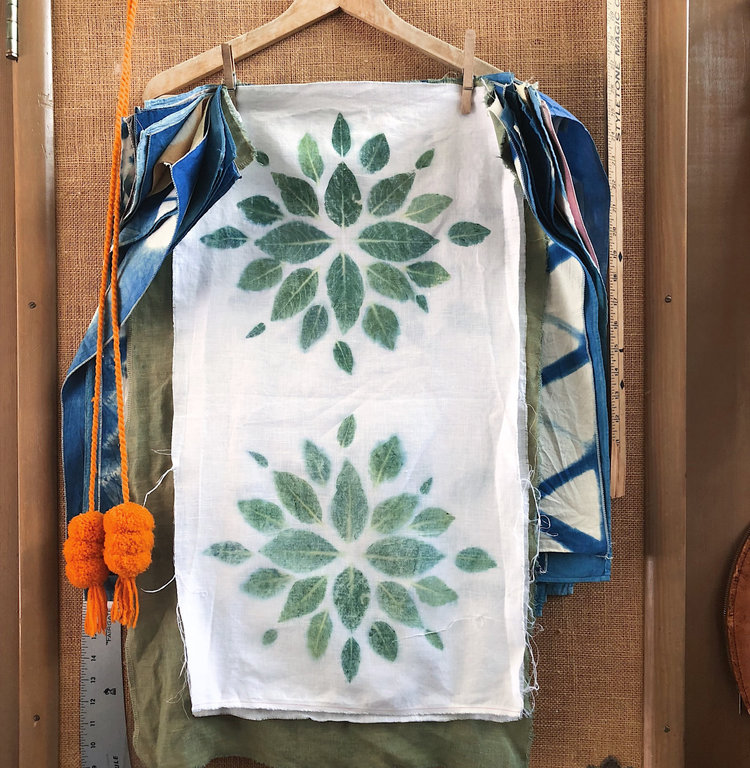

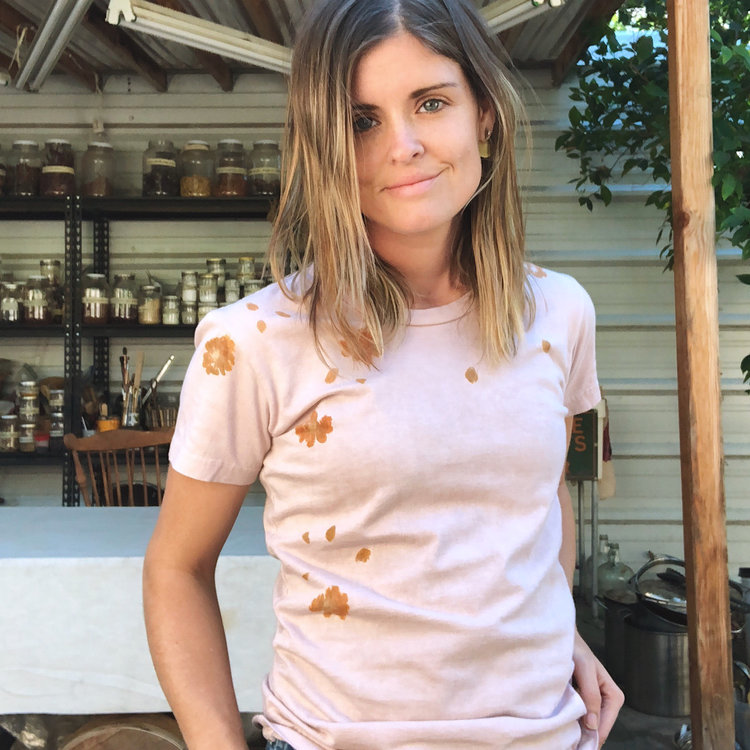
Rebecca Desnos


Tea Knowledge
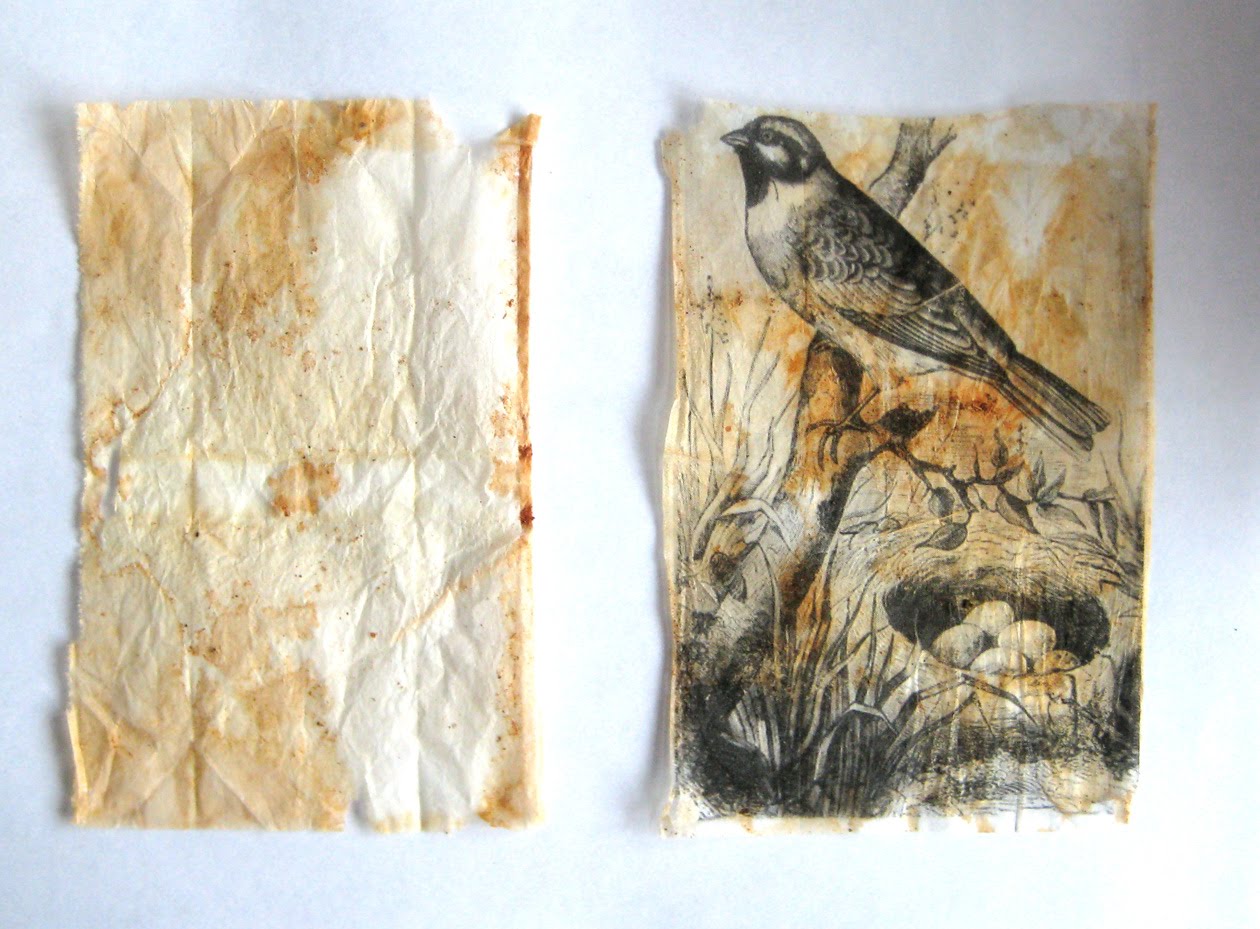
Tea plants are composed of hundreds of various compounds. Many are categorized as polyphenols, the name hinting at their molecular structure. Polyphenol compounds, specifically one of their sub-categories called “tannins,” produce the dark color often visible in tea. They also account for tea’s possible health benefits.
Tannins themselves have a pale color, but in reacting with iron they form darker tints. Historically, inks were created by extracting tannings from oak trees and combing them with iron compounds.
But where does the iron come in when making tea at home? The water! As water flows through the iron-rich ground, it collects and dissolves iron compounds. In different regions, the same tea will produce a different color depending on the water’s iron content.
Practicing Artist
Judy Coates Perez


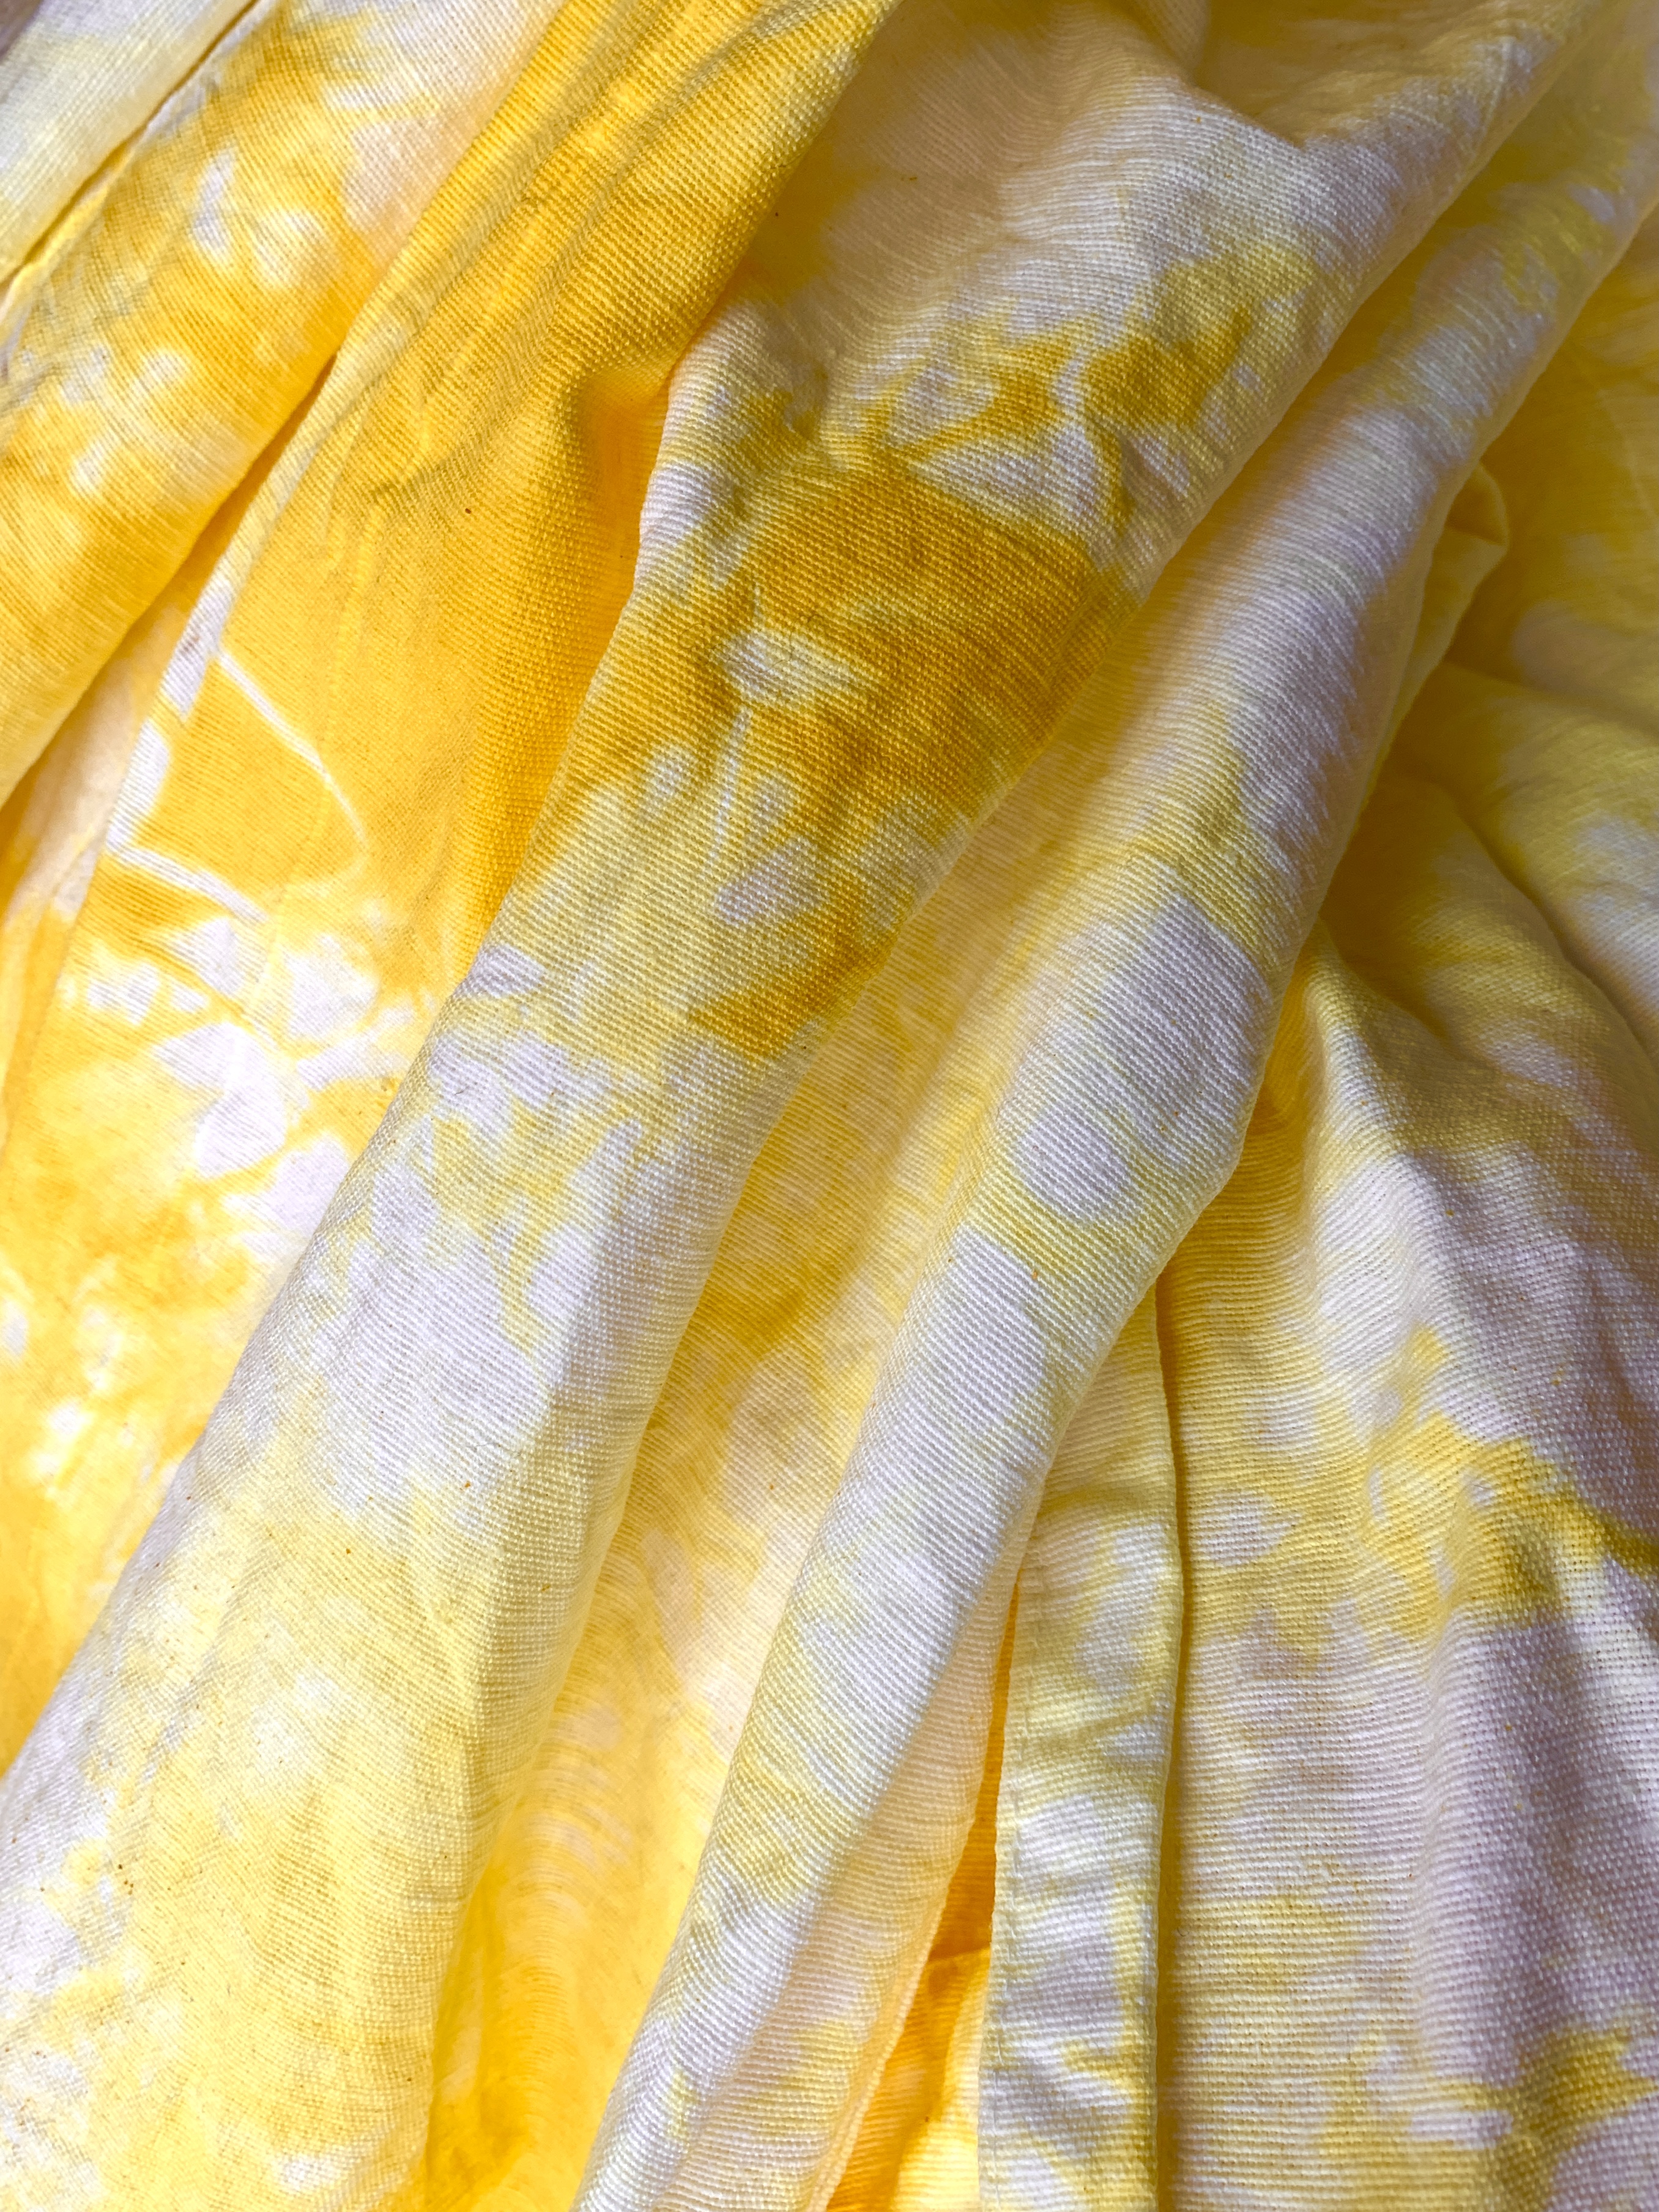
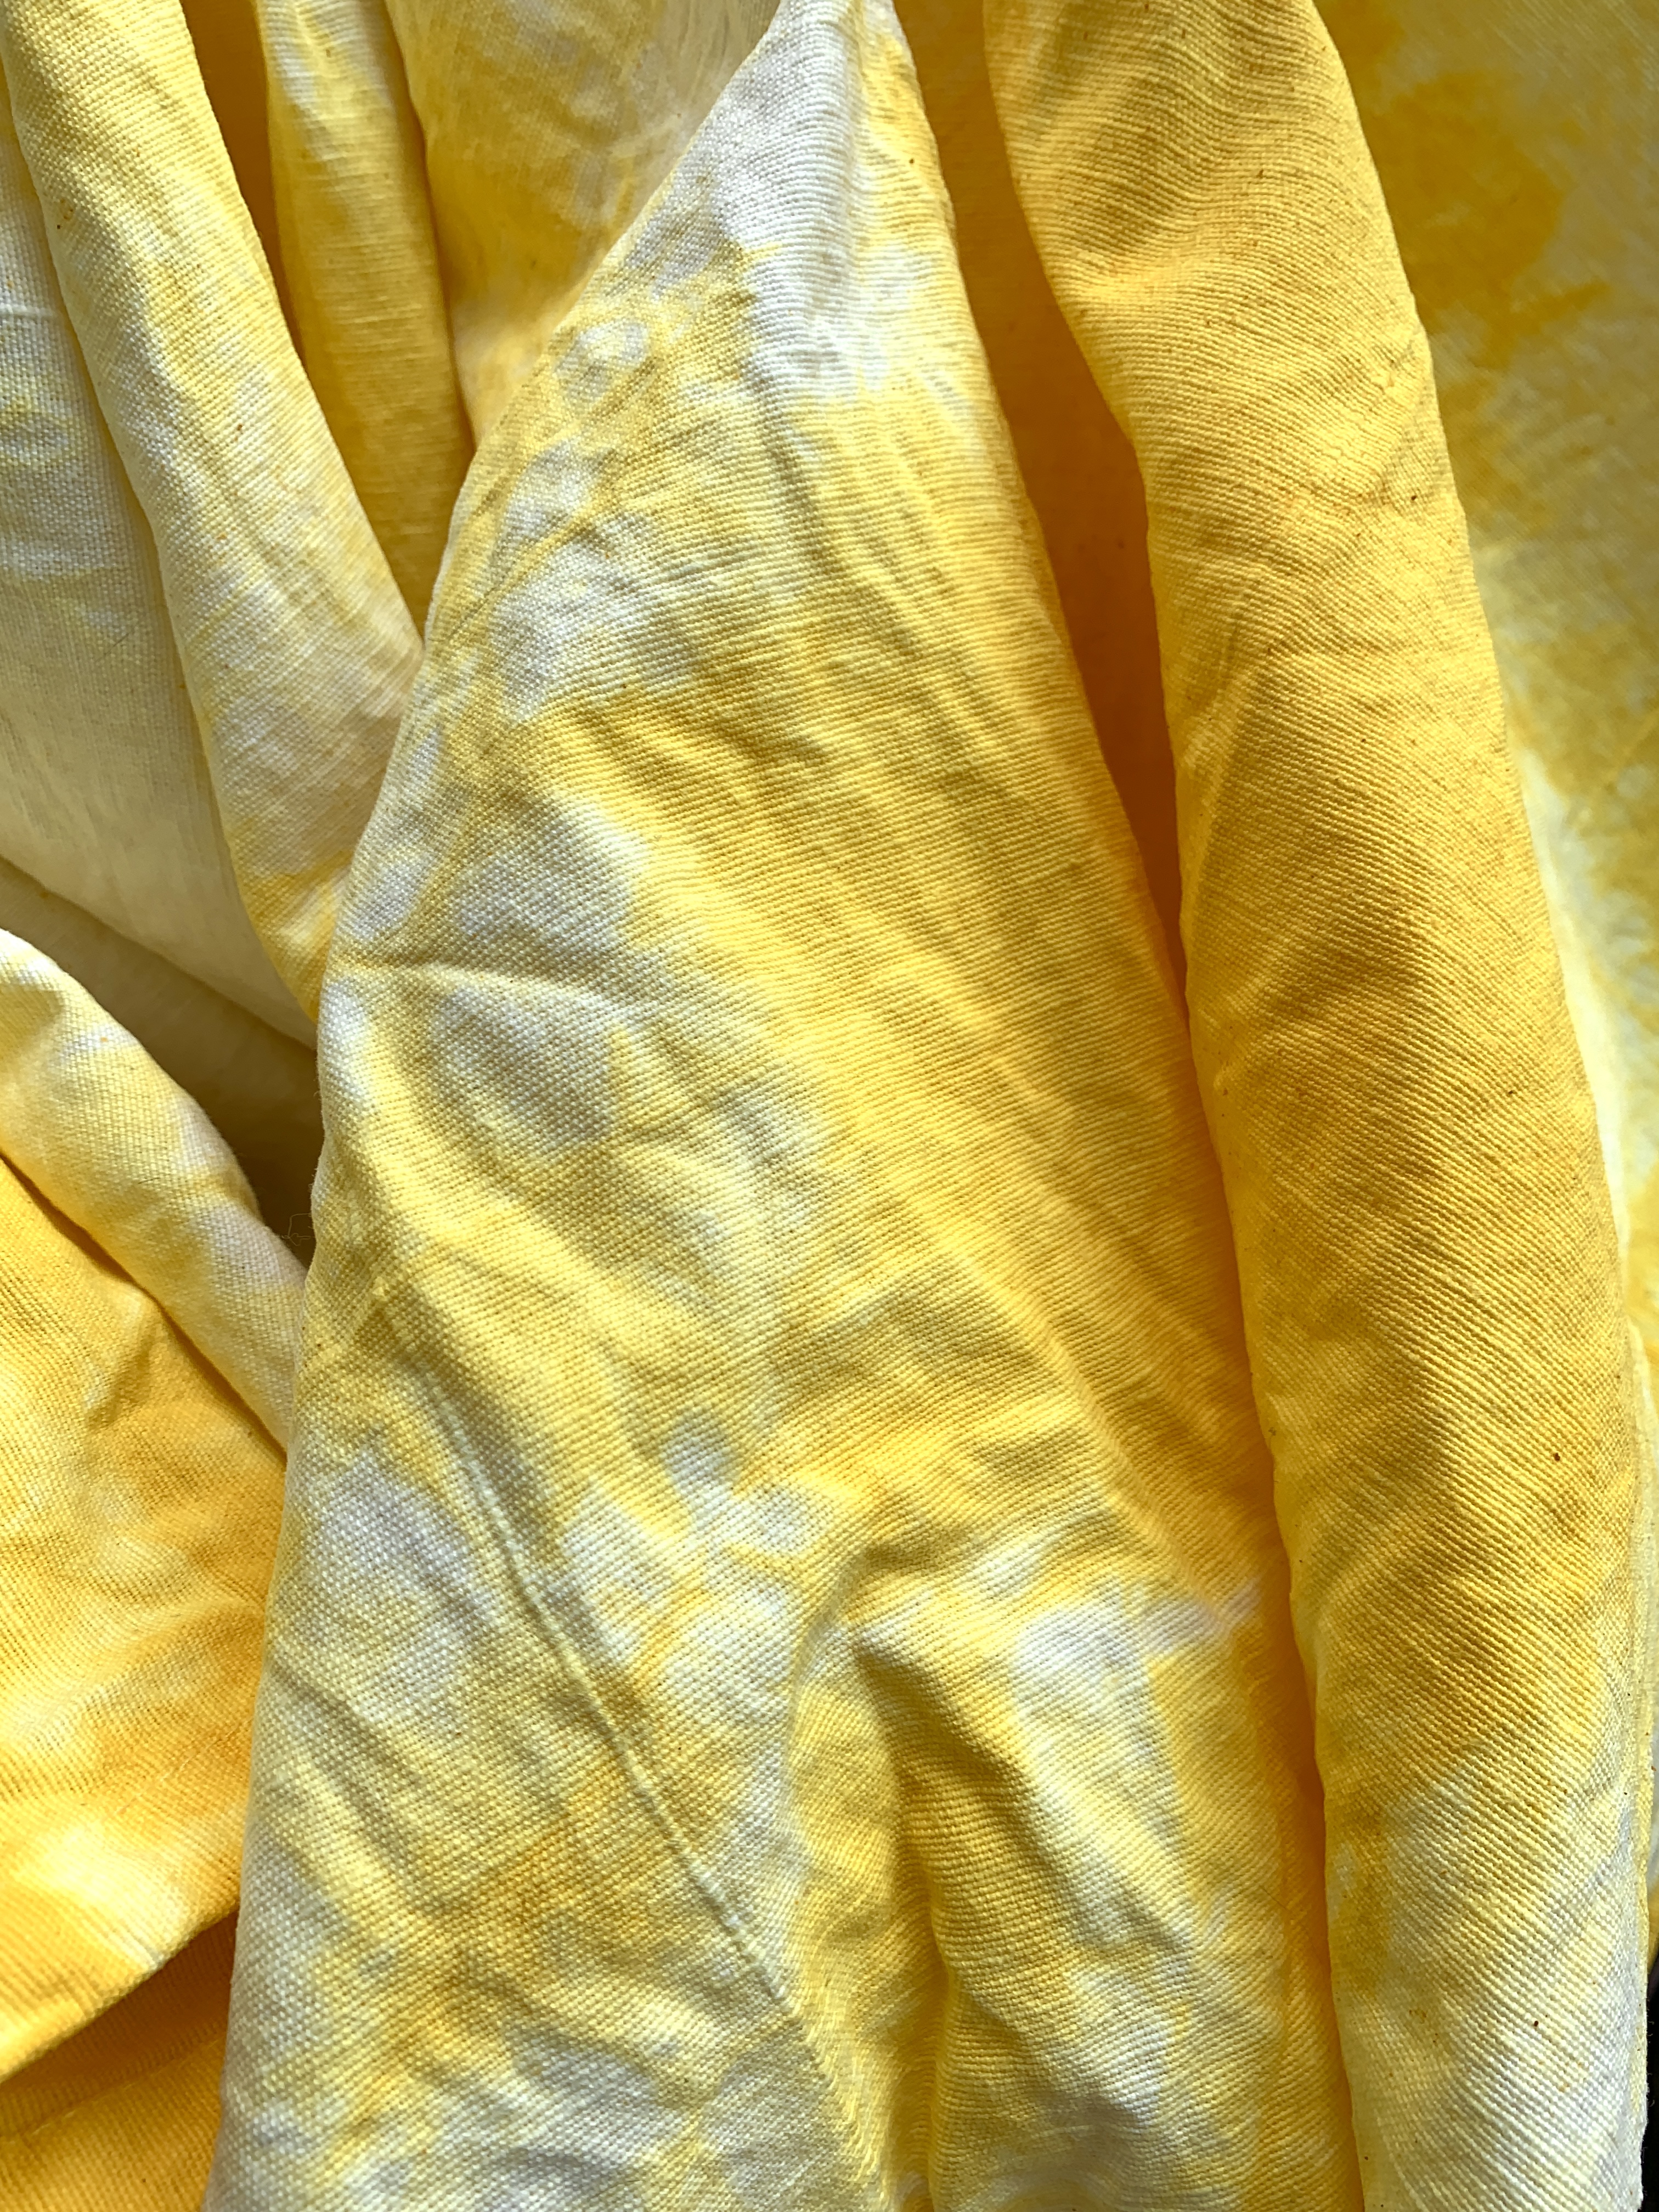
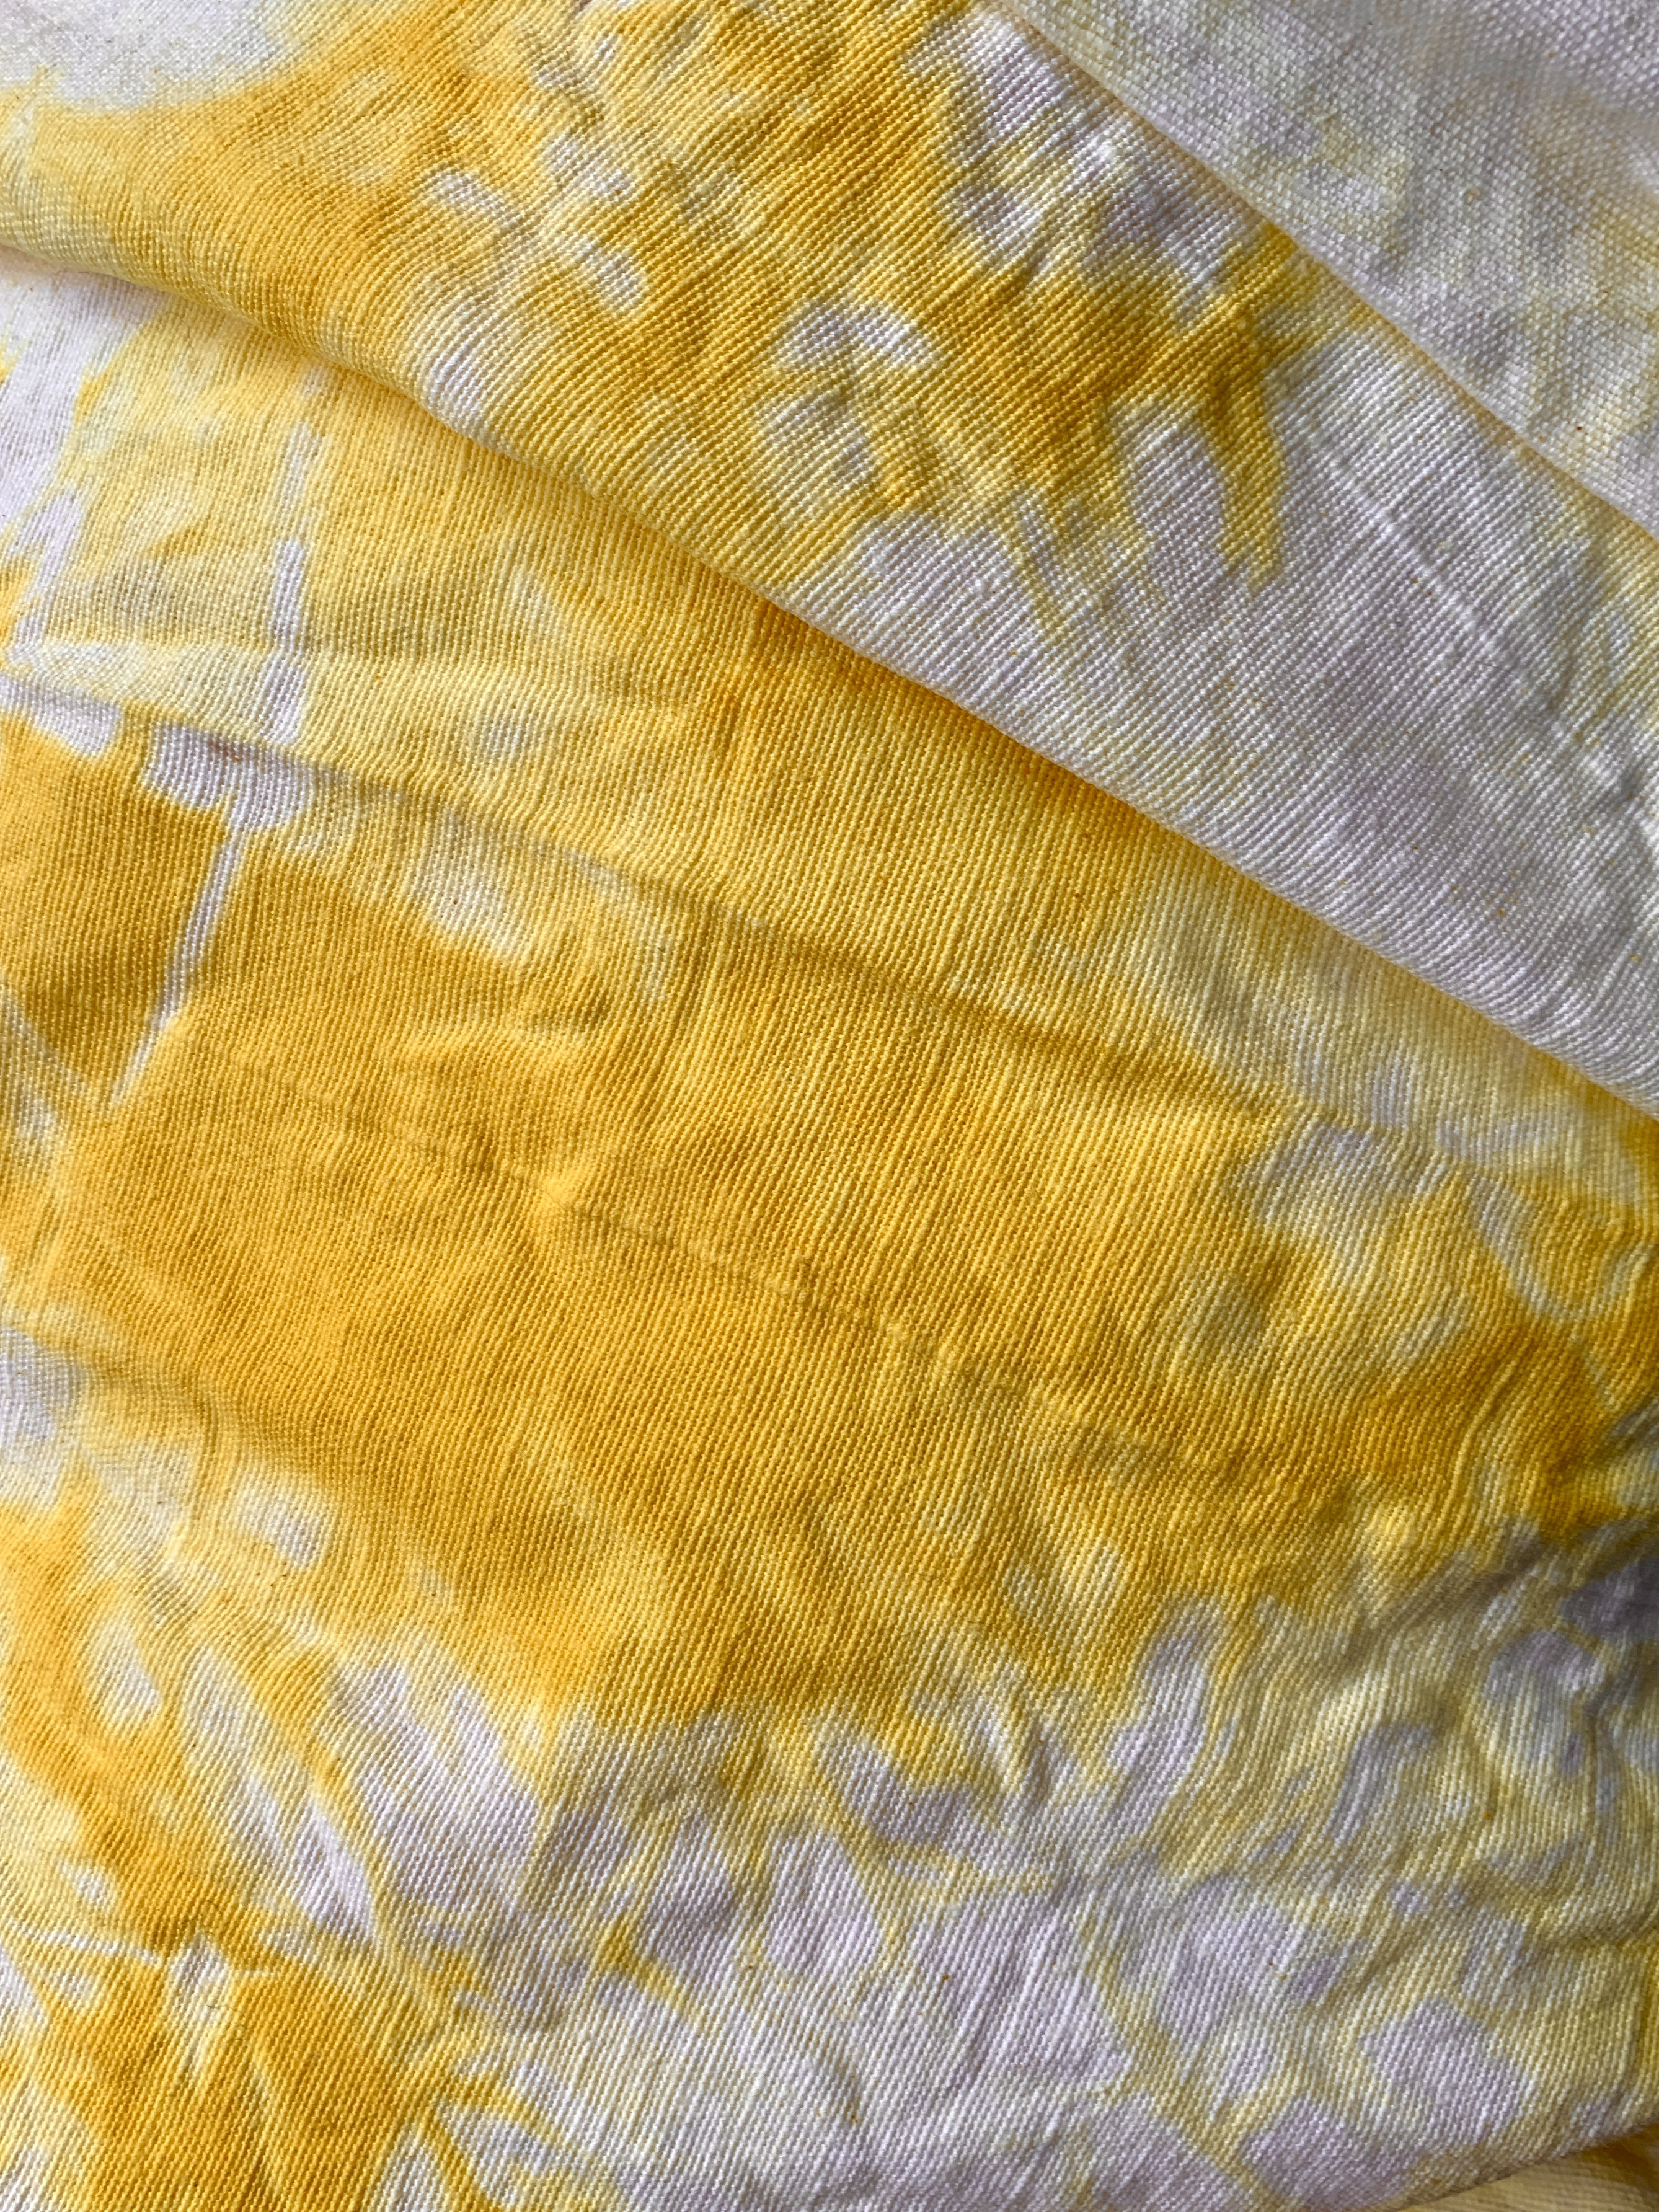
Dye of choice
(I used turmeric)
Natural fabric (100% cotton)
Dye pot
Drying pot
Mordant
(vinegar for vegetables and plants, salt for fruits)
Salt: 1/2cup salt per 8 cups of water
Vinegar: 1 part white vinegar to 4 parts water
Alum
(binds the dye to the fabric and gives it a more vibrant color)
(Disclaimer: Once you dye with alum, the pot is no longer safe to cook in.)
Water
Gloves
Spoon/tongs
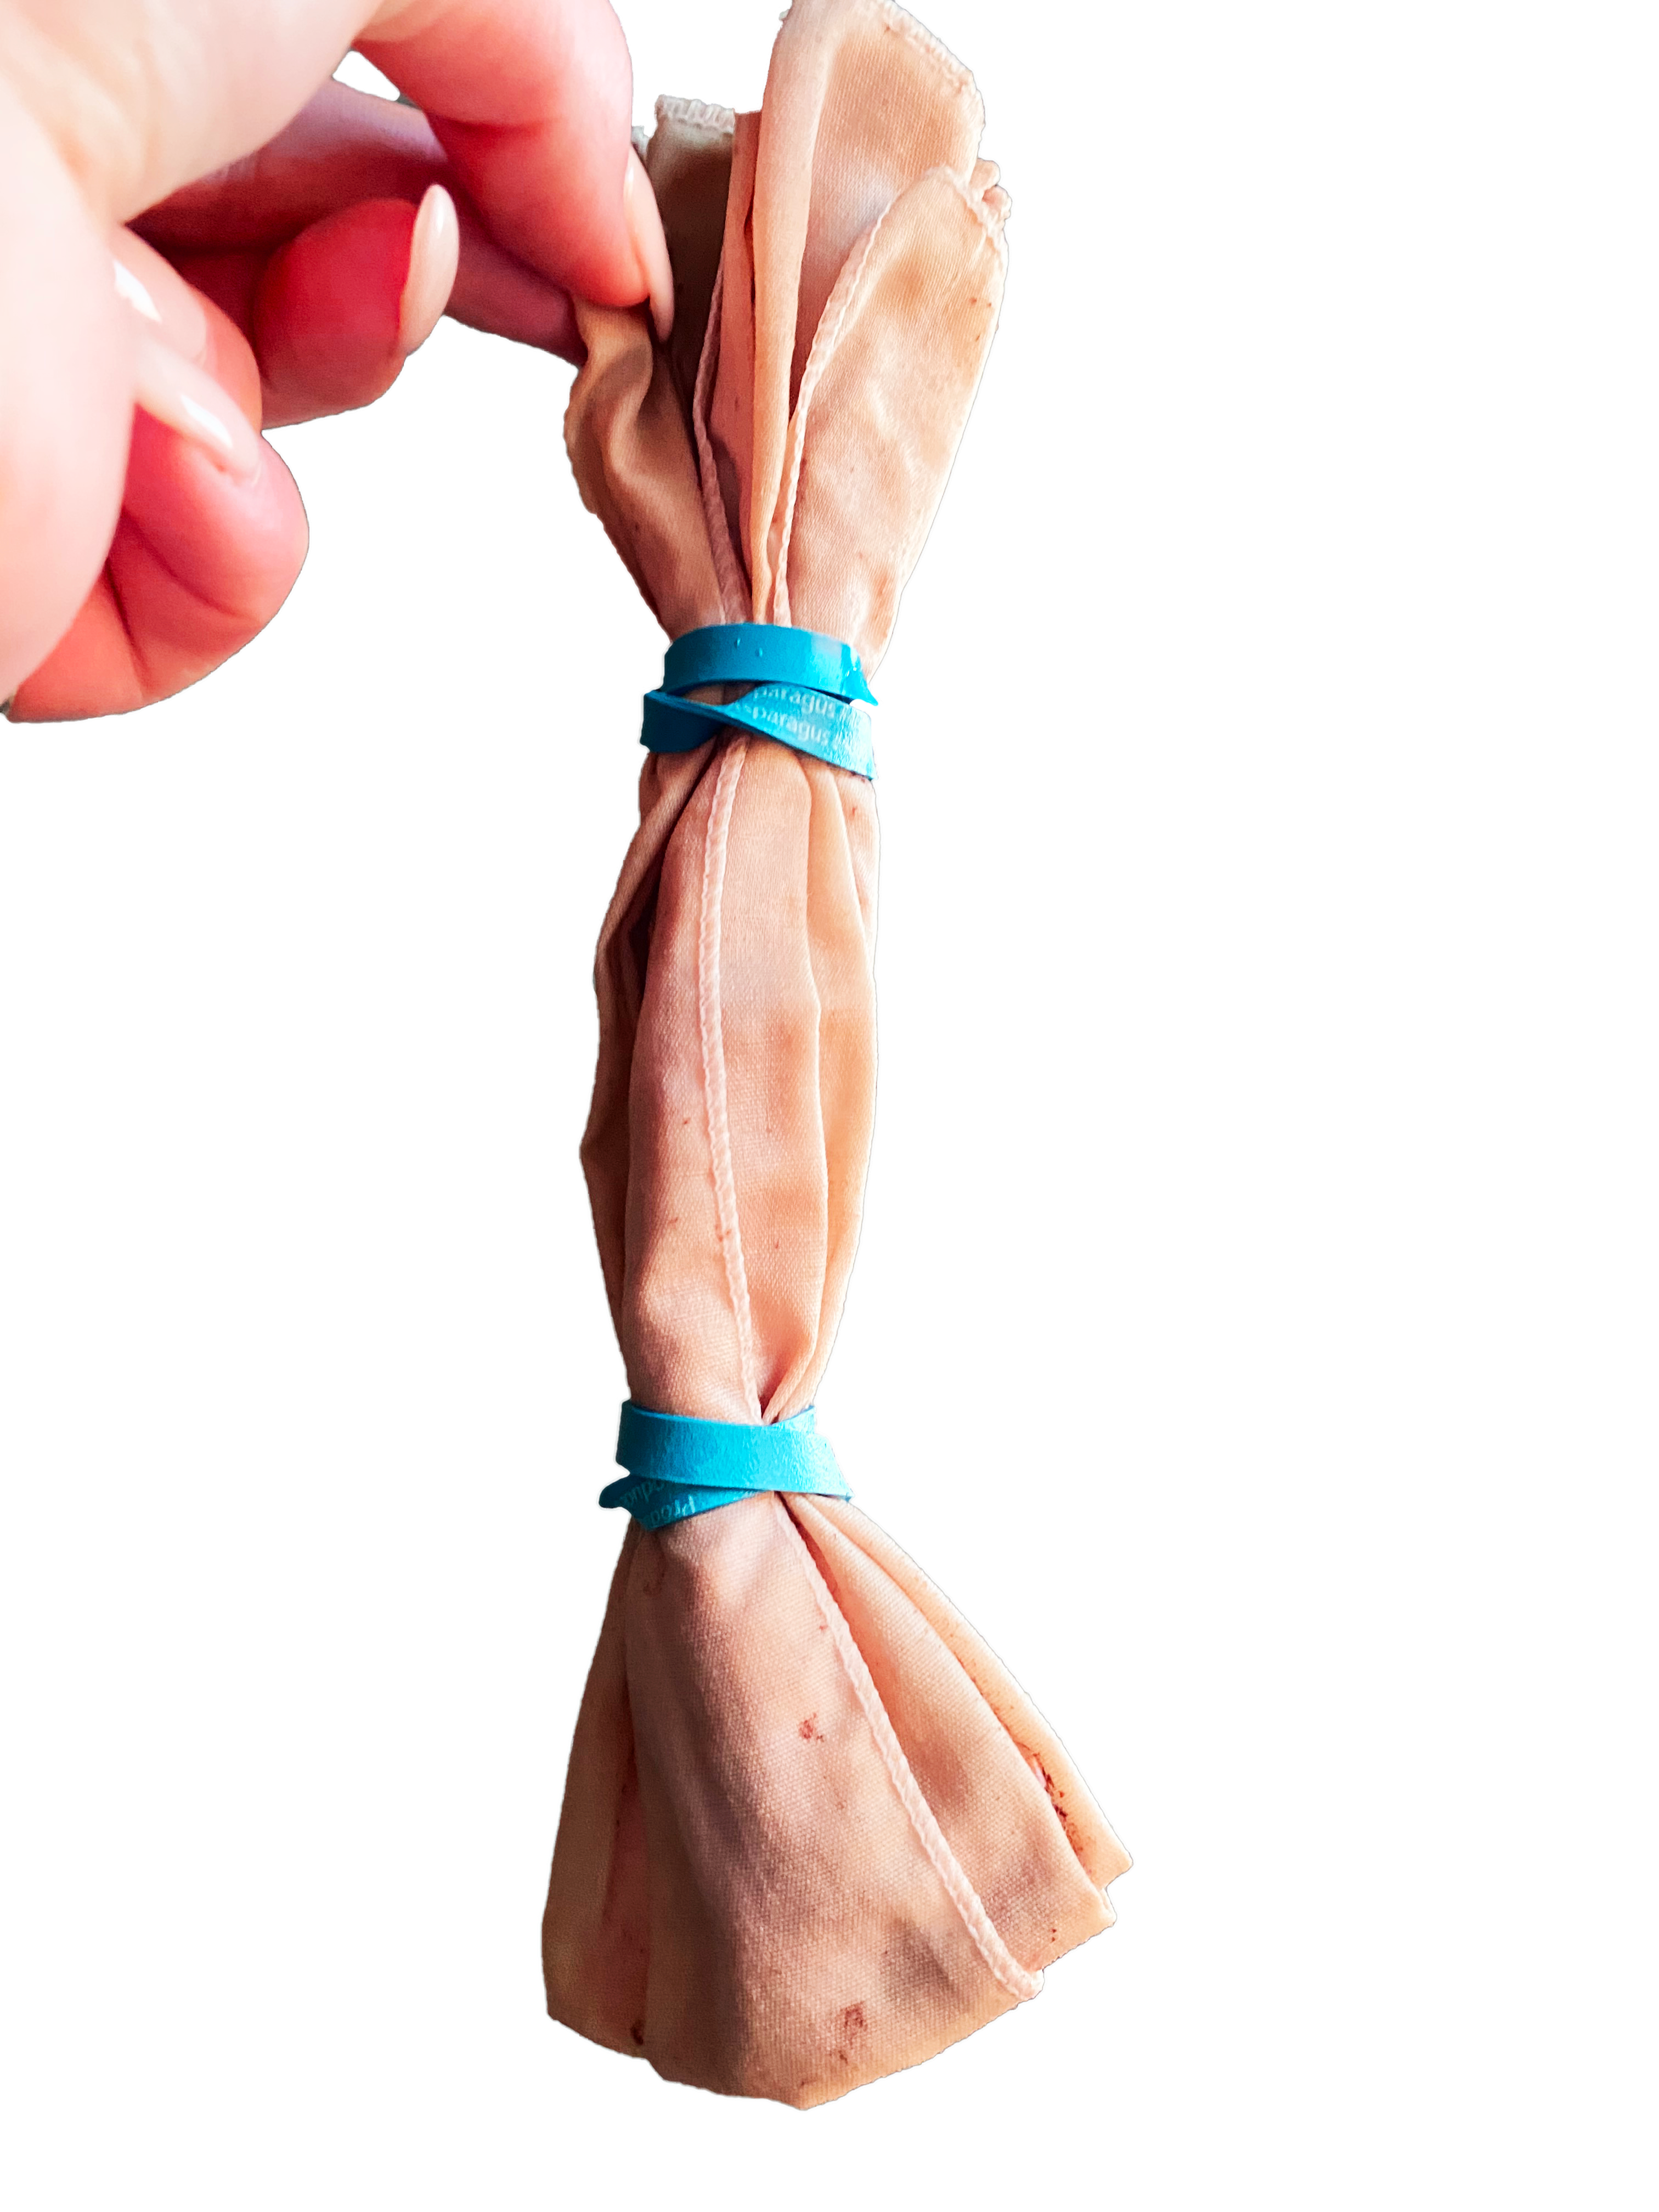
Rubber bands (for tie dye pattern if desired)
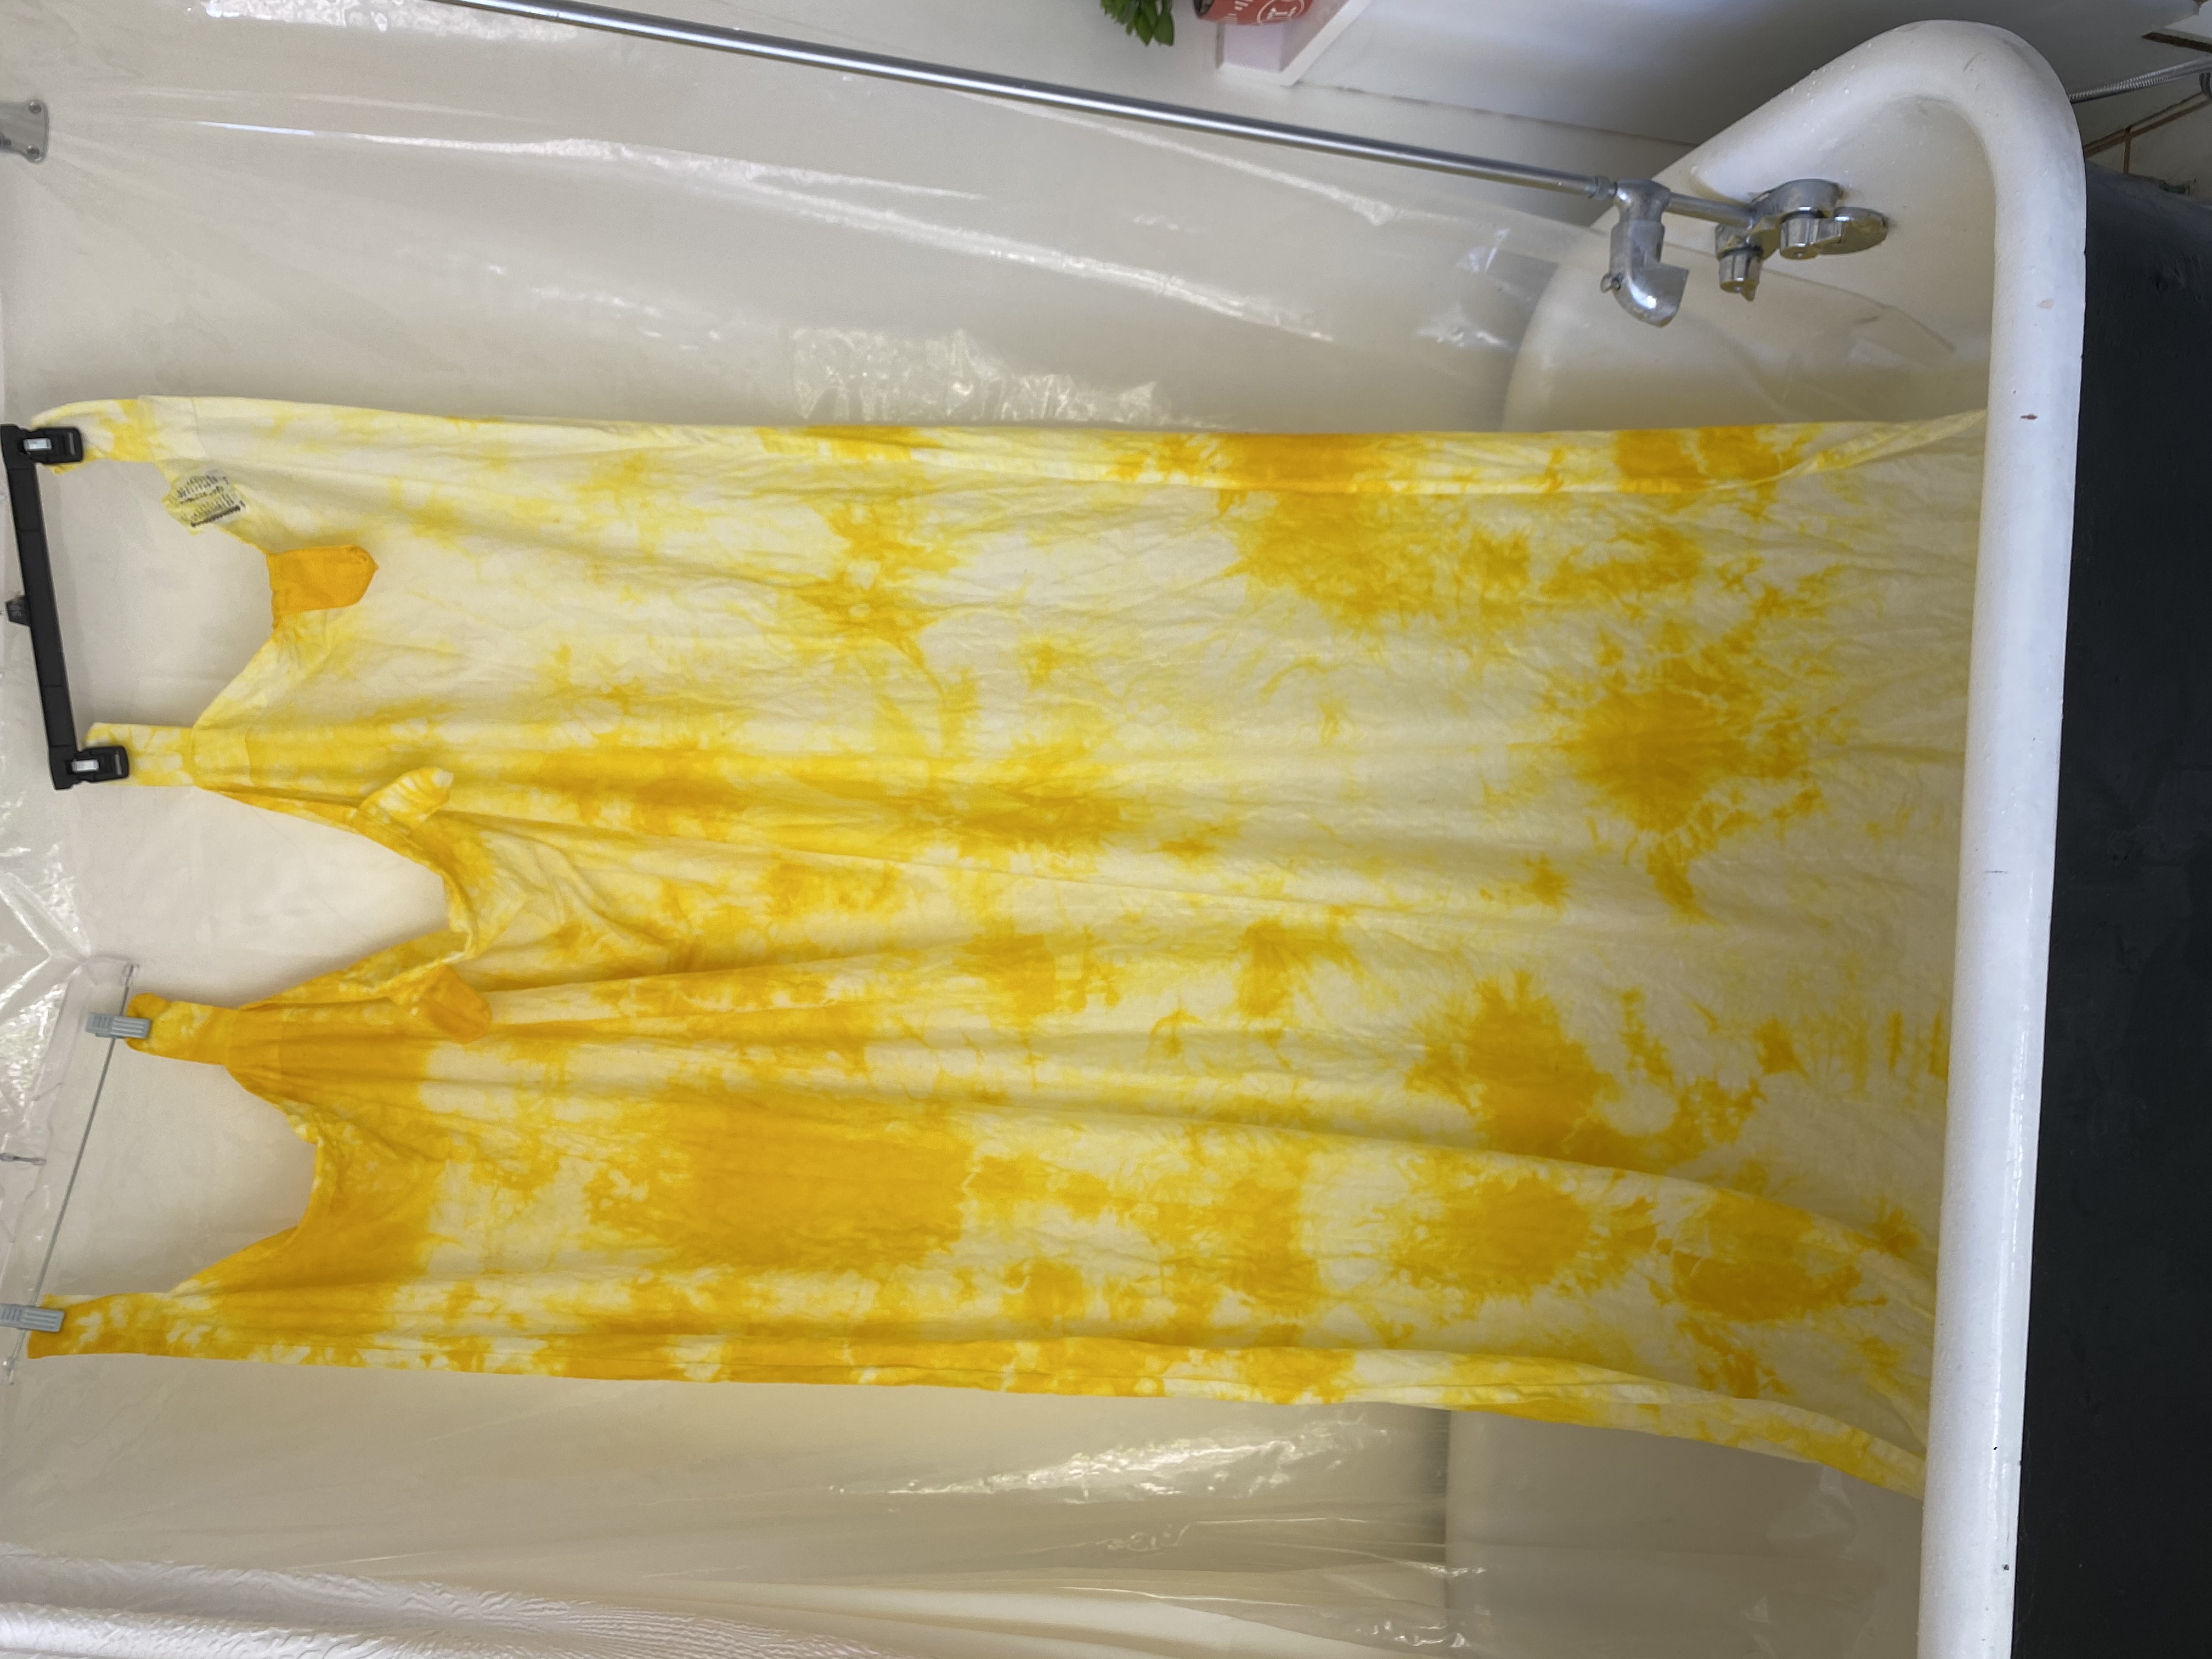

Orange:
carrots, gold lichen, onion skins
Brown: dandelion roots, oak bark, walnut hulls, tea, coffee, acorns
Pink: berries, cherries, red and pink roses, avocado skins and seeds (really!)
Blue: indigo, woad, red cabbage, elderberries, red mulberries, blueberries, purple grapes, dogwood bark
Red-brown: pomegranates, beets, bamboo, hibiscus (reddish color flowers), bloodroot
Grey-black:
blackberries, walnut hulls, iris root
Red-purple: red sumac berries, basil leaves, daylilies, pokeweed berries, huckleberries
Green: artichokes, sorrel roots, spinach, peppermint leaves, snapdragons, lilacs, grass, nettles, plantain, peach leaves
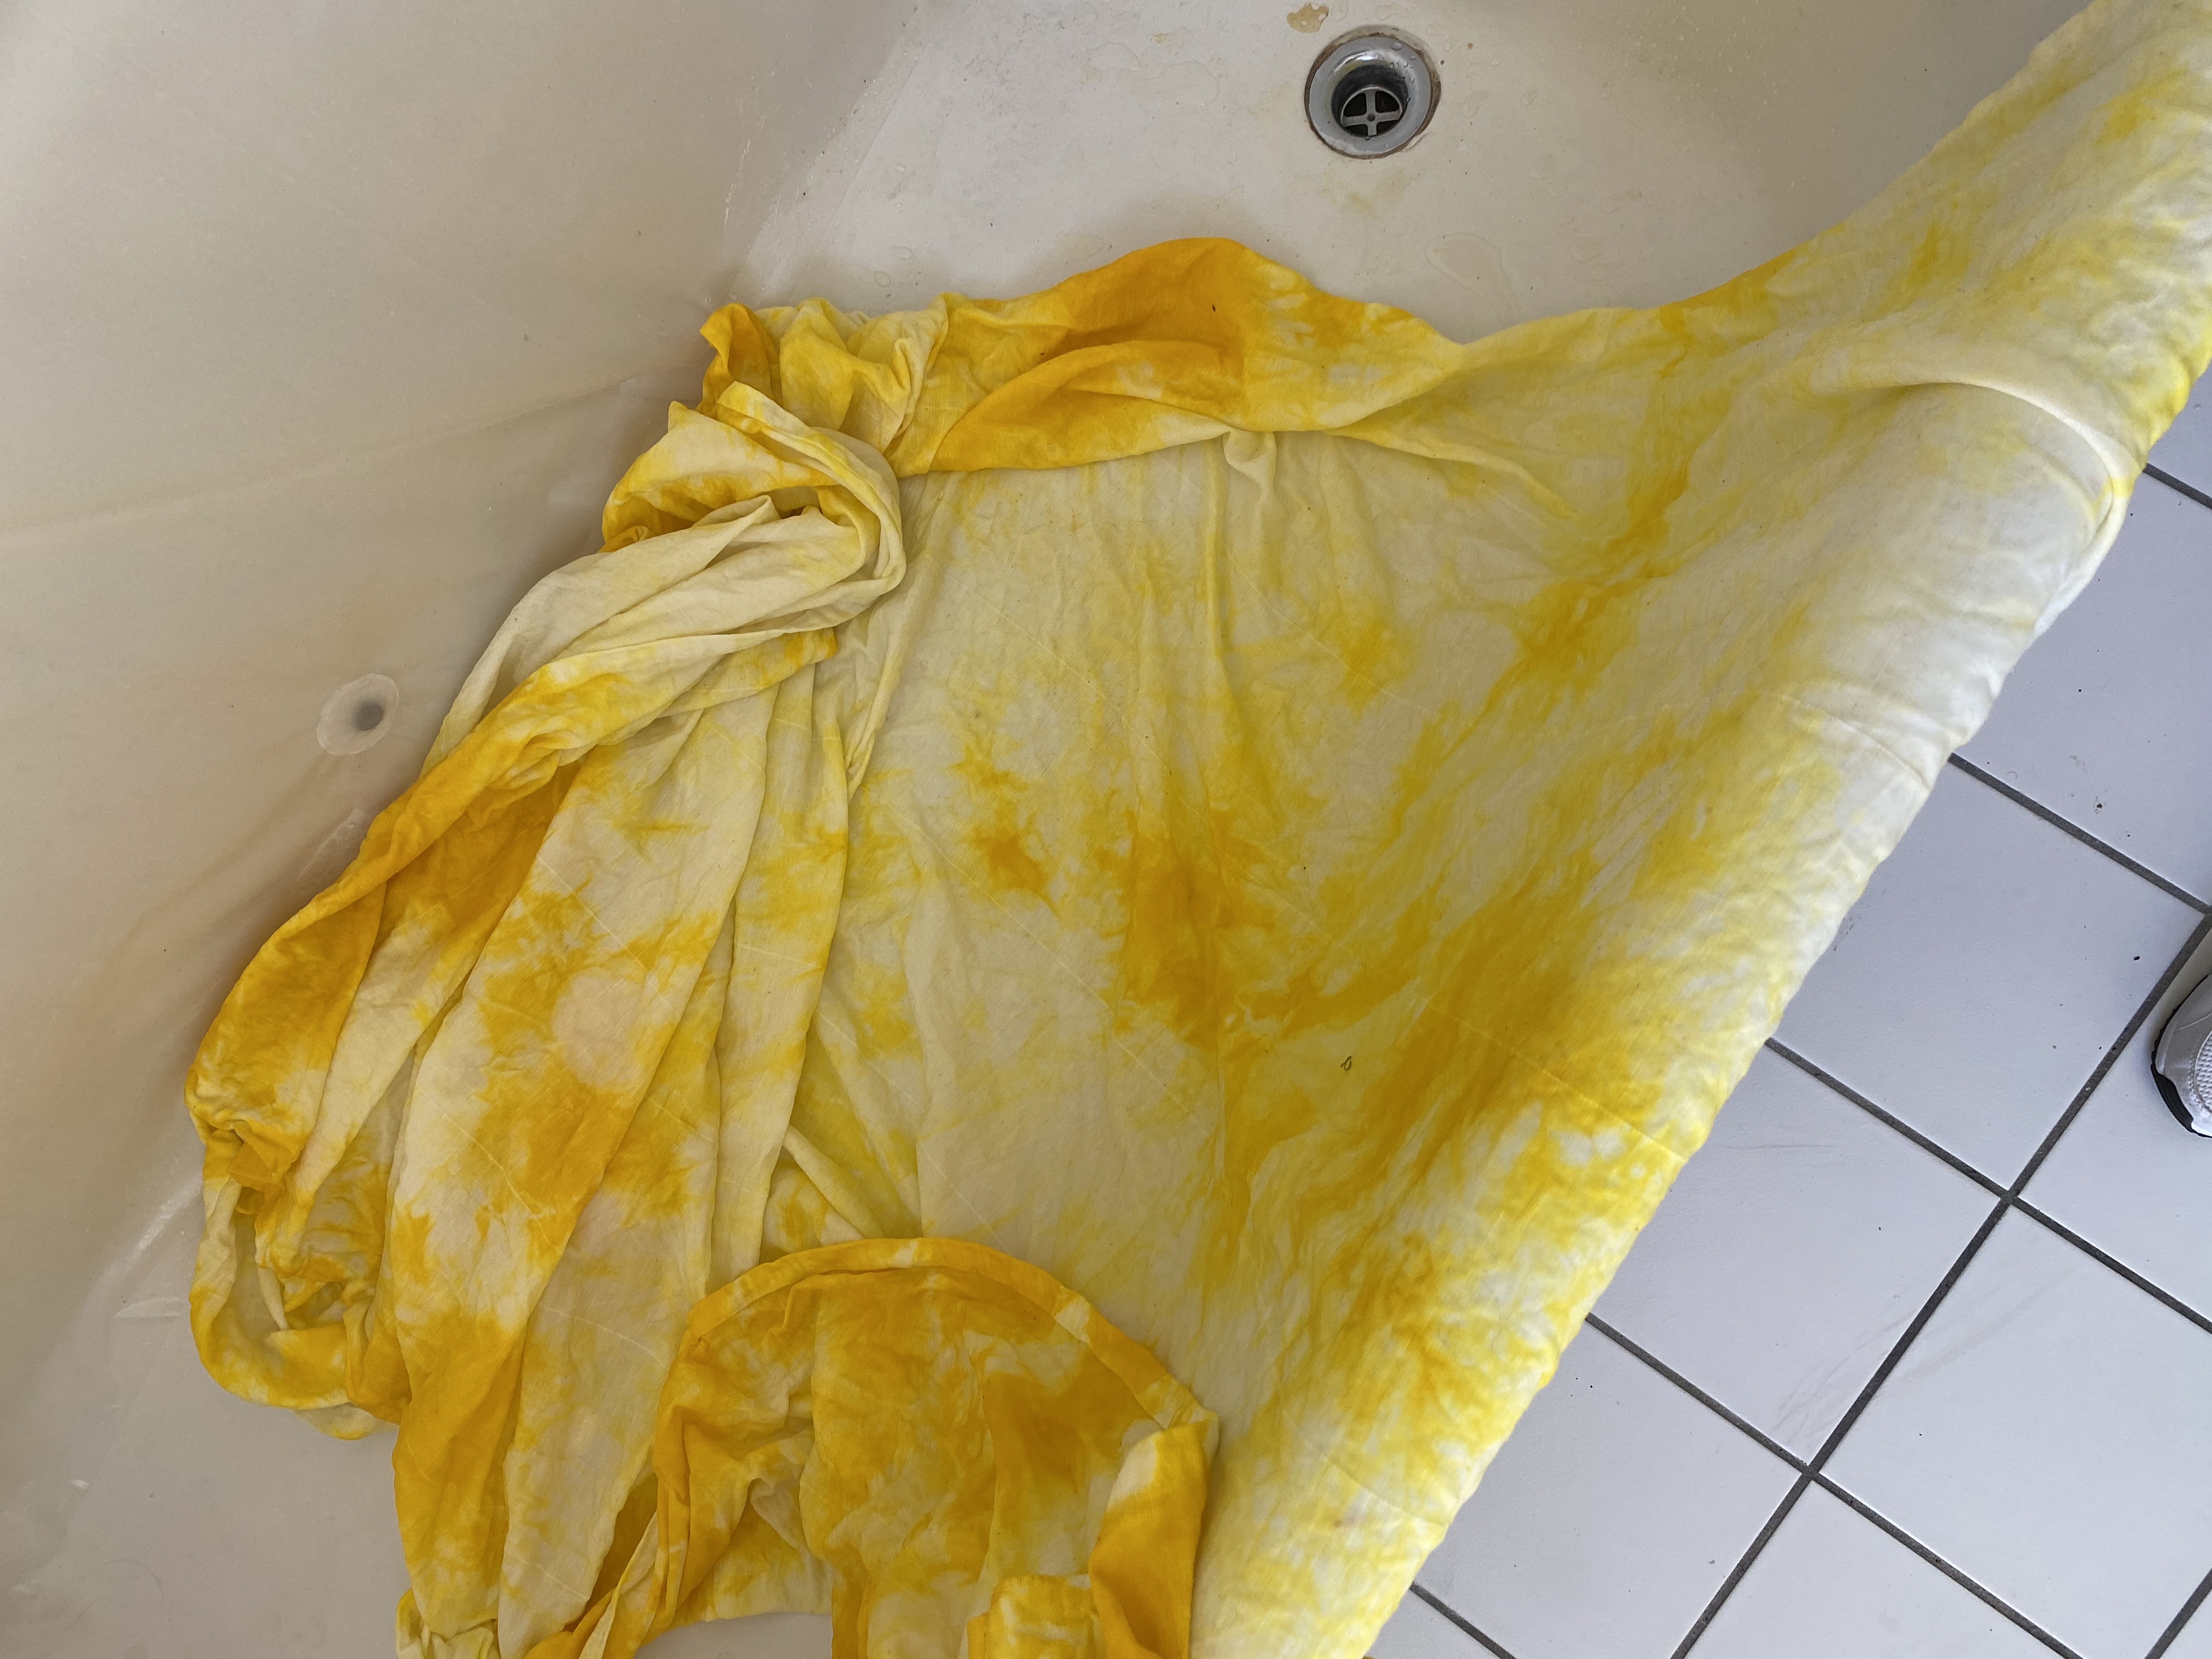
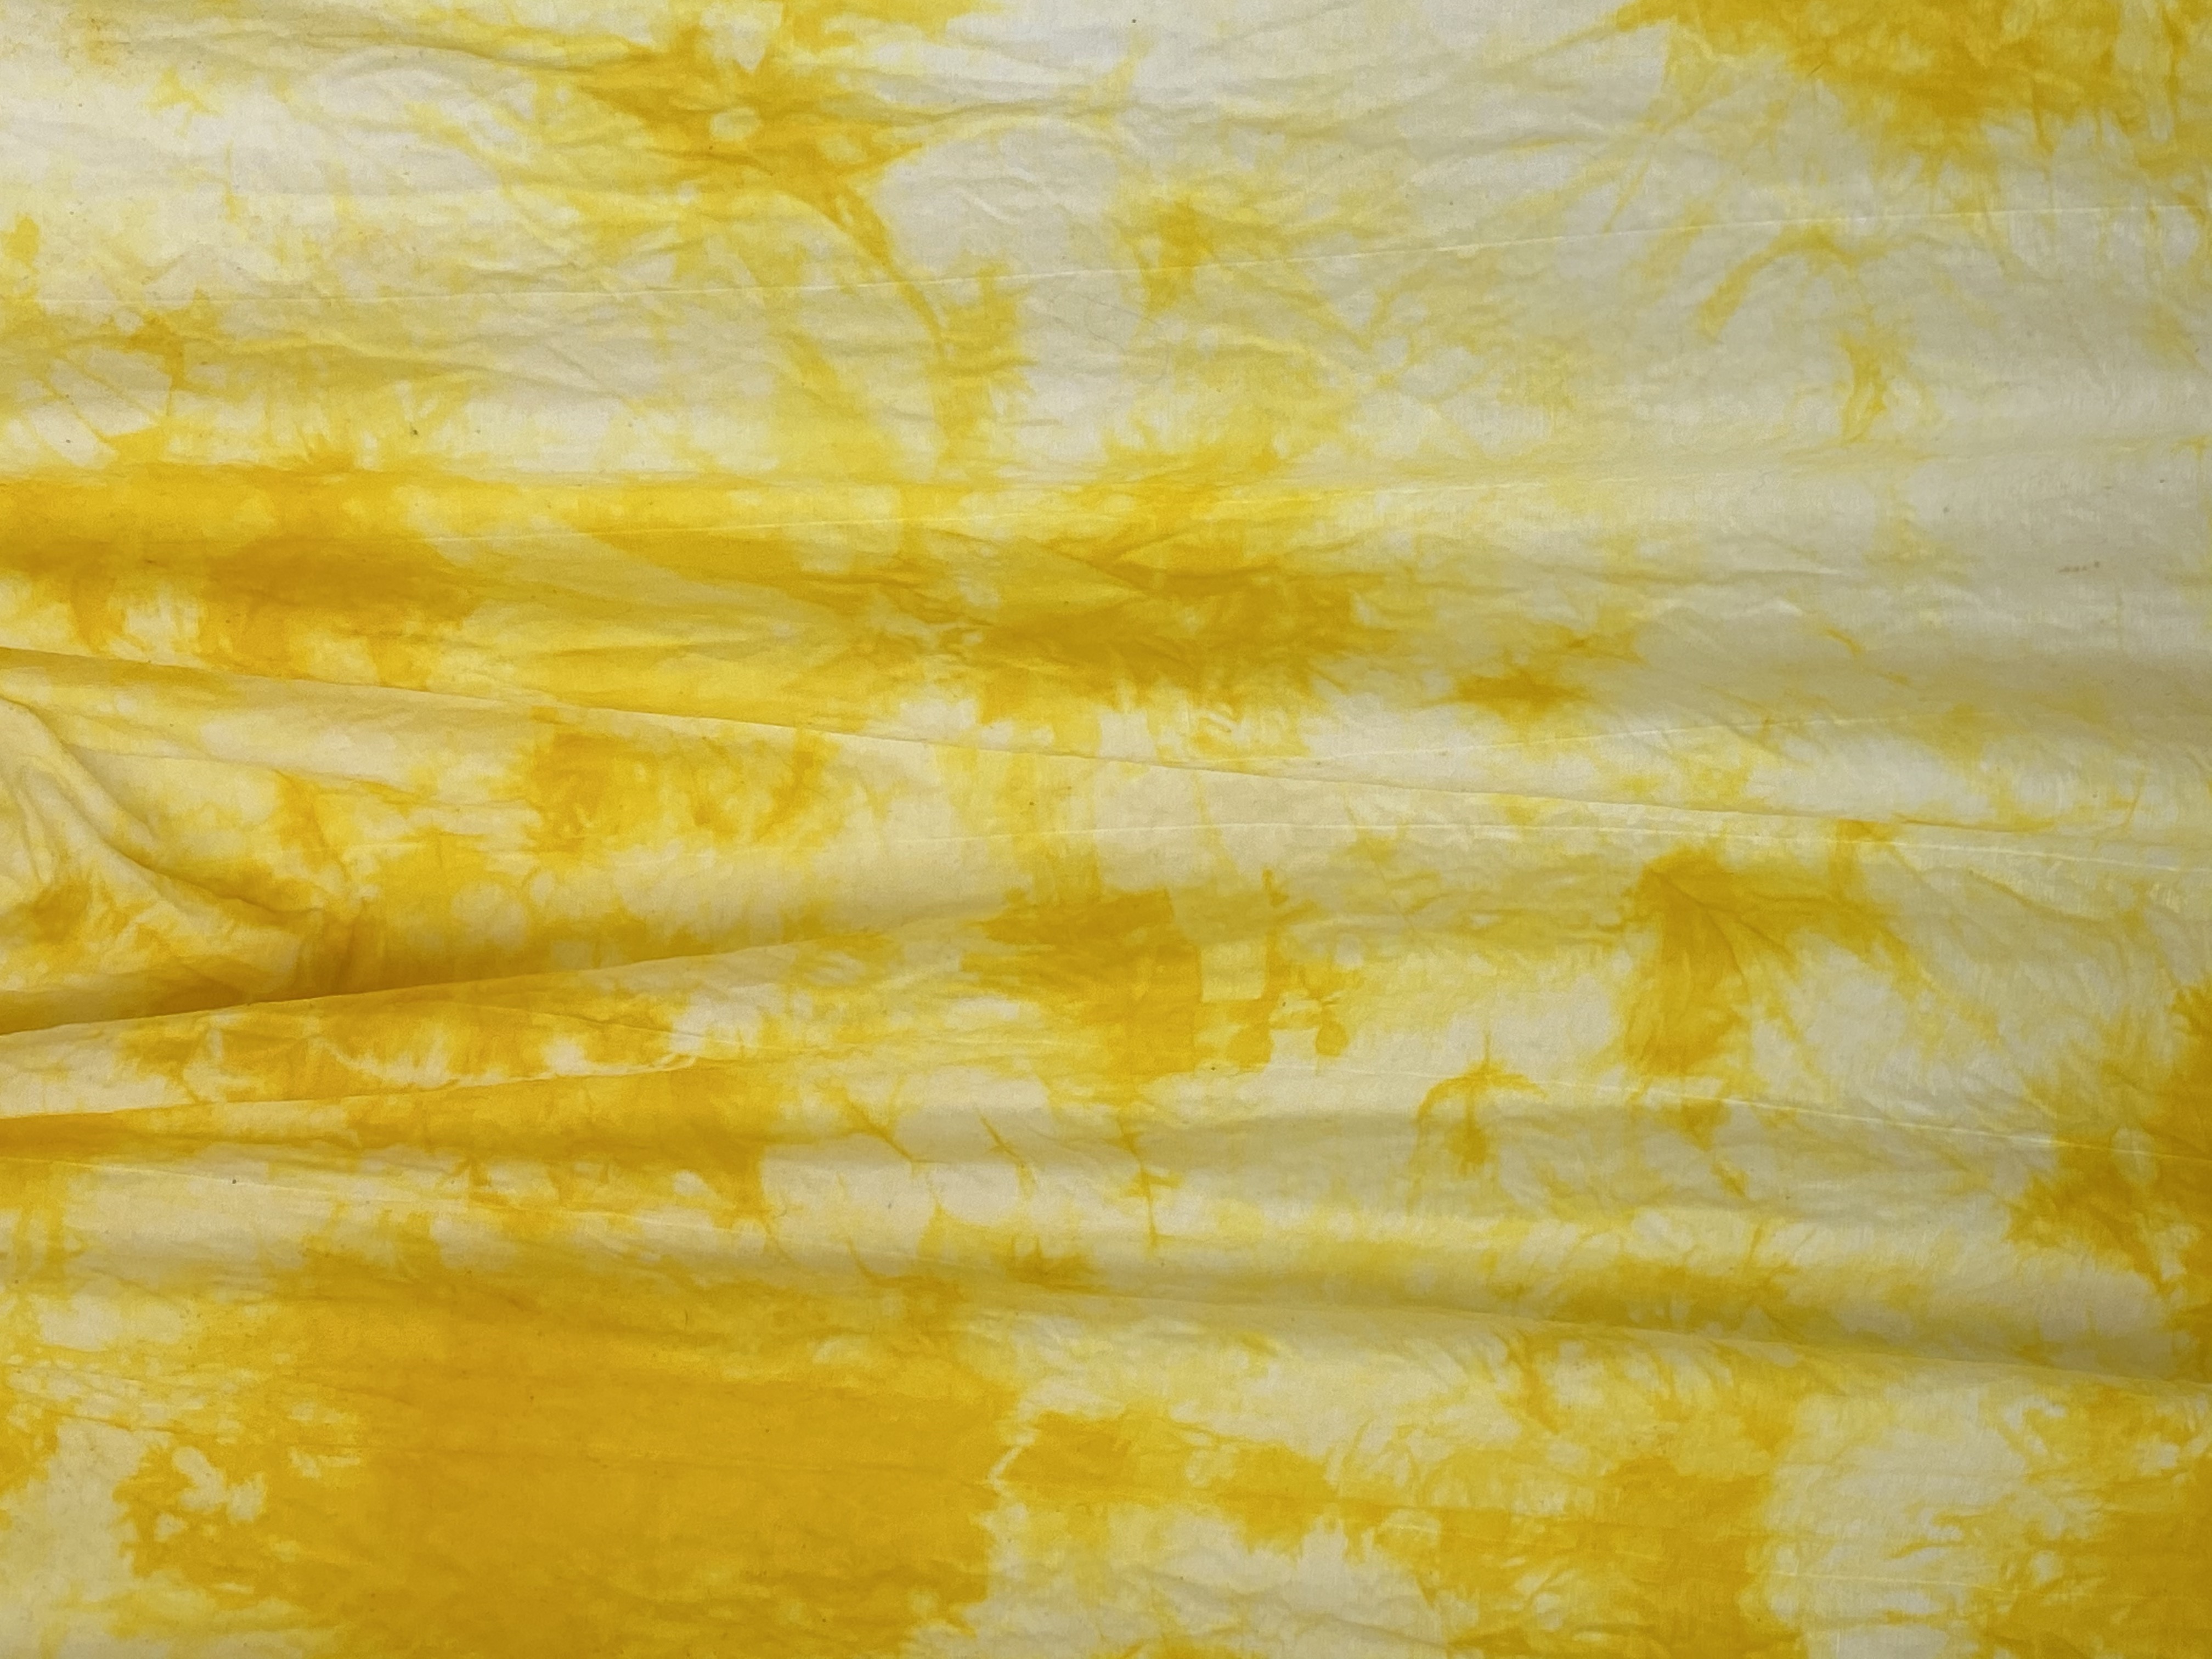
Yellow: bay leaves, marigolds, sunflower petals, St John’s Wort, dandelion flowers, paprika, turmeric, celery leaves, lilac twigs, Queen Anne’s Lace roots, mahonia roots, barberry roots, yellowroot roots, yellow dock roots


1 // Prepare your fabric—
You will want to have your fabric washed and damp before starting the dyeing process. This allows the dye to cling easier to the fabric. Hand wash with gentle detergent (I used dawn dish soap). Ring out and it's ready to go!
2 // Apply mordant to fabric—
Boil a pot full of water that is enough to submerge your fabric
3 // Place fabric and alum—
Once boiled, place in your fabric, add 2 tablespoons of vinegar or salt depending on your chosen dye and 1 tablespoon of alum. Put on simmer for an hour
4 // Prepare dye—
Get your largest dye pot and bring enough water to submerge your fabric to a boil. Add however many vegetables or fruits you see fit refer to the chart to see how much you will need. (I used ¾ cup of turmeric)
5 // Simmer—
Keep dye on simmer for an hour.
6 // Now your fabric and dye are ready—
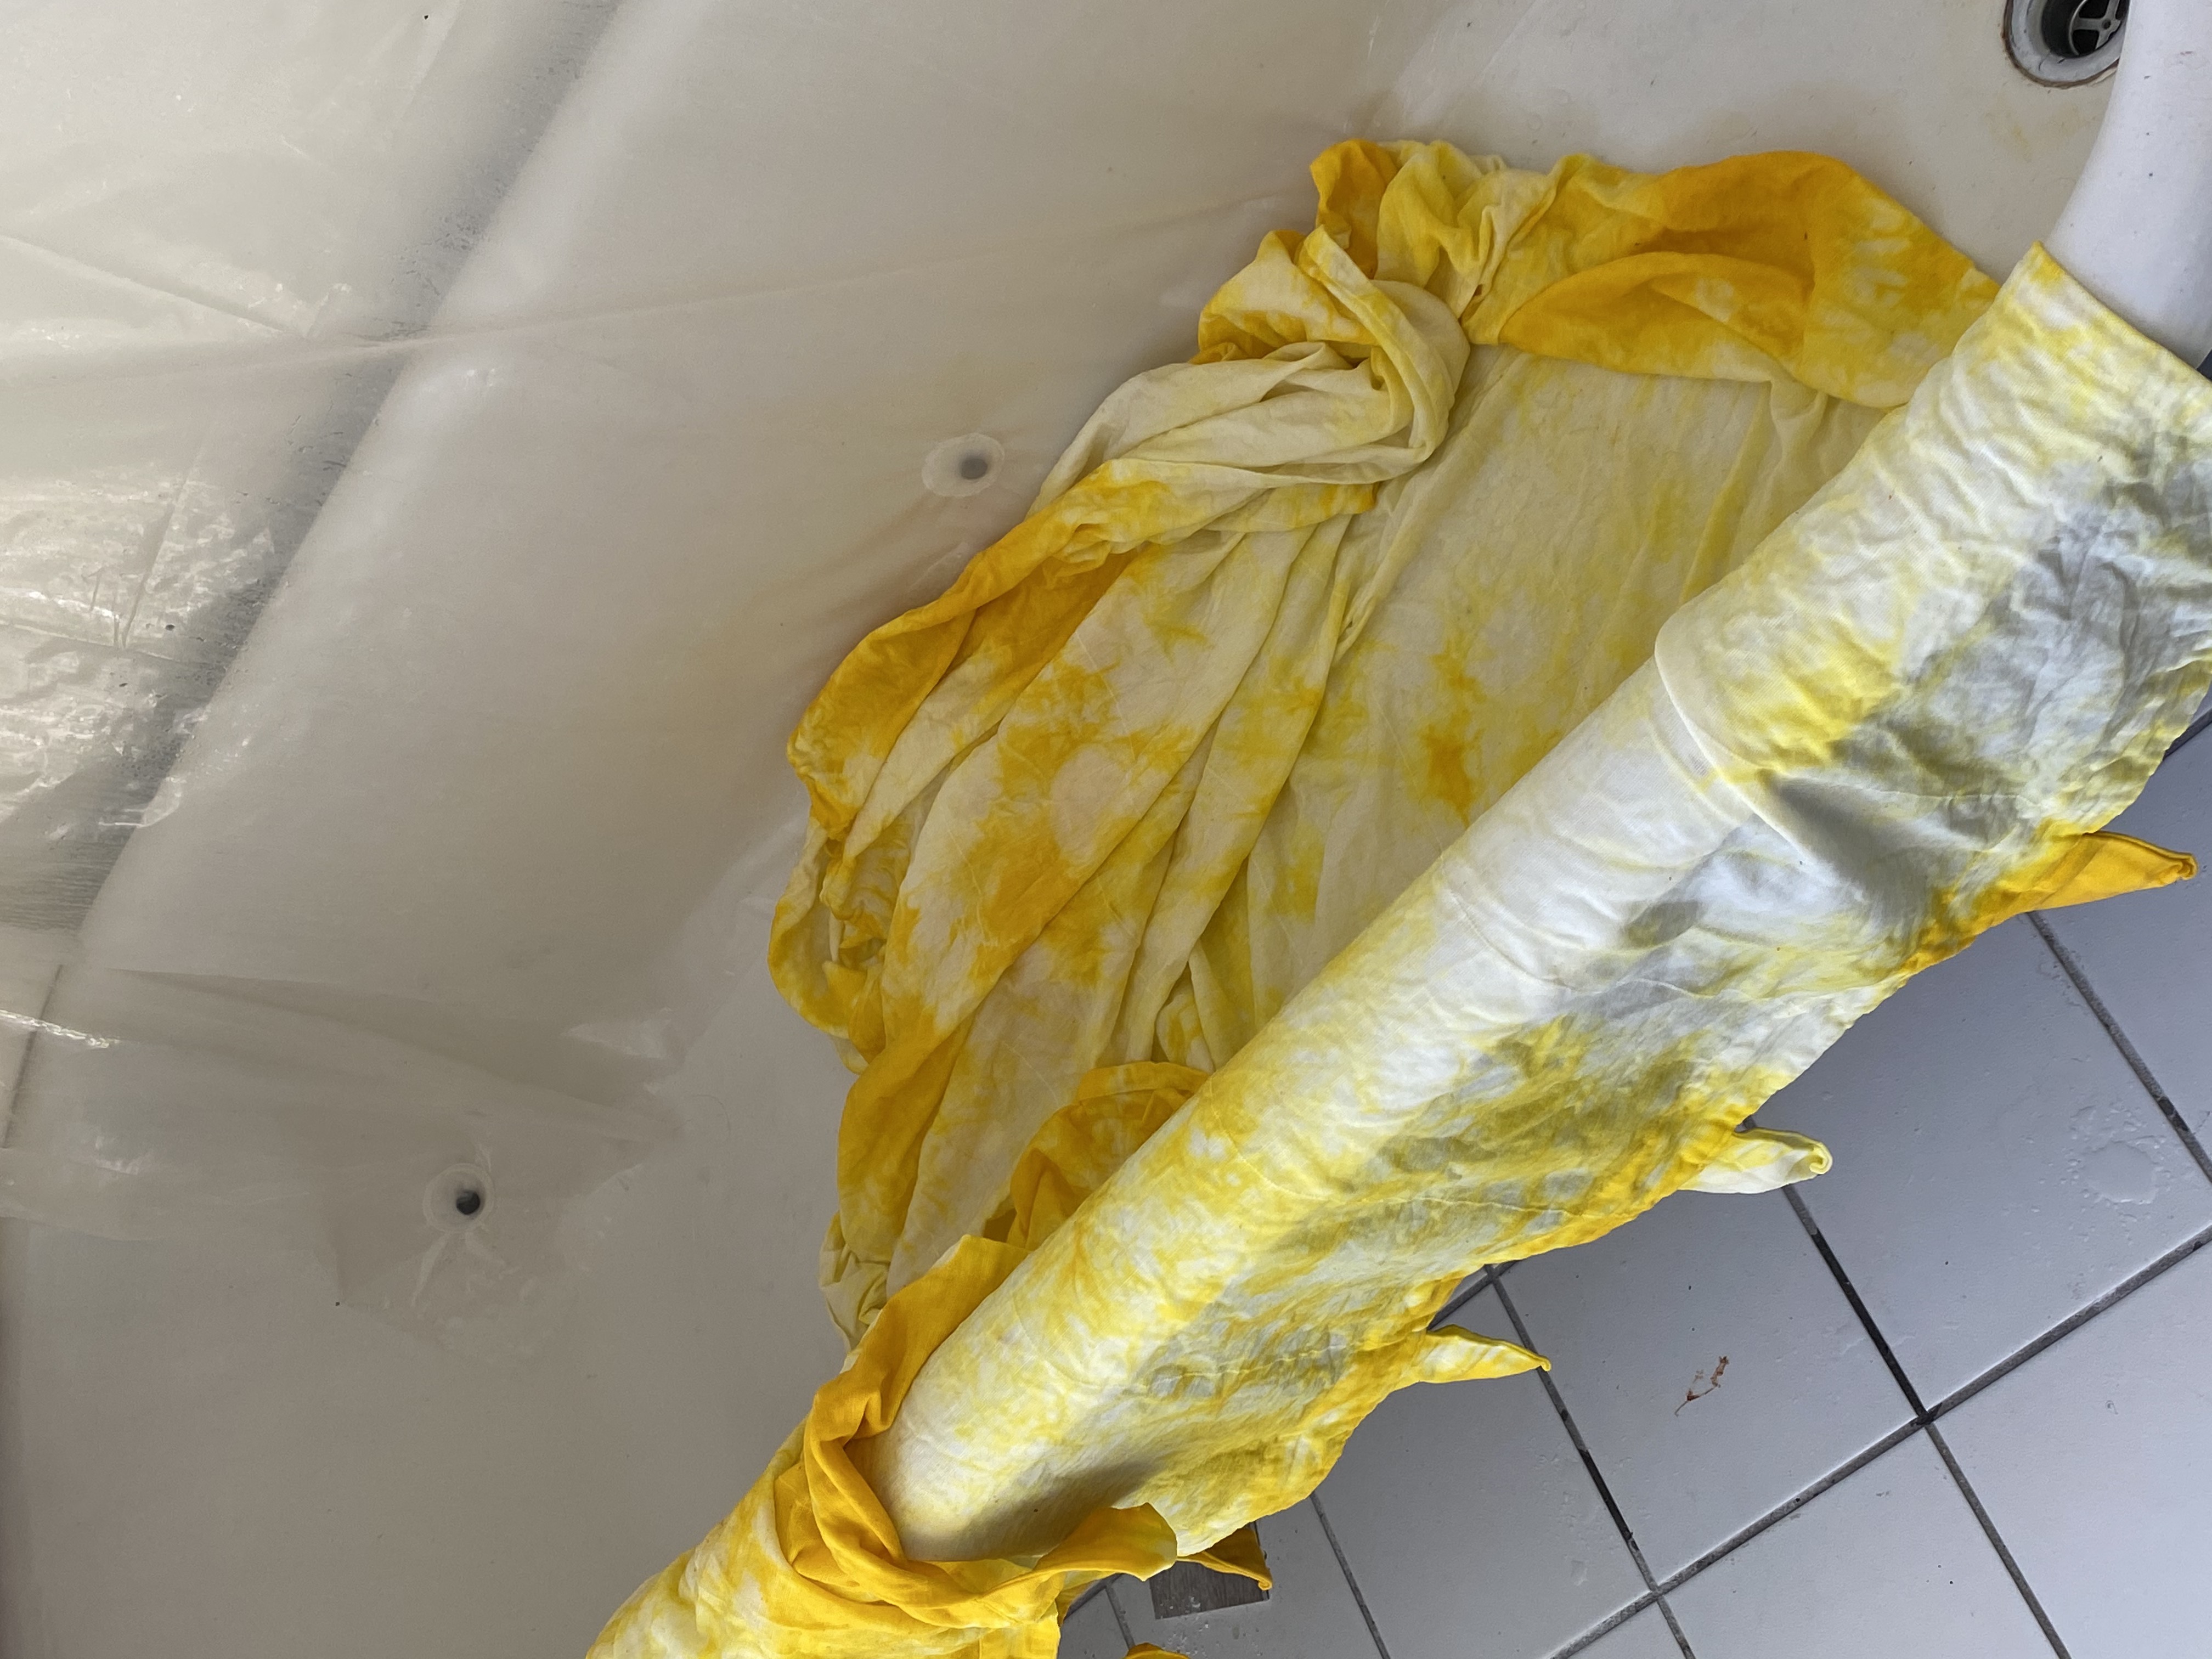
Roll up the fabric and tie with rubber bands if you want a tie-dye effect. (I rolled the sheet up randomly to get my desired pattern)
7 // Time to dye—
Turn off the heat and place fabric into pot filled with dye.
8 // Let sit—
Let sit overnight while stirring every once in a while to ensure an even dye.
9 // Rinse—
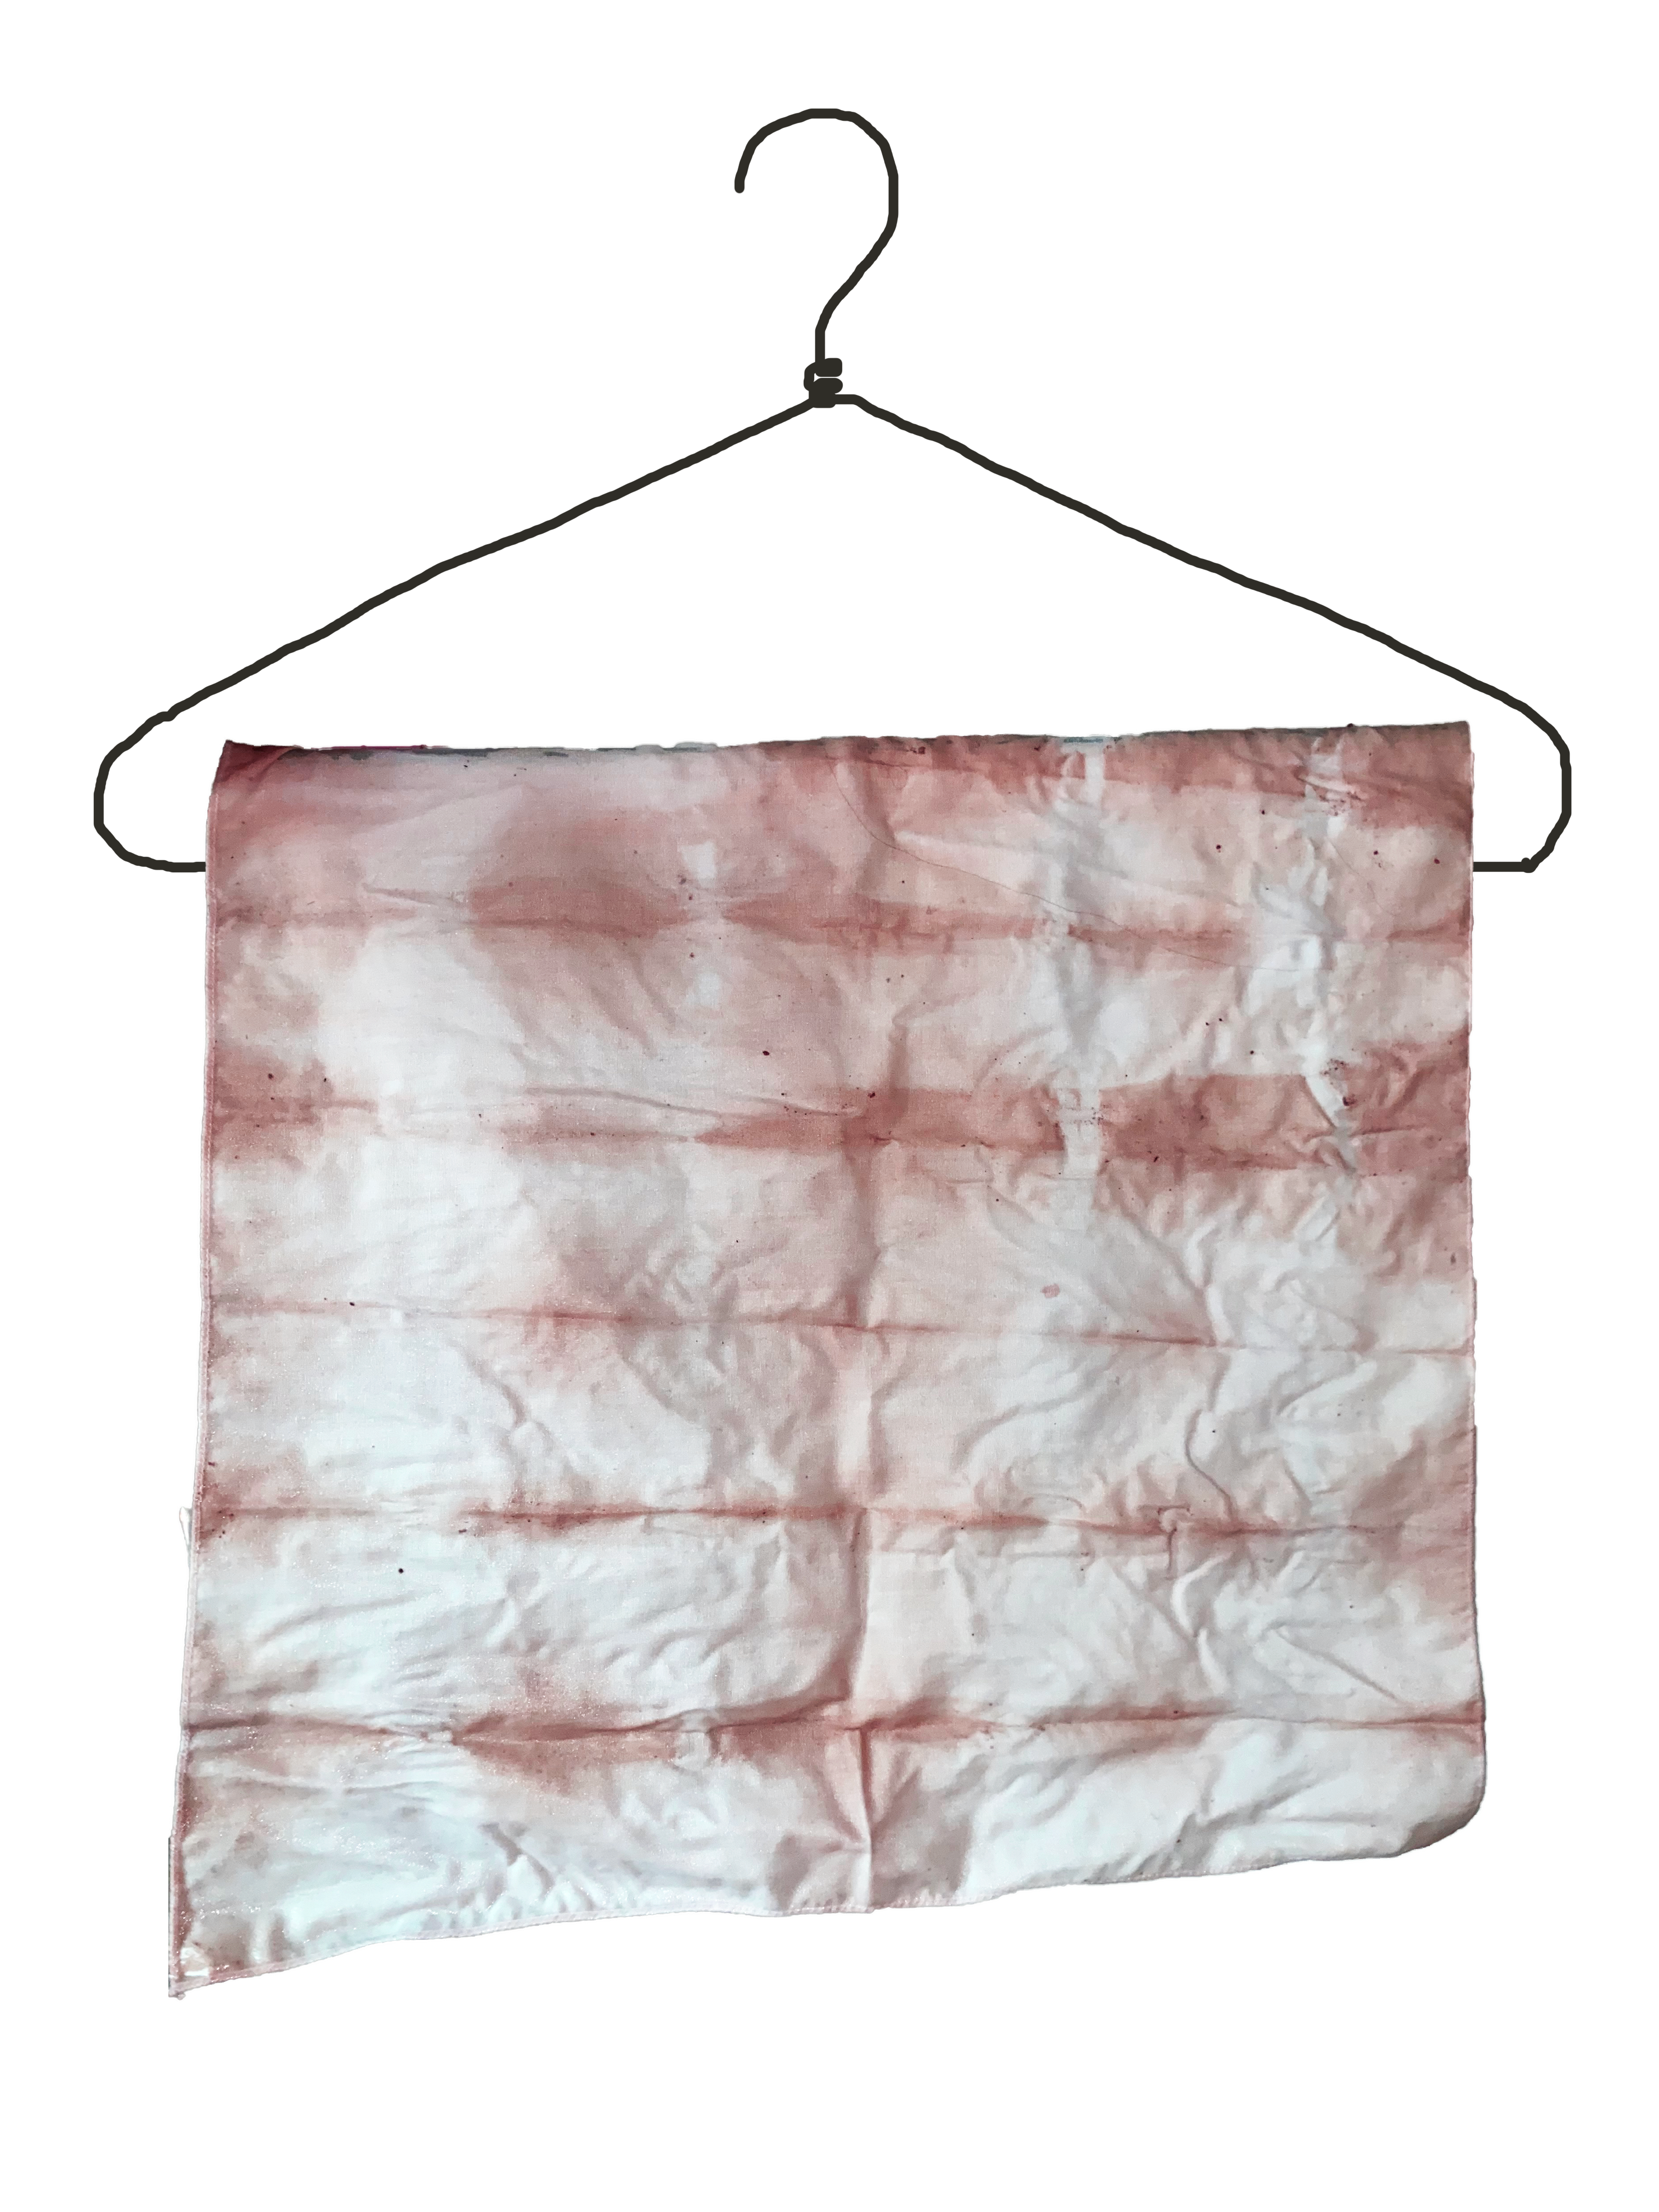
Take fabric out and gently hand wash until water is running clear and hang to dry out of direct sunlight.
10 // Future washes—
Fabric should be hand washed separately for the first couple washes because some dye may still come out.
Enjoy your new dyed fabric!

Fabric (preferably light colored)
Hammer
Scissors
Marker
Tape (optional)
Paper towels
Various flowers and leaves (store-bought or collected from outside)
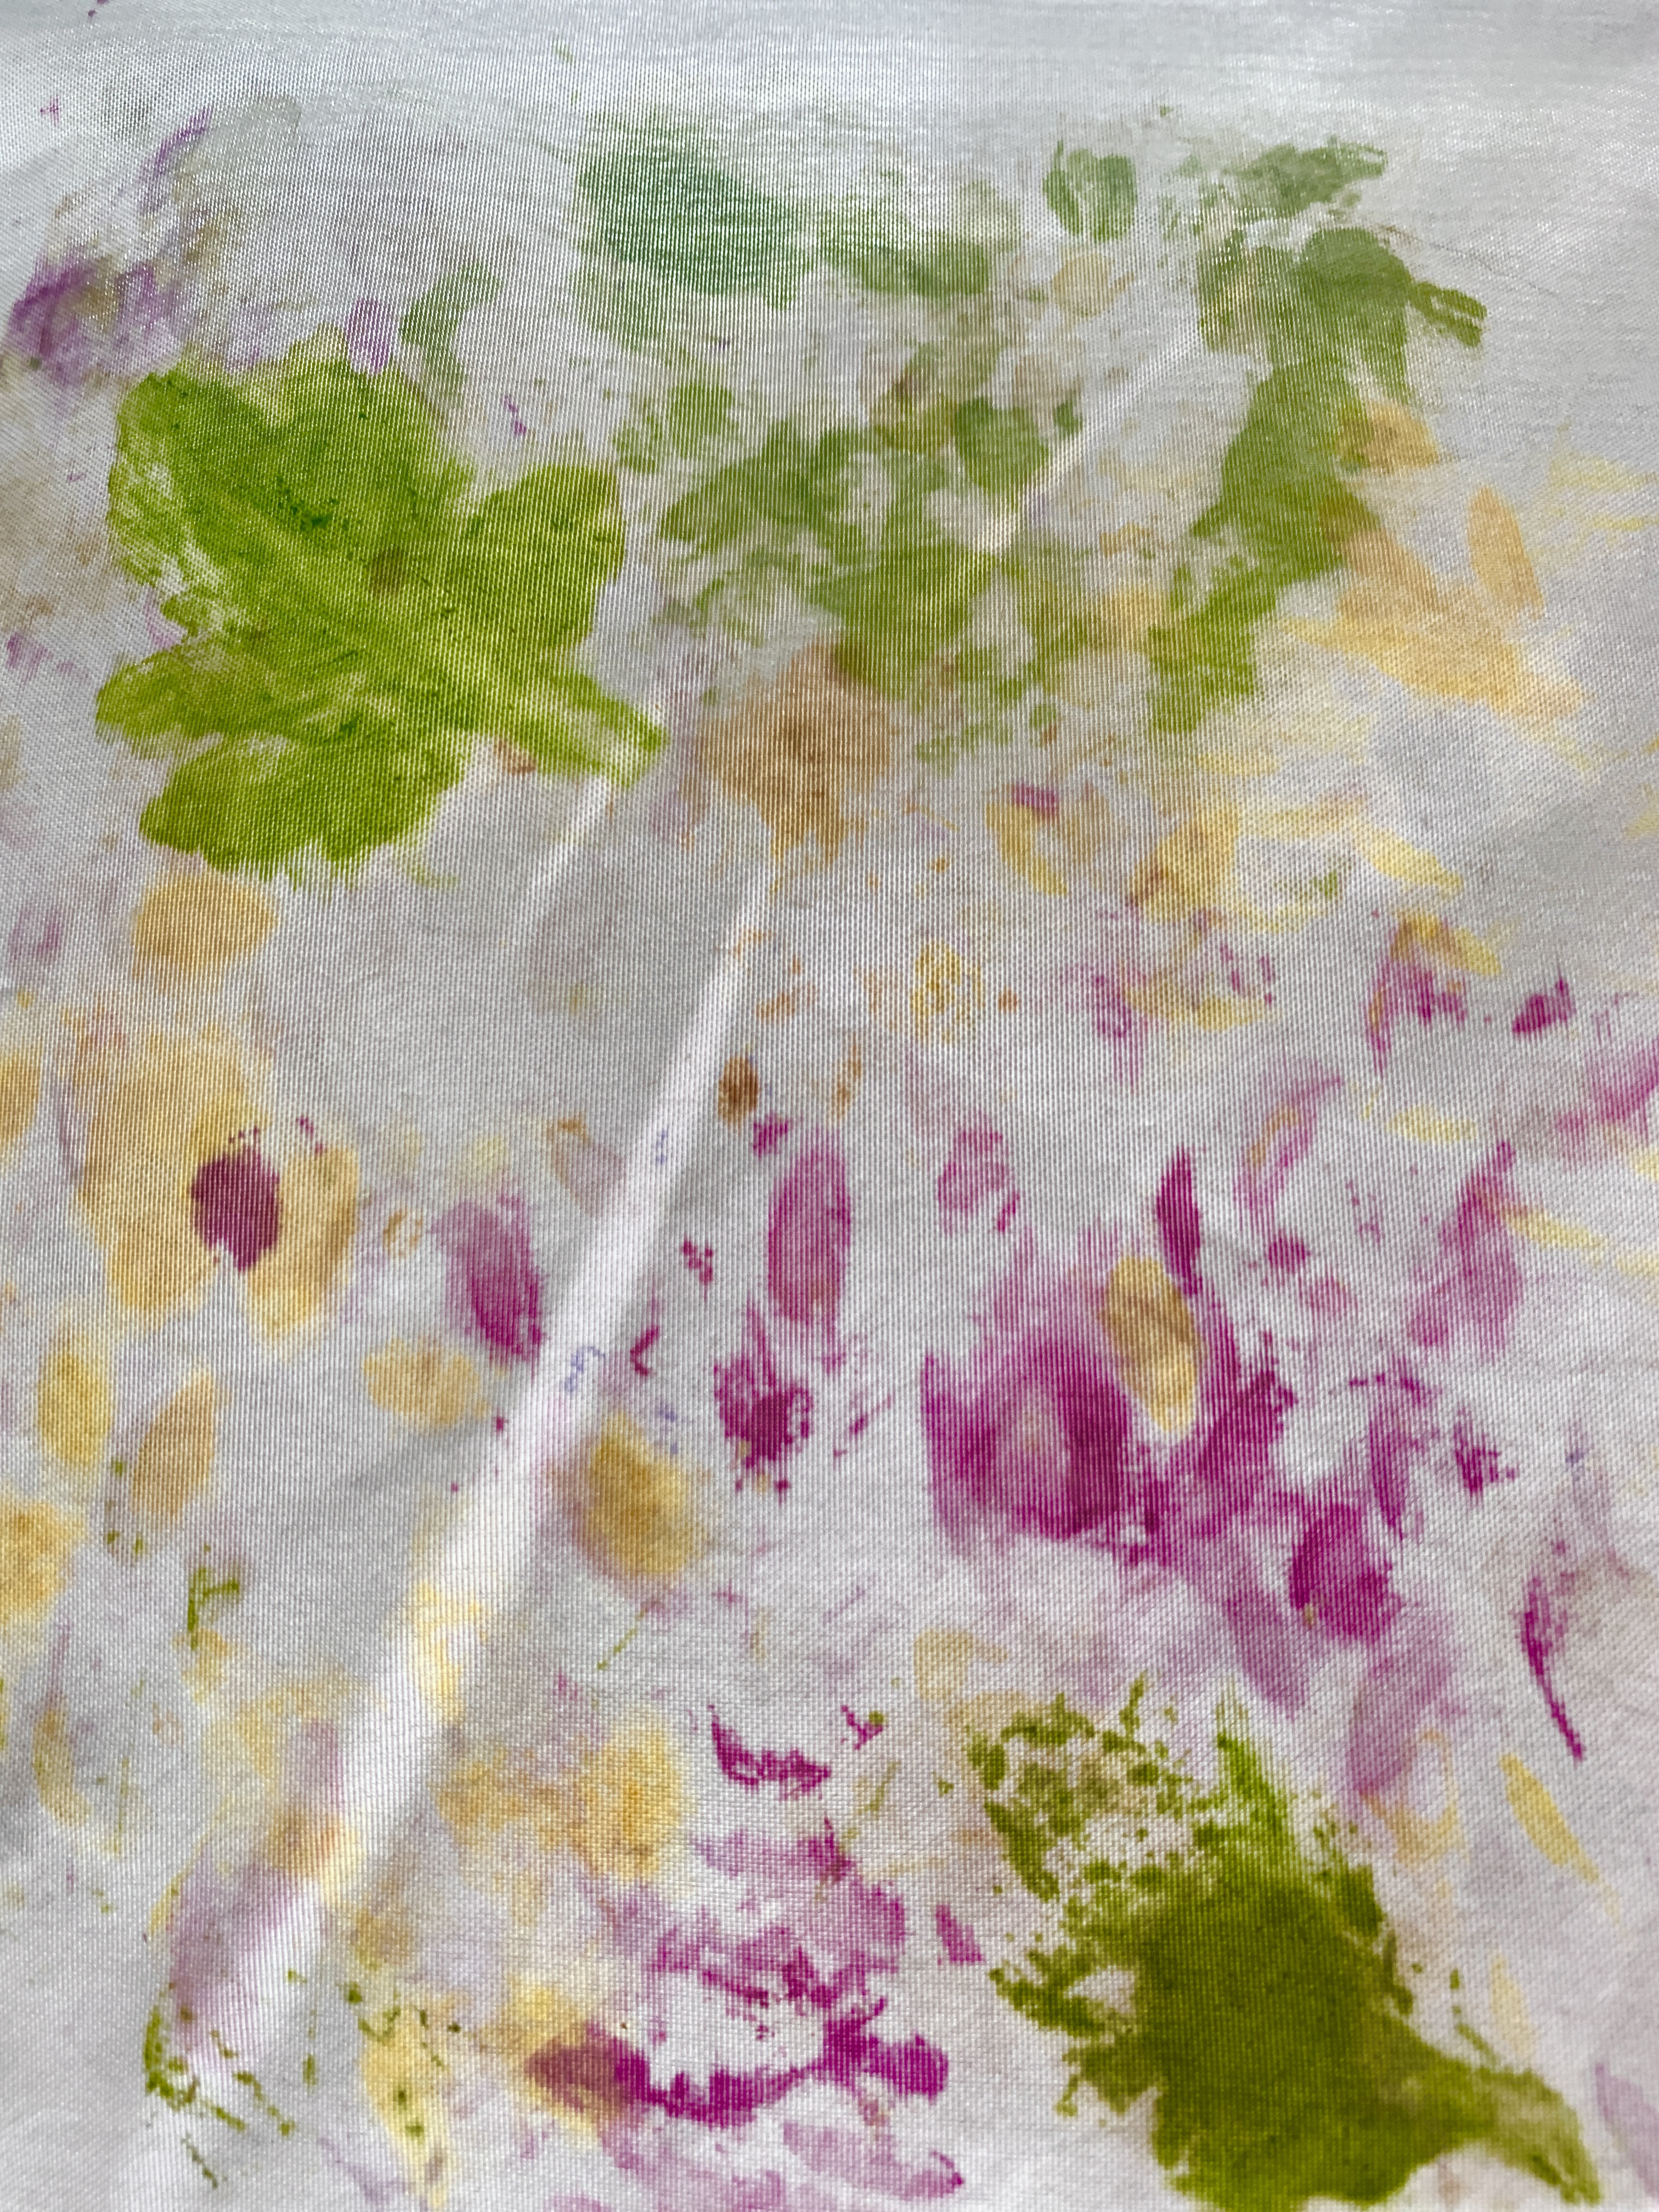
1 // Cut fabric to desired size/shape.
2 // Place fabric on a hard, sturdy, and flat surface.
3 // Remove excess stems and buds from organic materials.
4 // Arrange flowers and leaves flat on the fabric—
(Optional: tape them down so they stay in place)
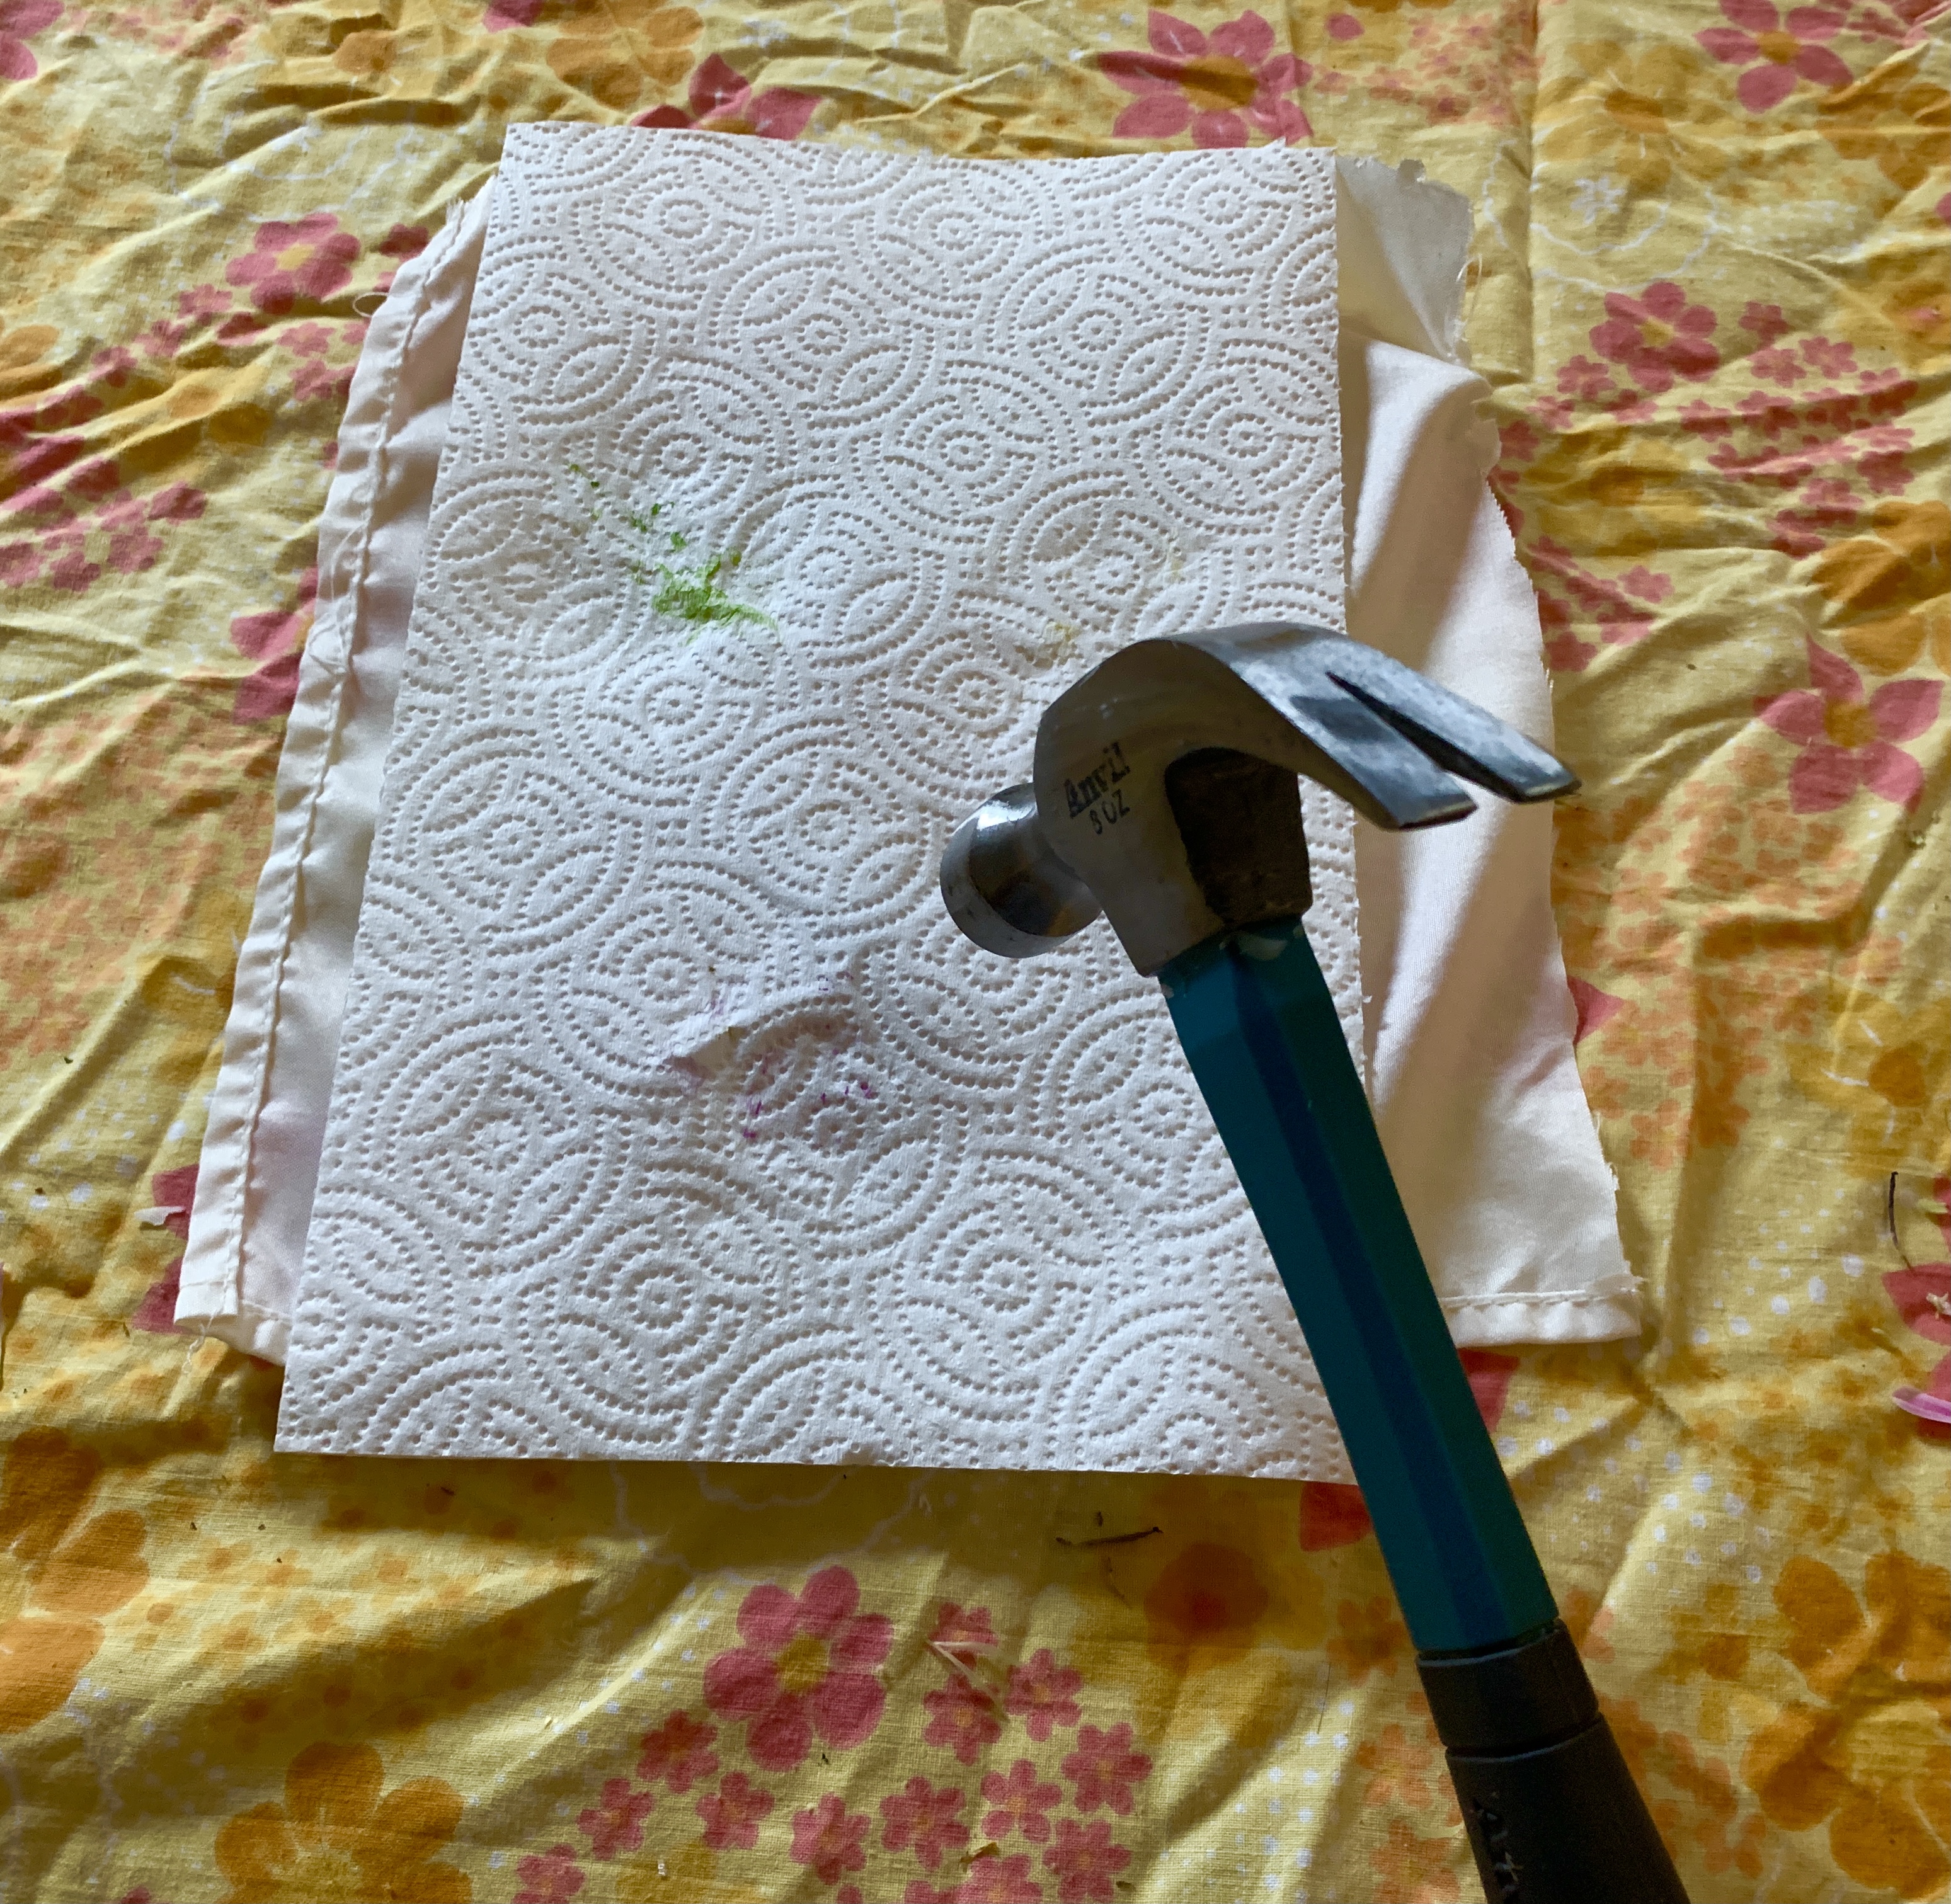
5 // Place 2-3 layers of paper towel (or an old rag) over the area to be printed.
6 // Draw guides with a marker to emphasize the area that needs to be hammered.
7 // Thoroughly hammer the flowers and leaves through the paper towel.
8 // Peel back the paper towels and remove the organic material to reveal the print!.
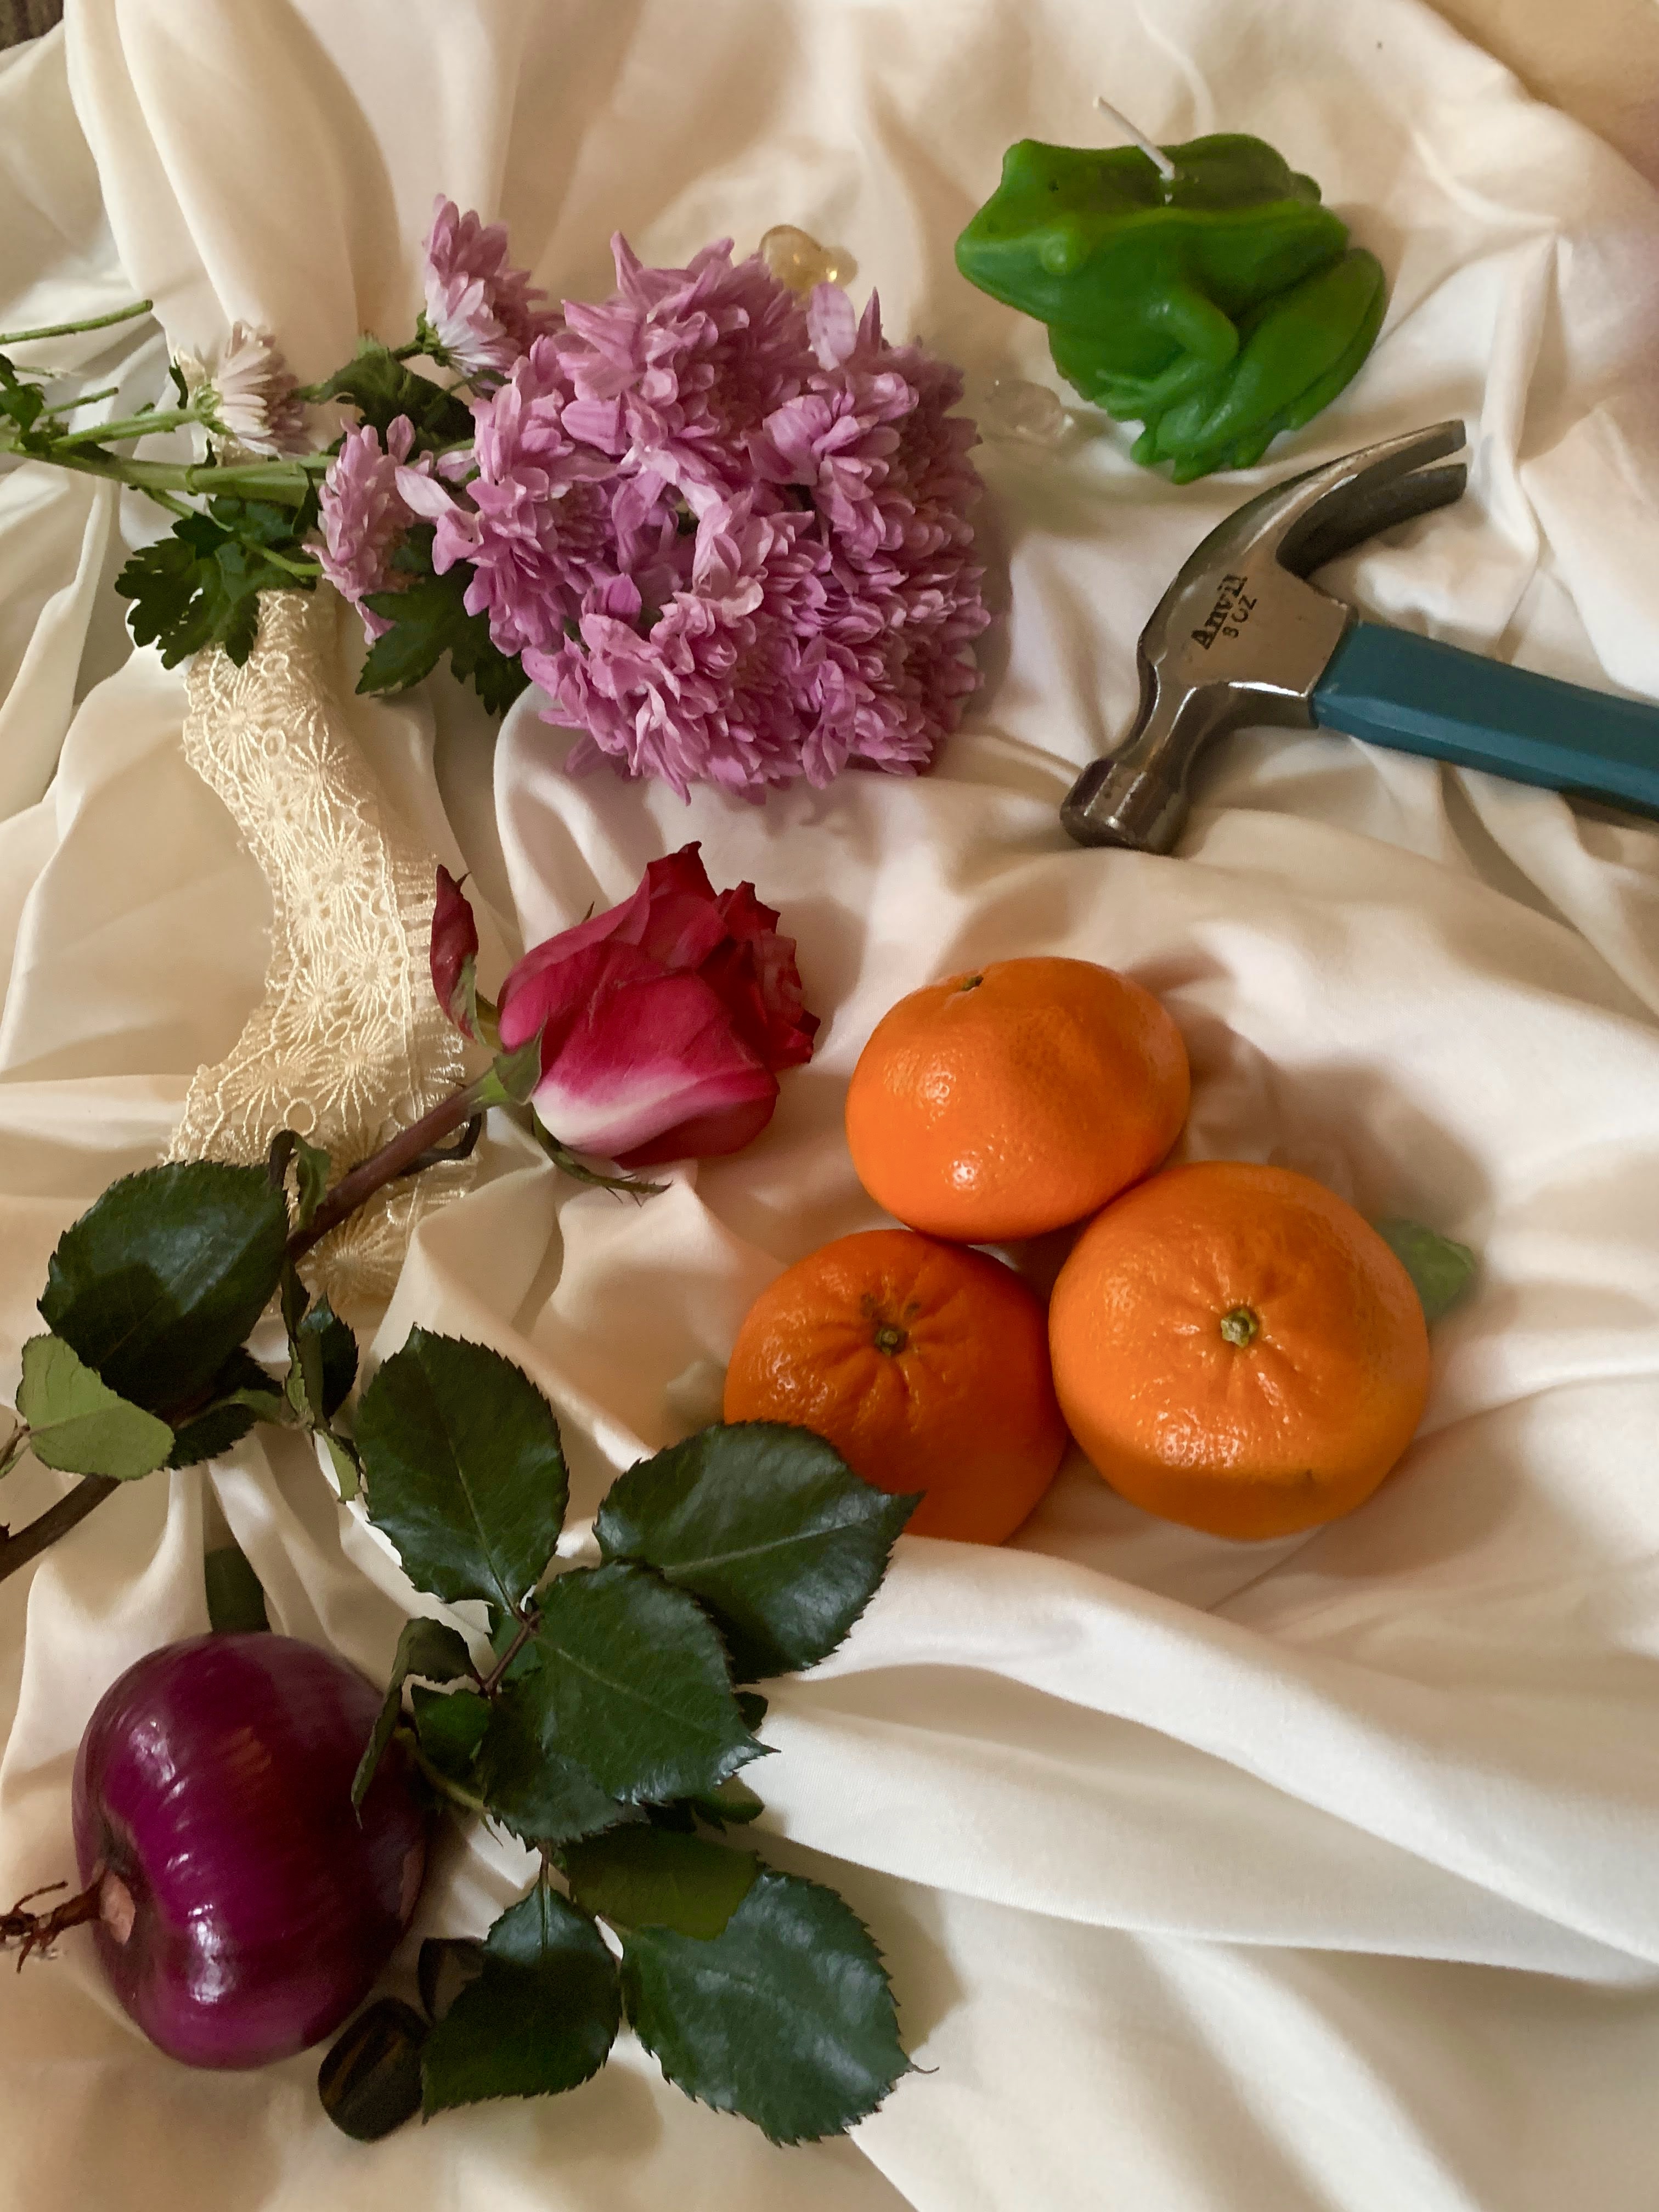


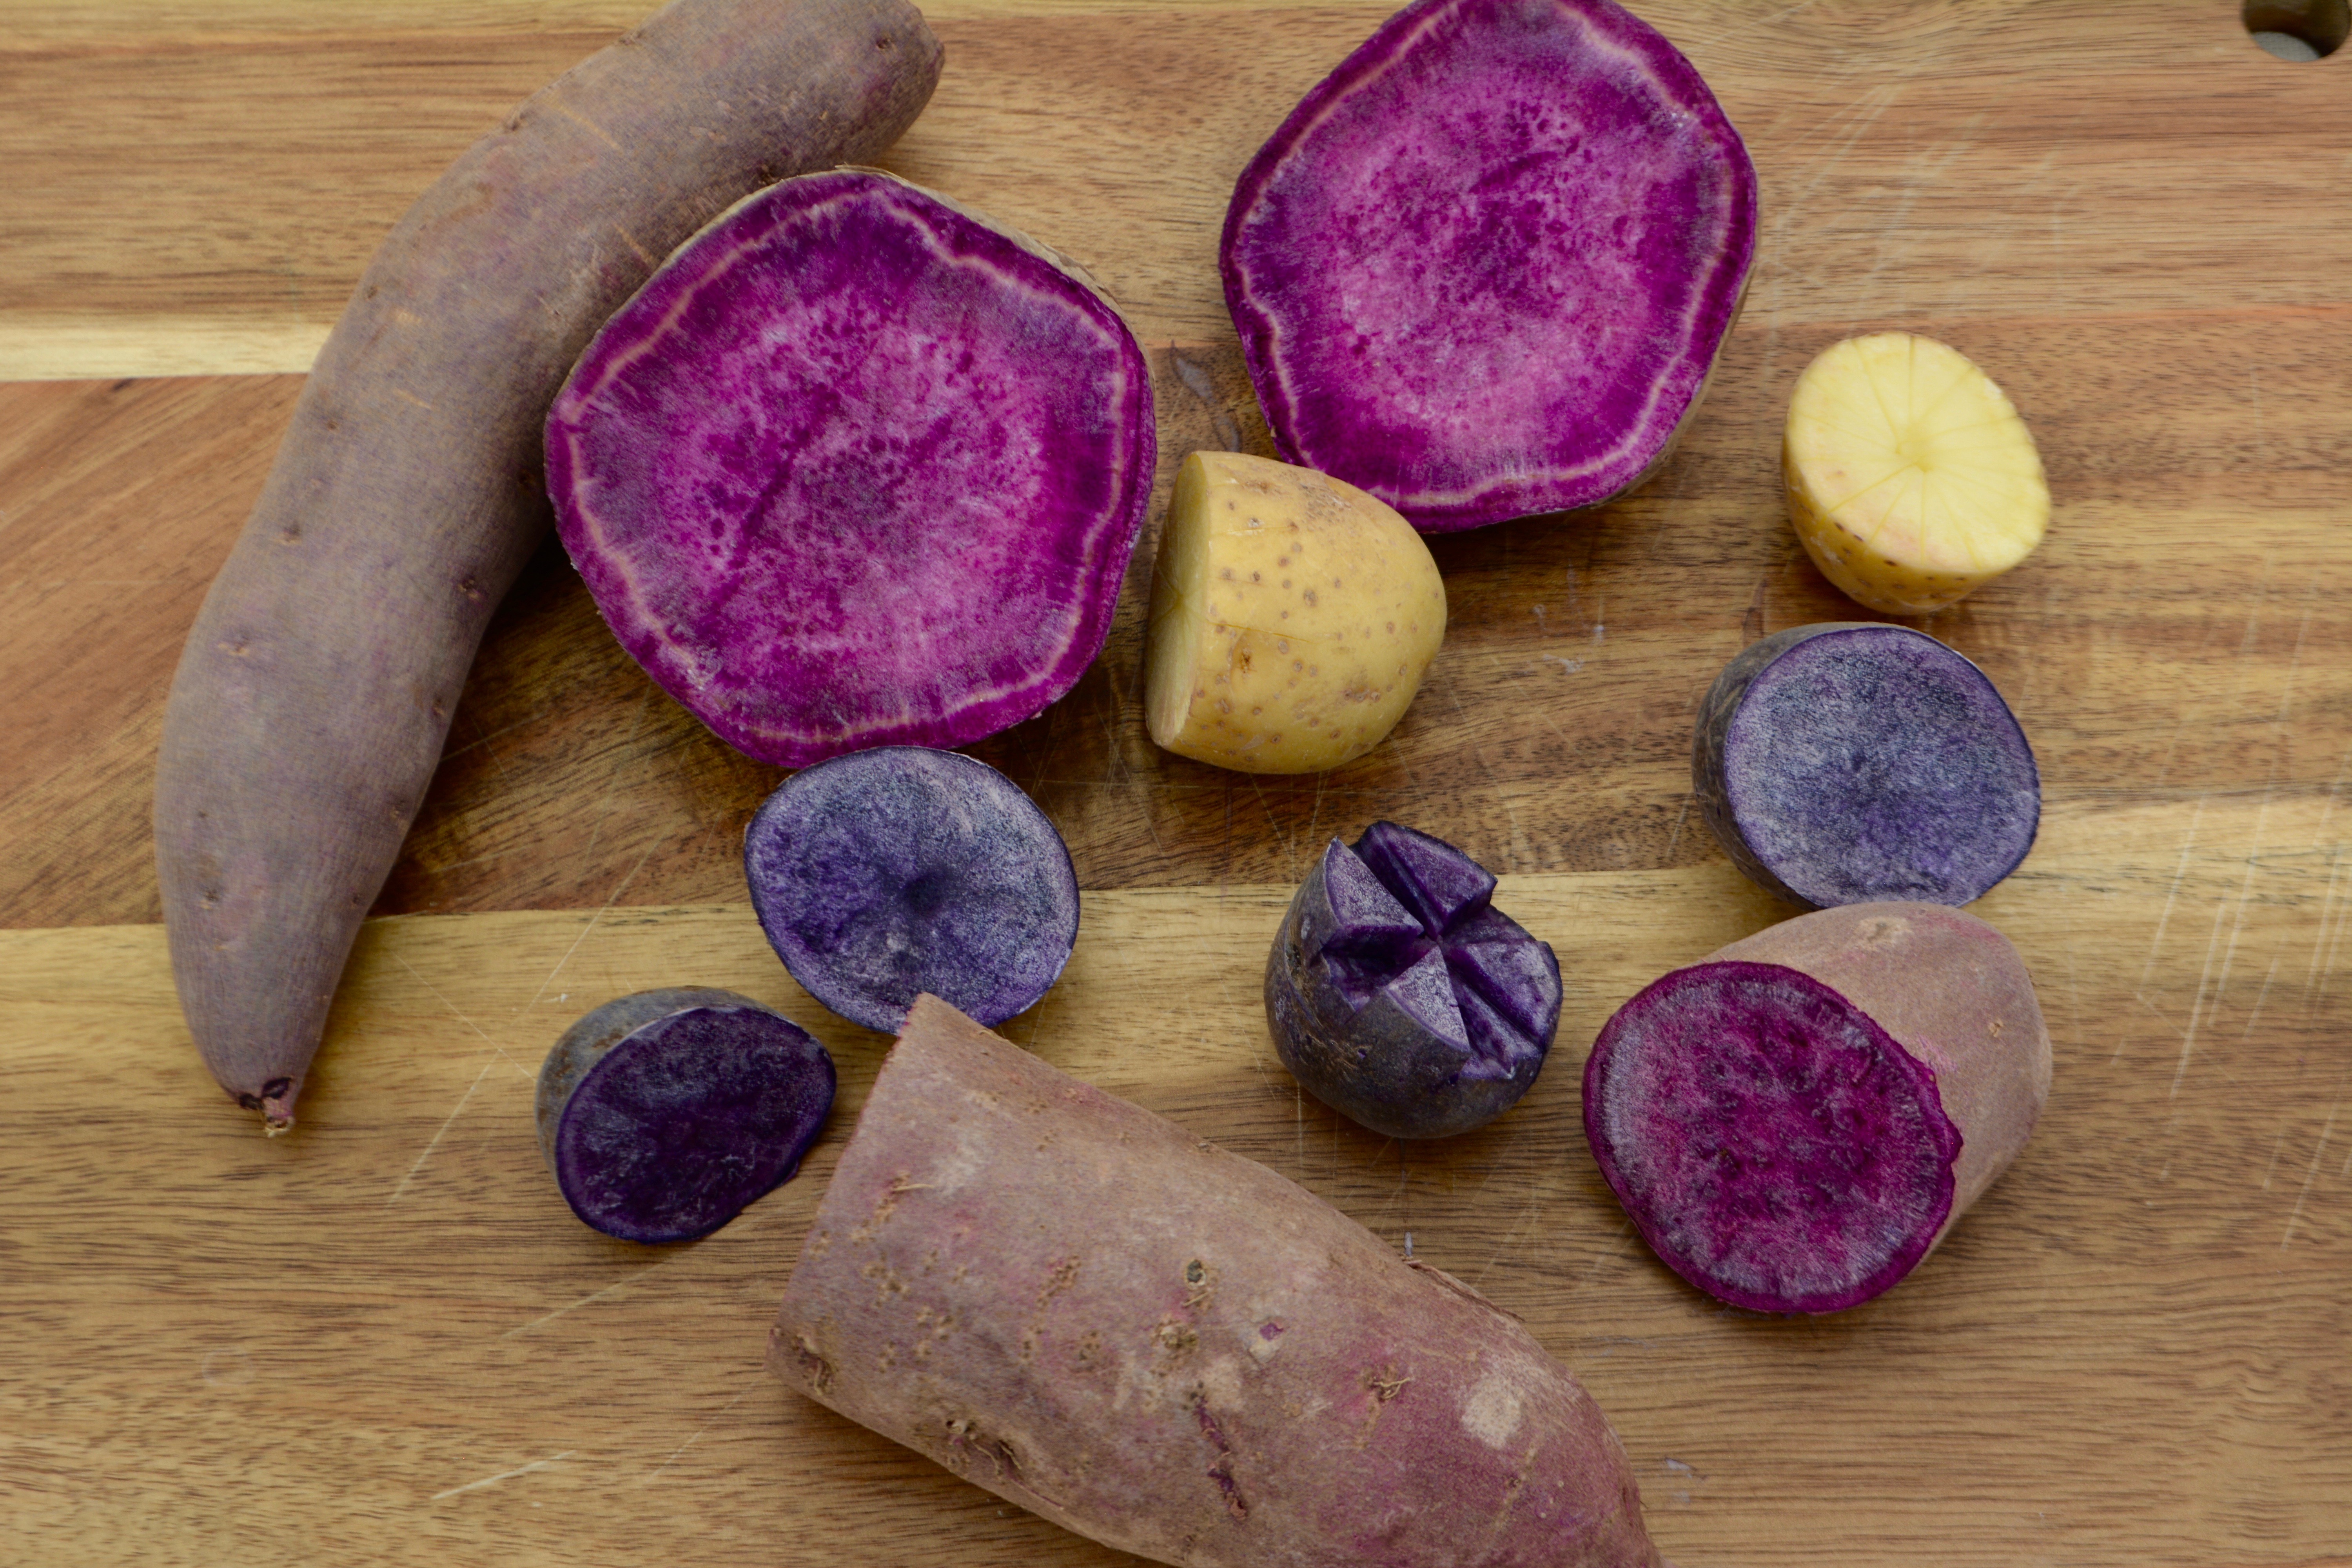
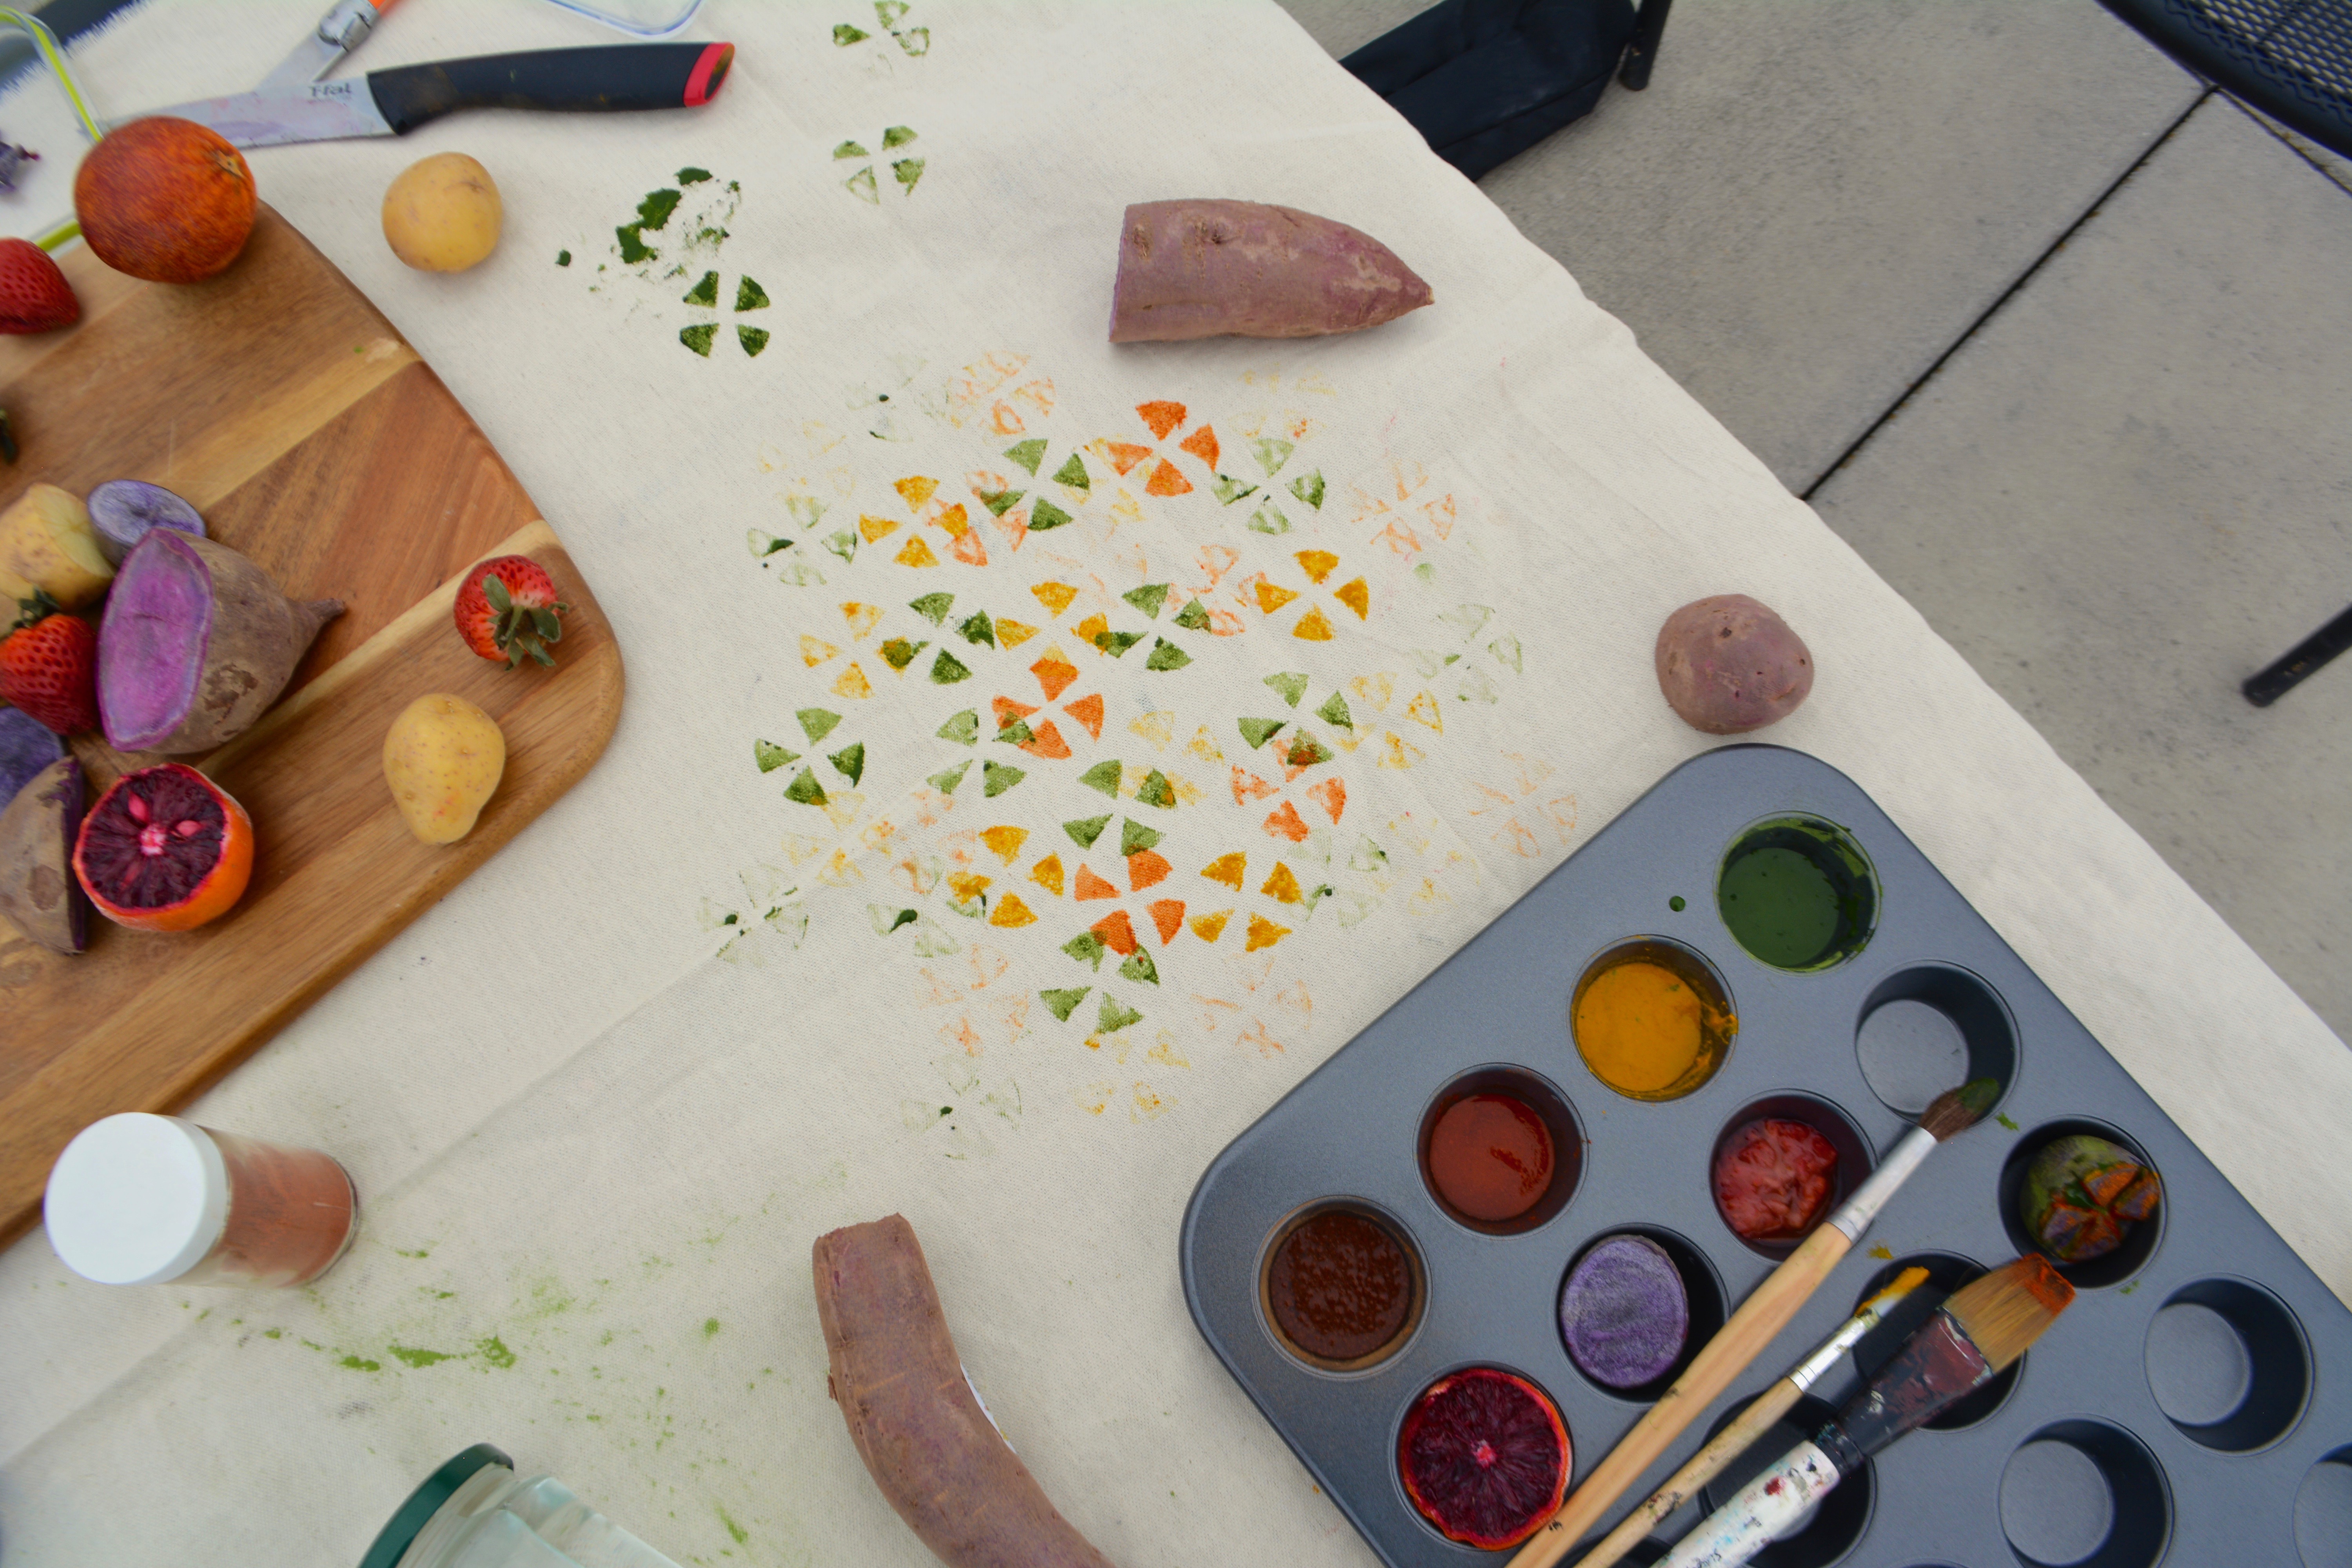
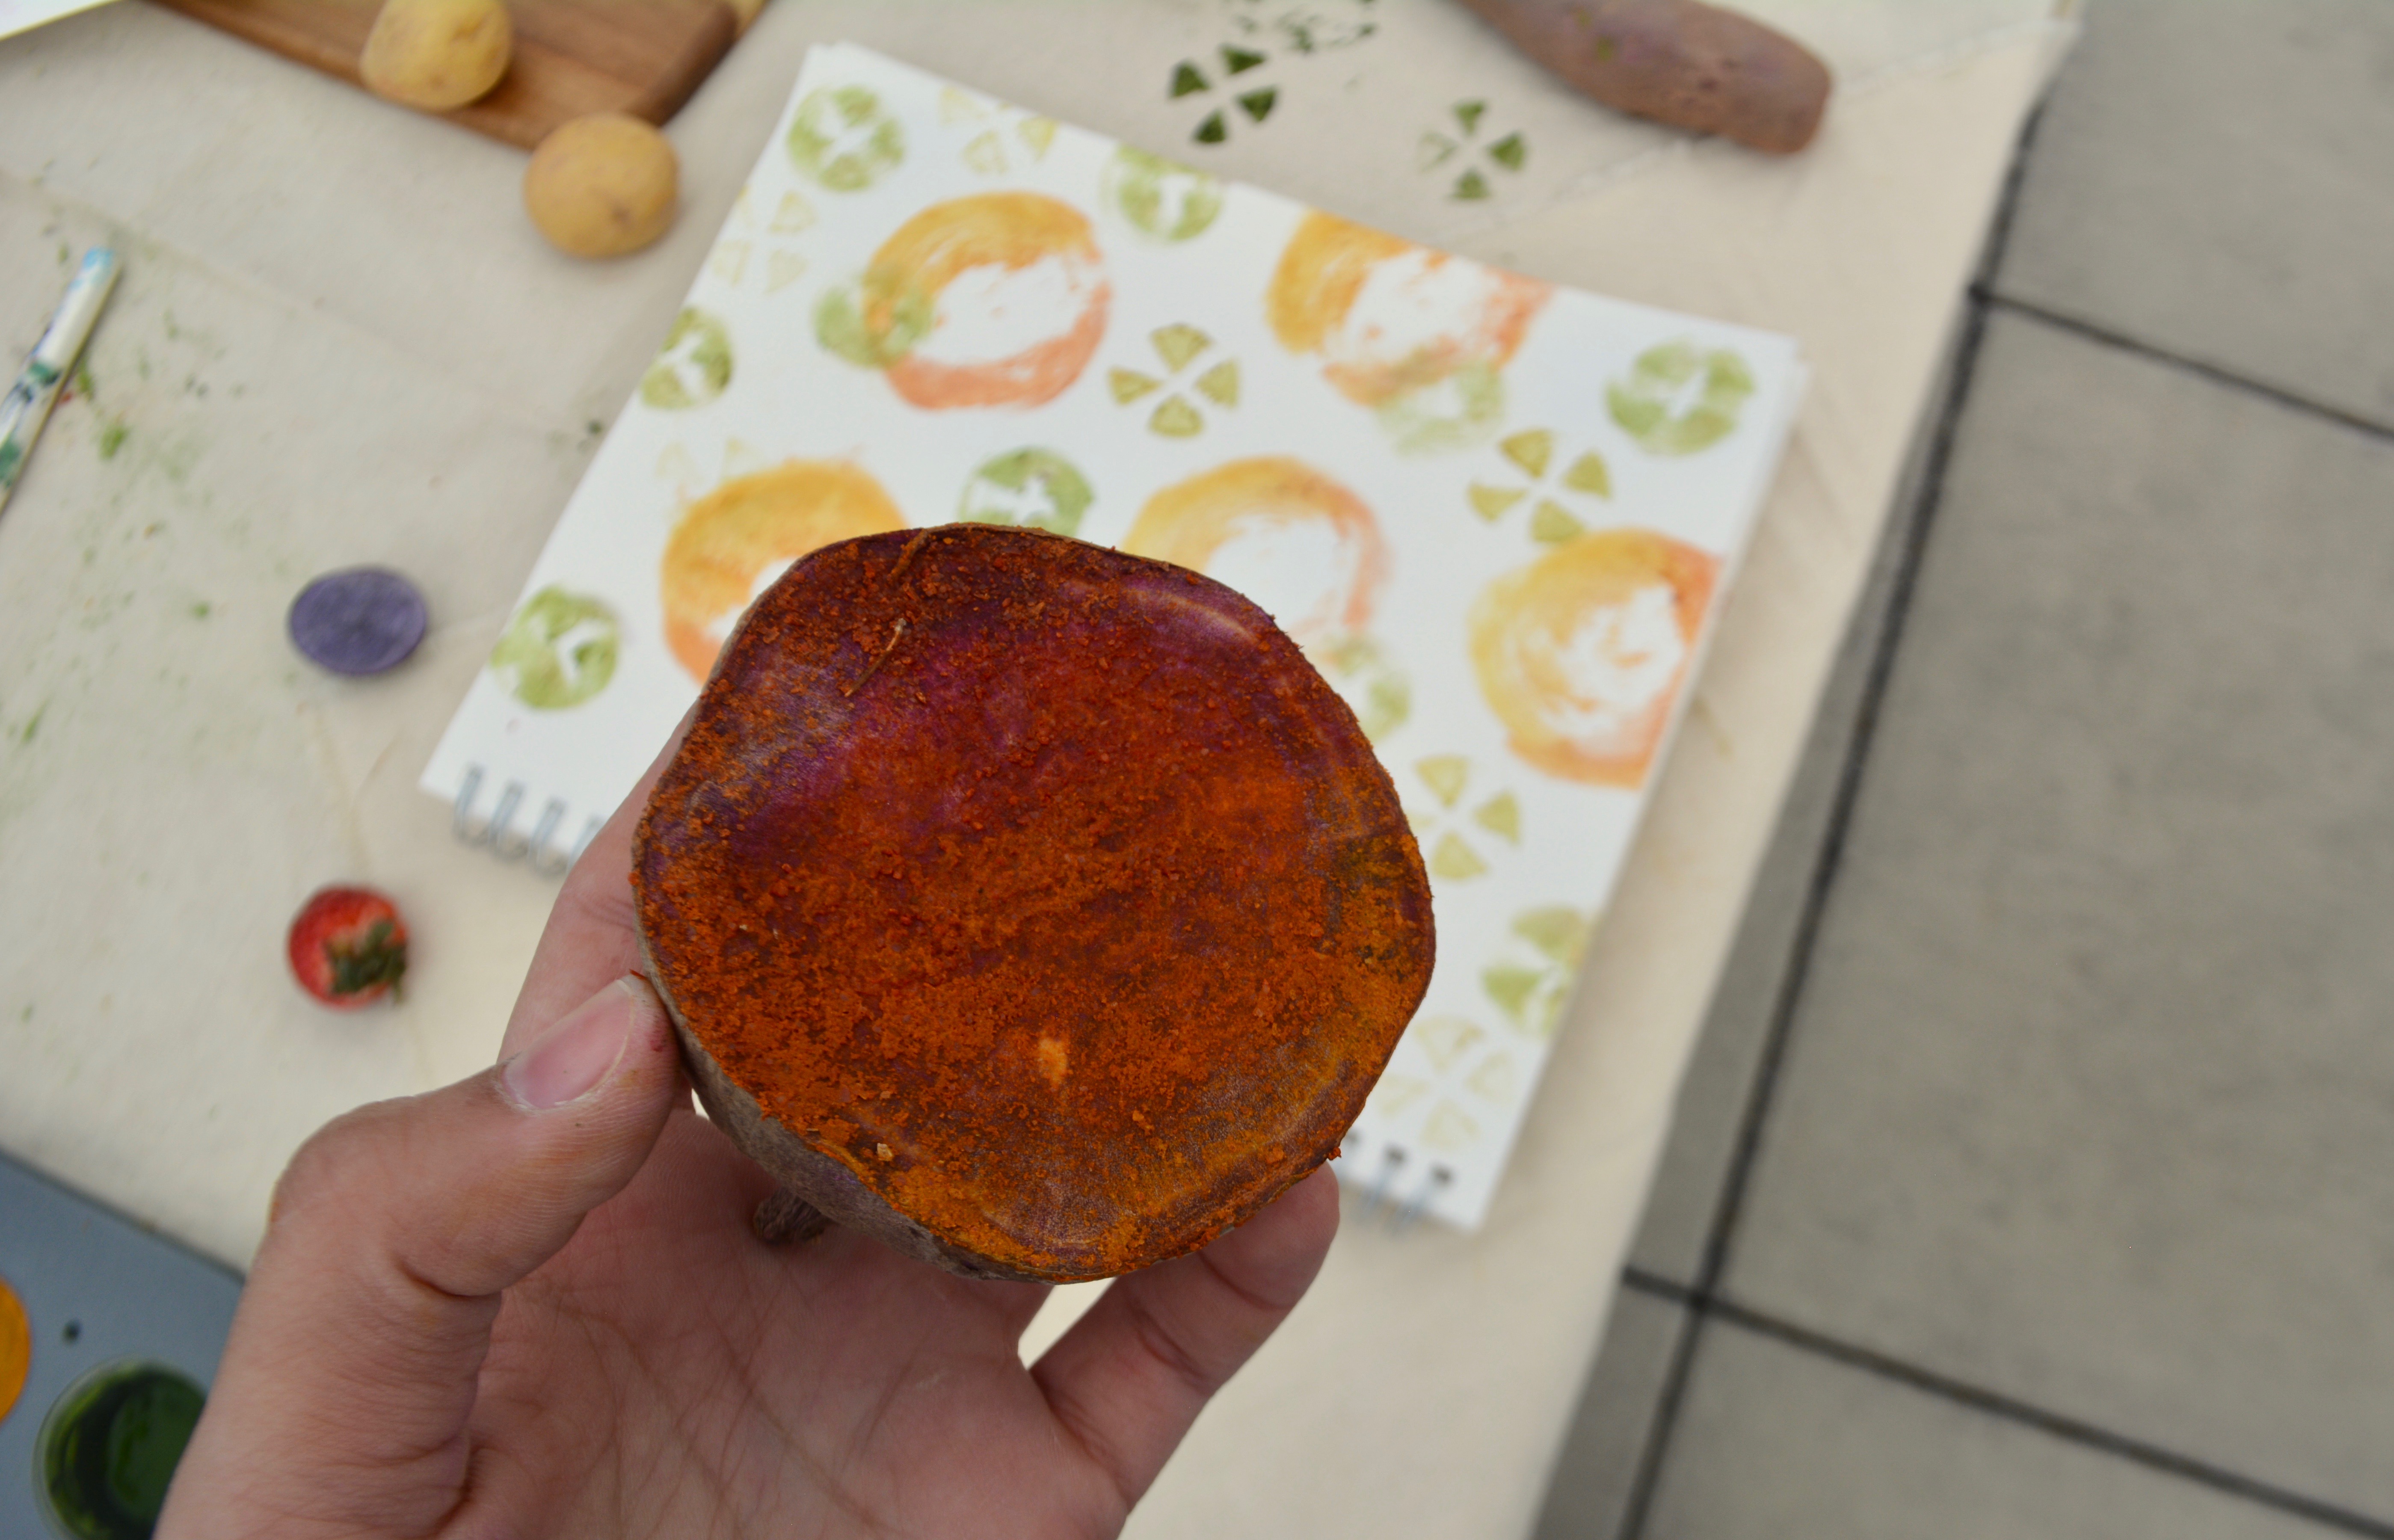
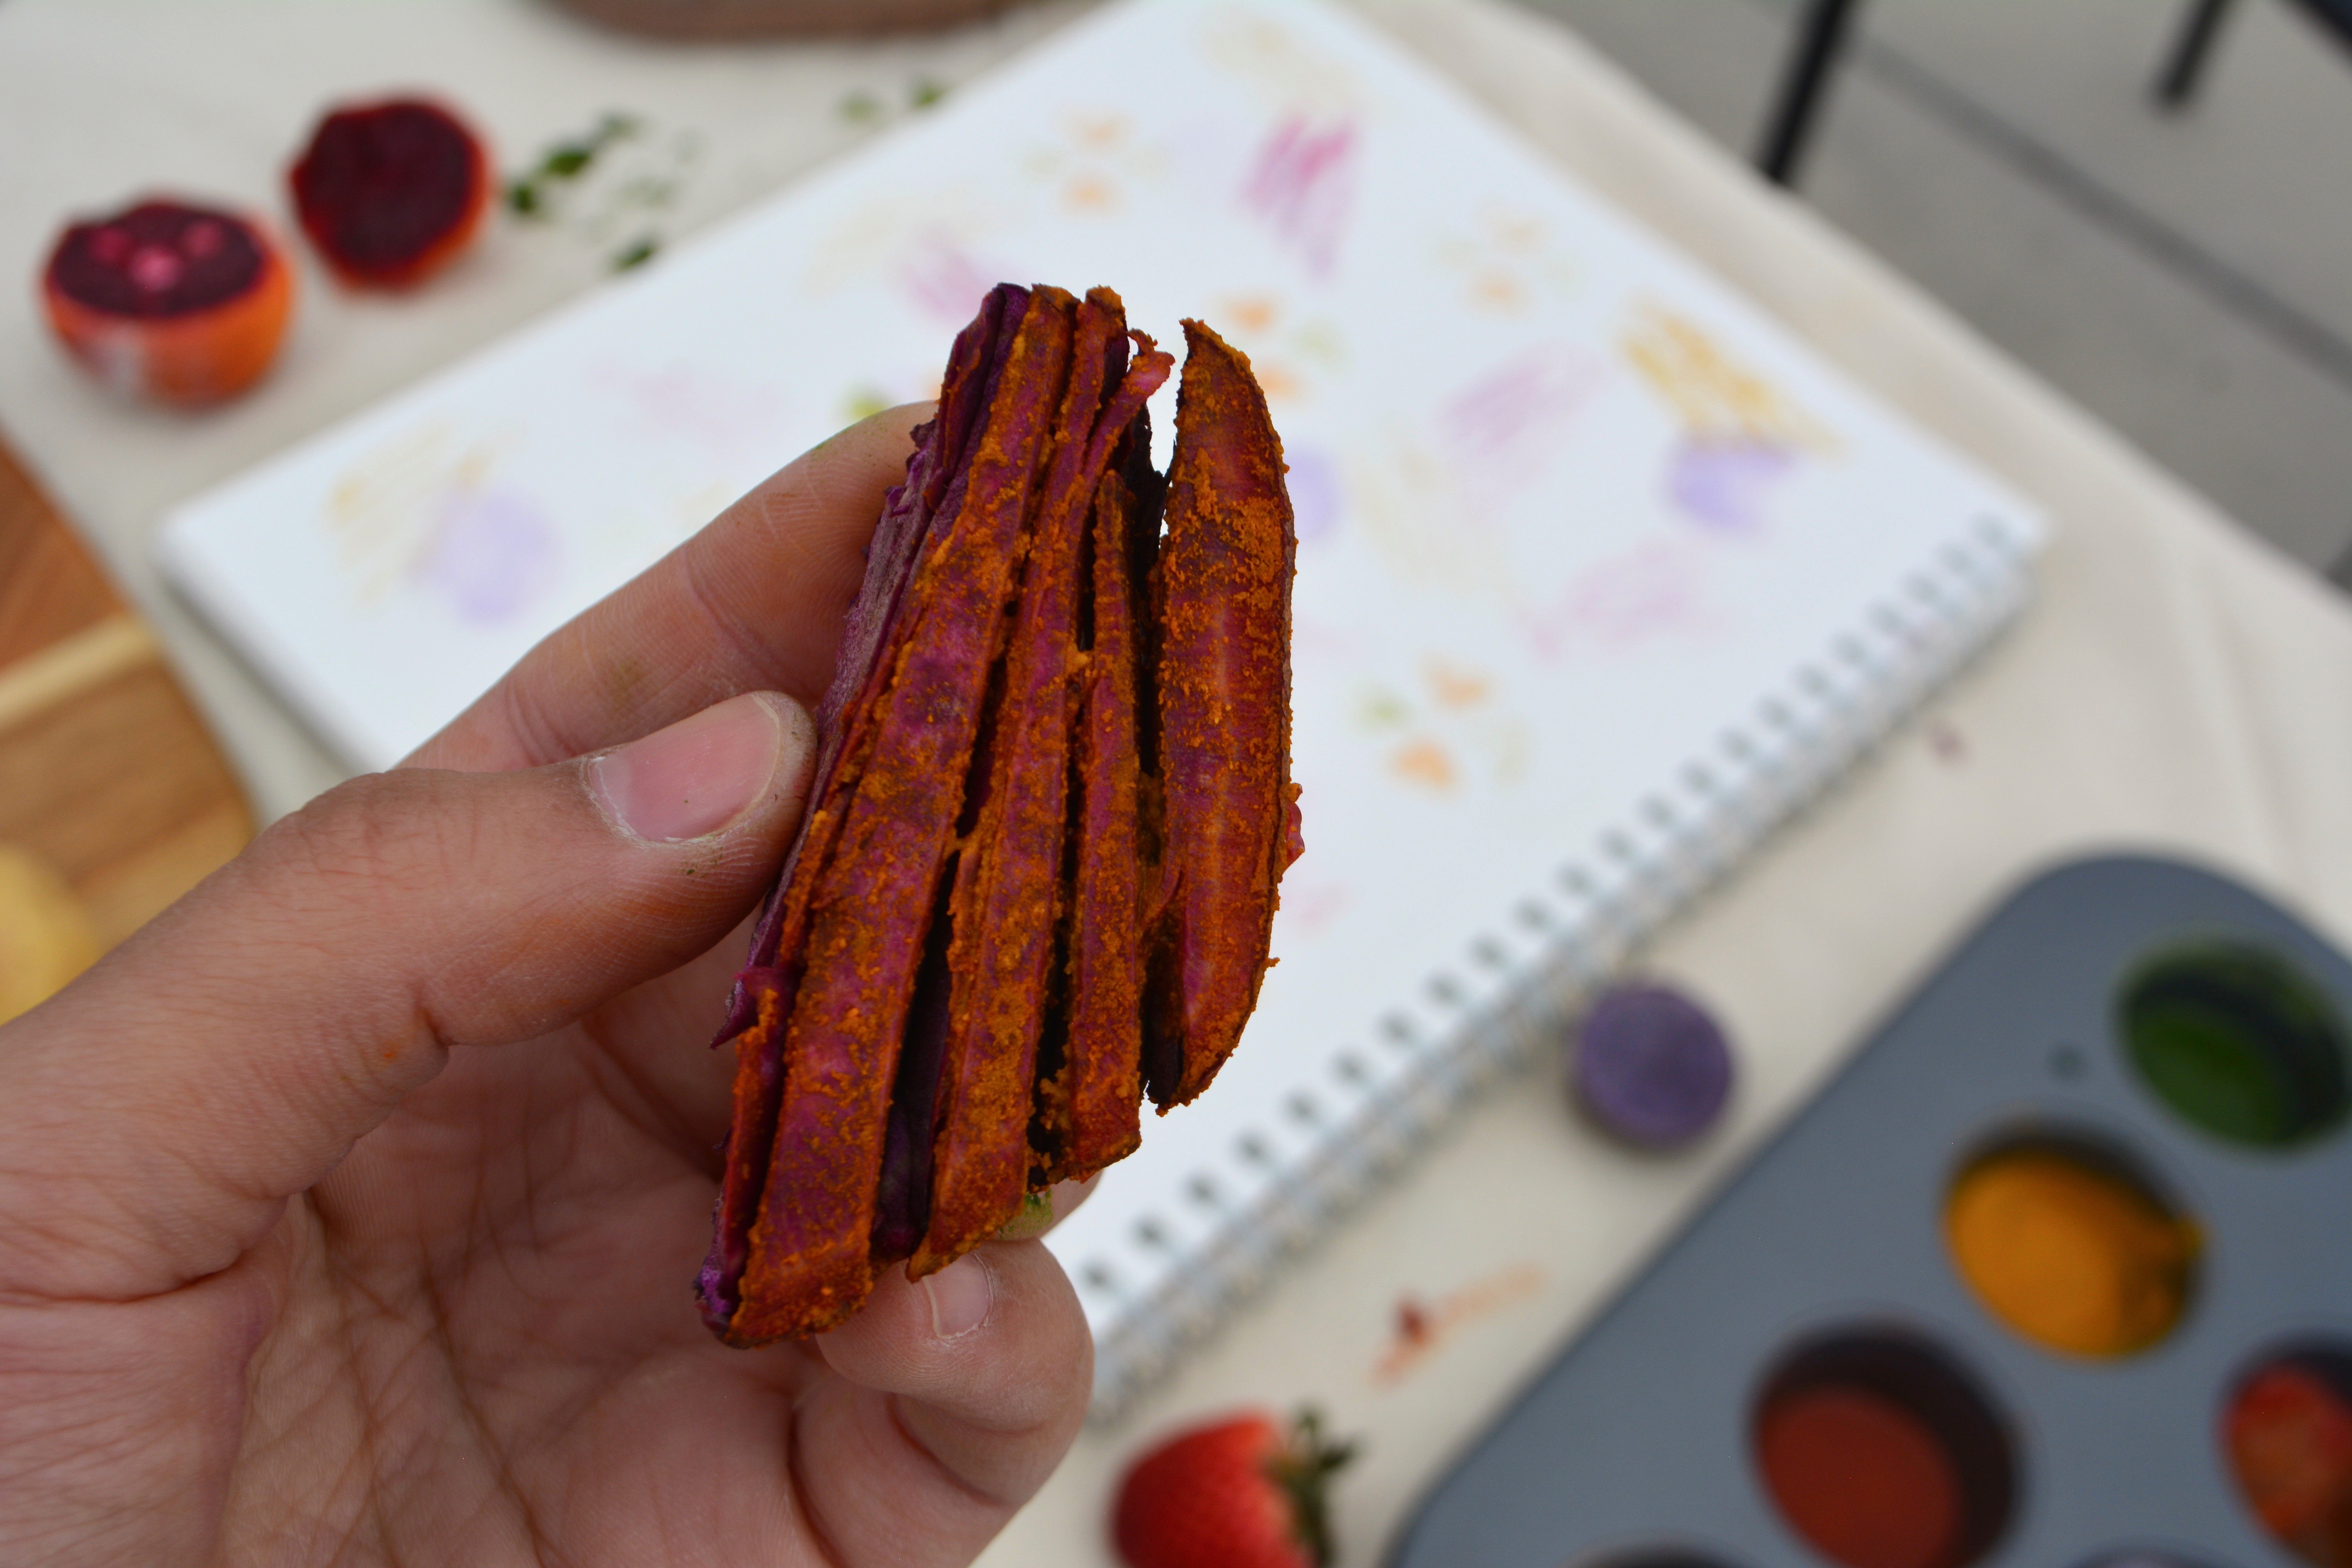
Potatoes(various sizes, white for less potato pigment, purple / sweet purple for more potato pigment; age/firmness of potato will affect output)
Carving tools (kitchen knife, smaller sharp knife, xacto blade)
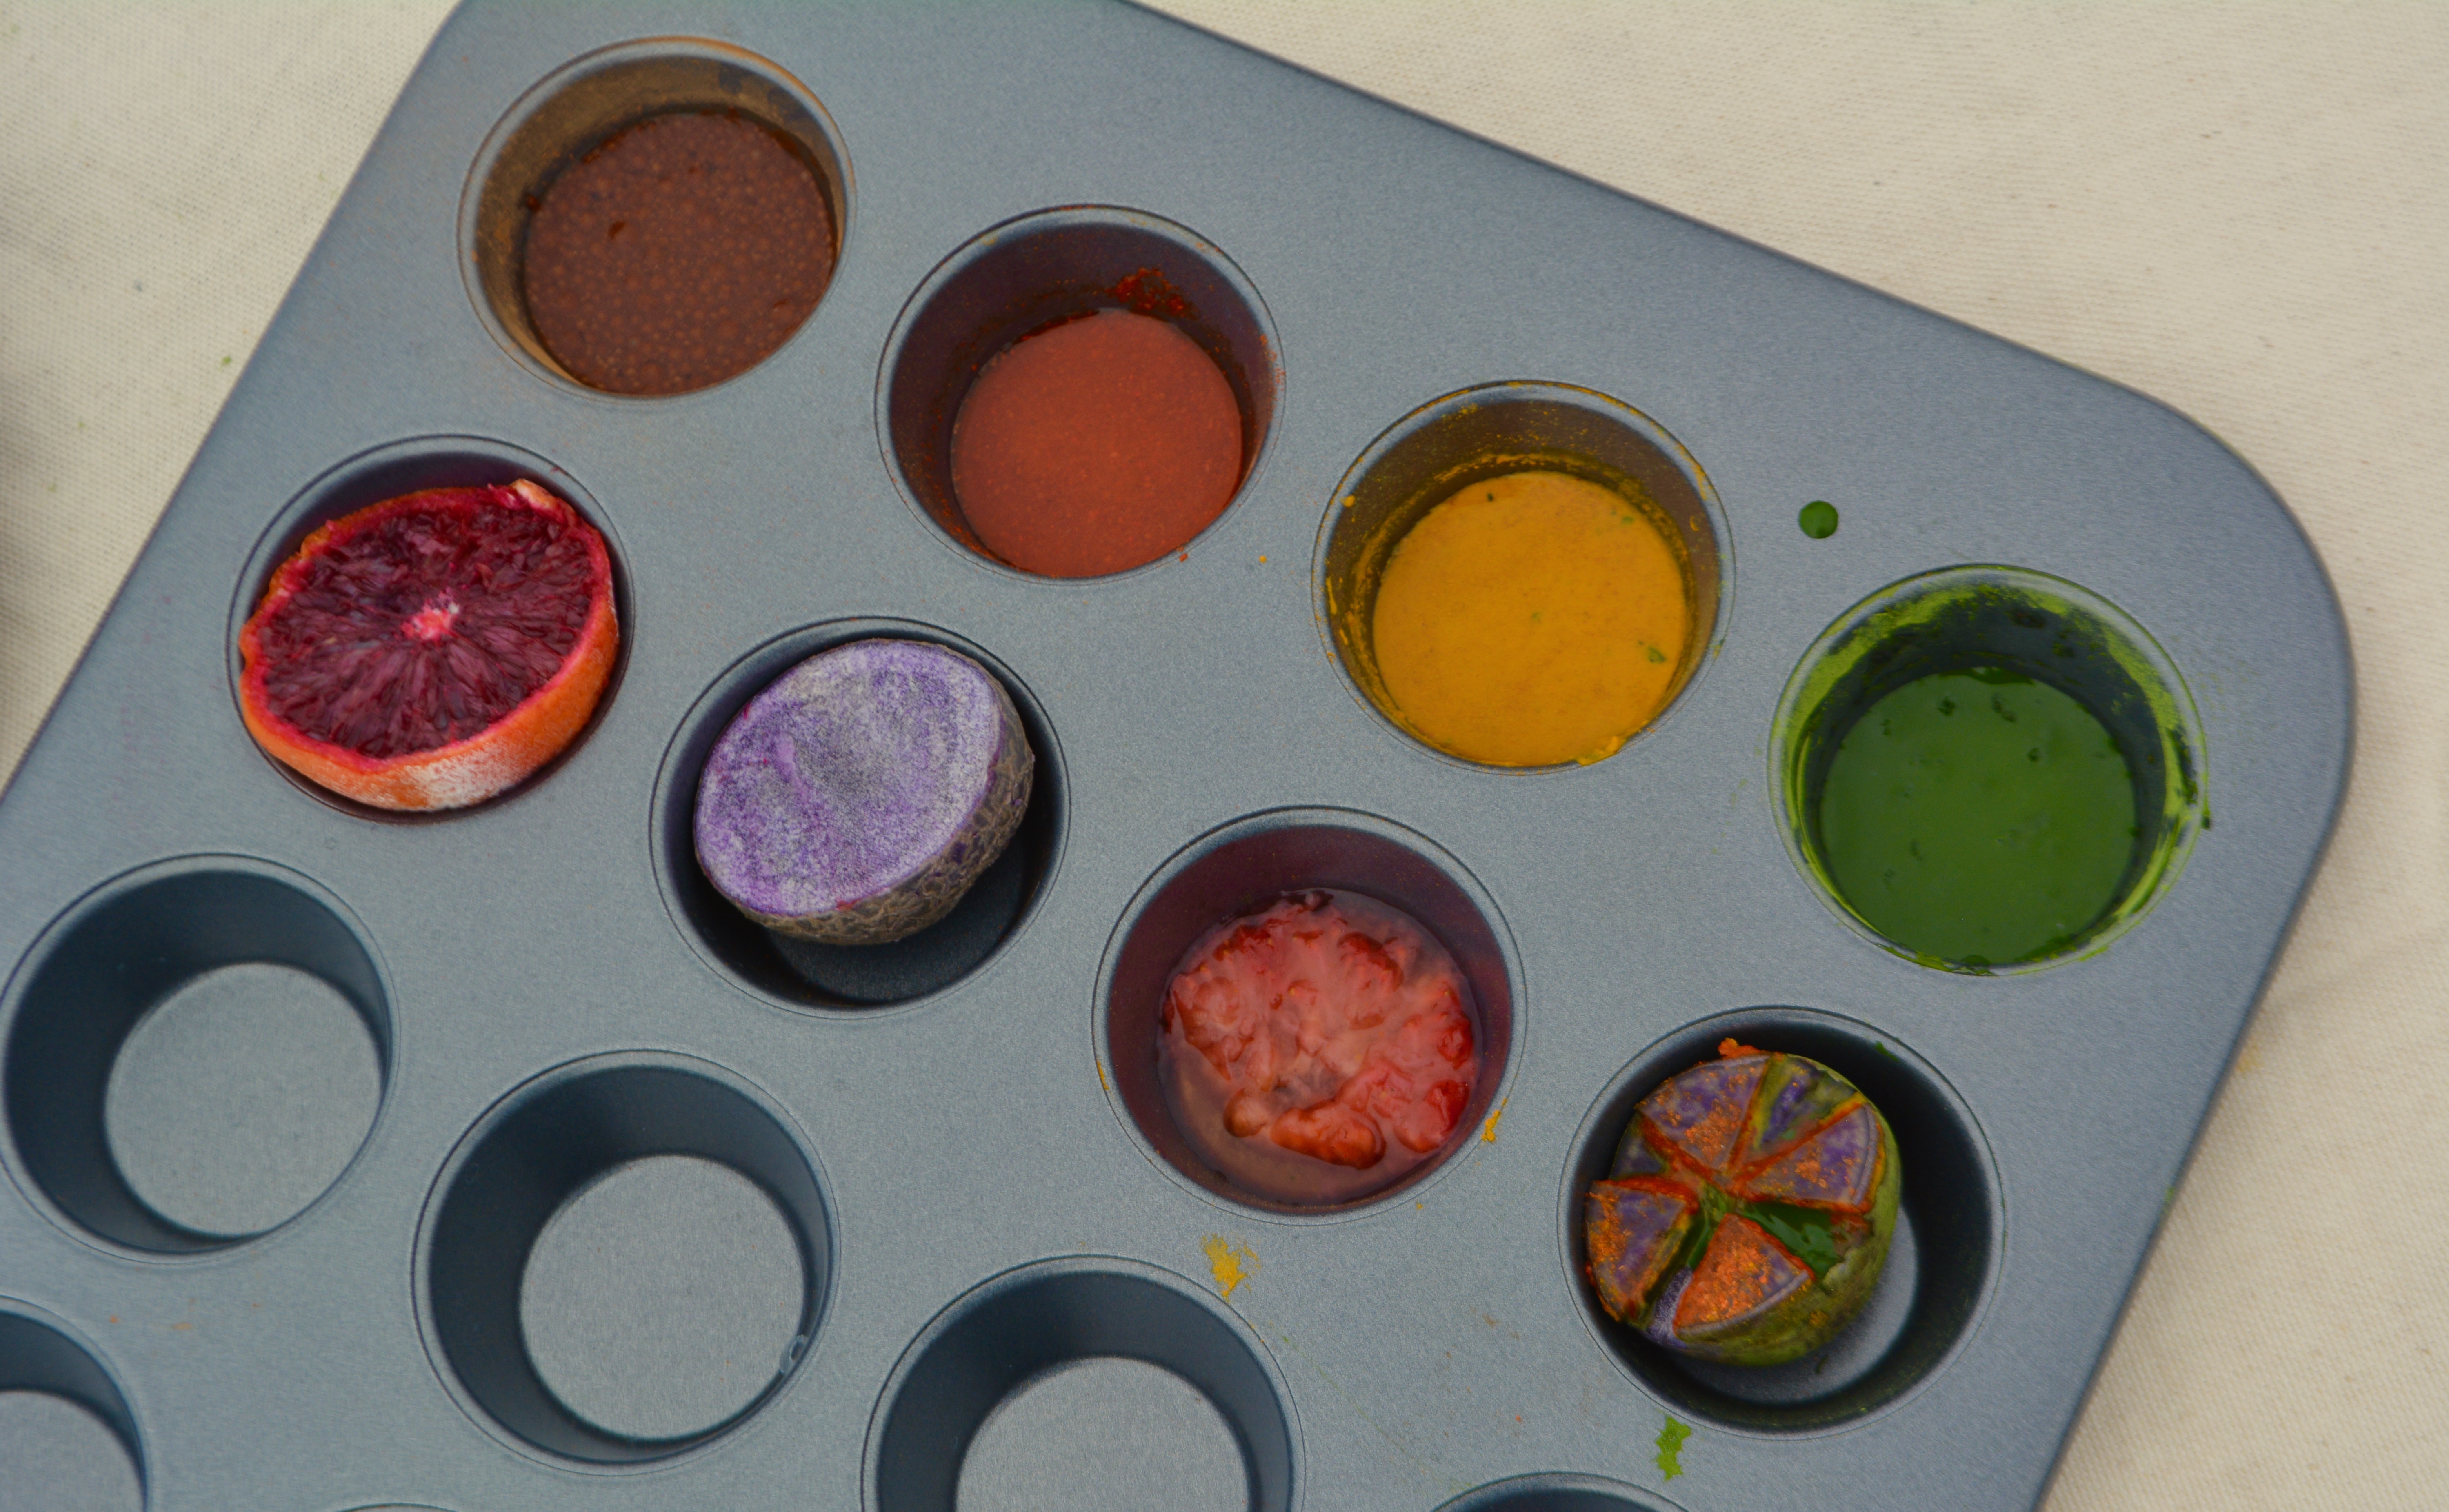
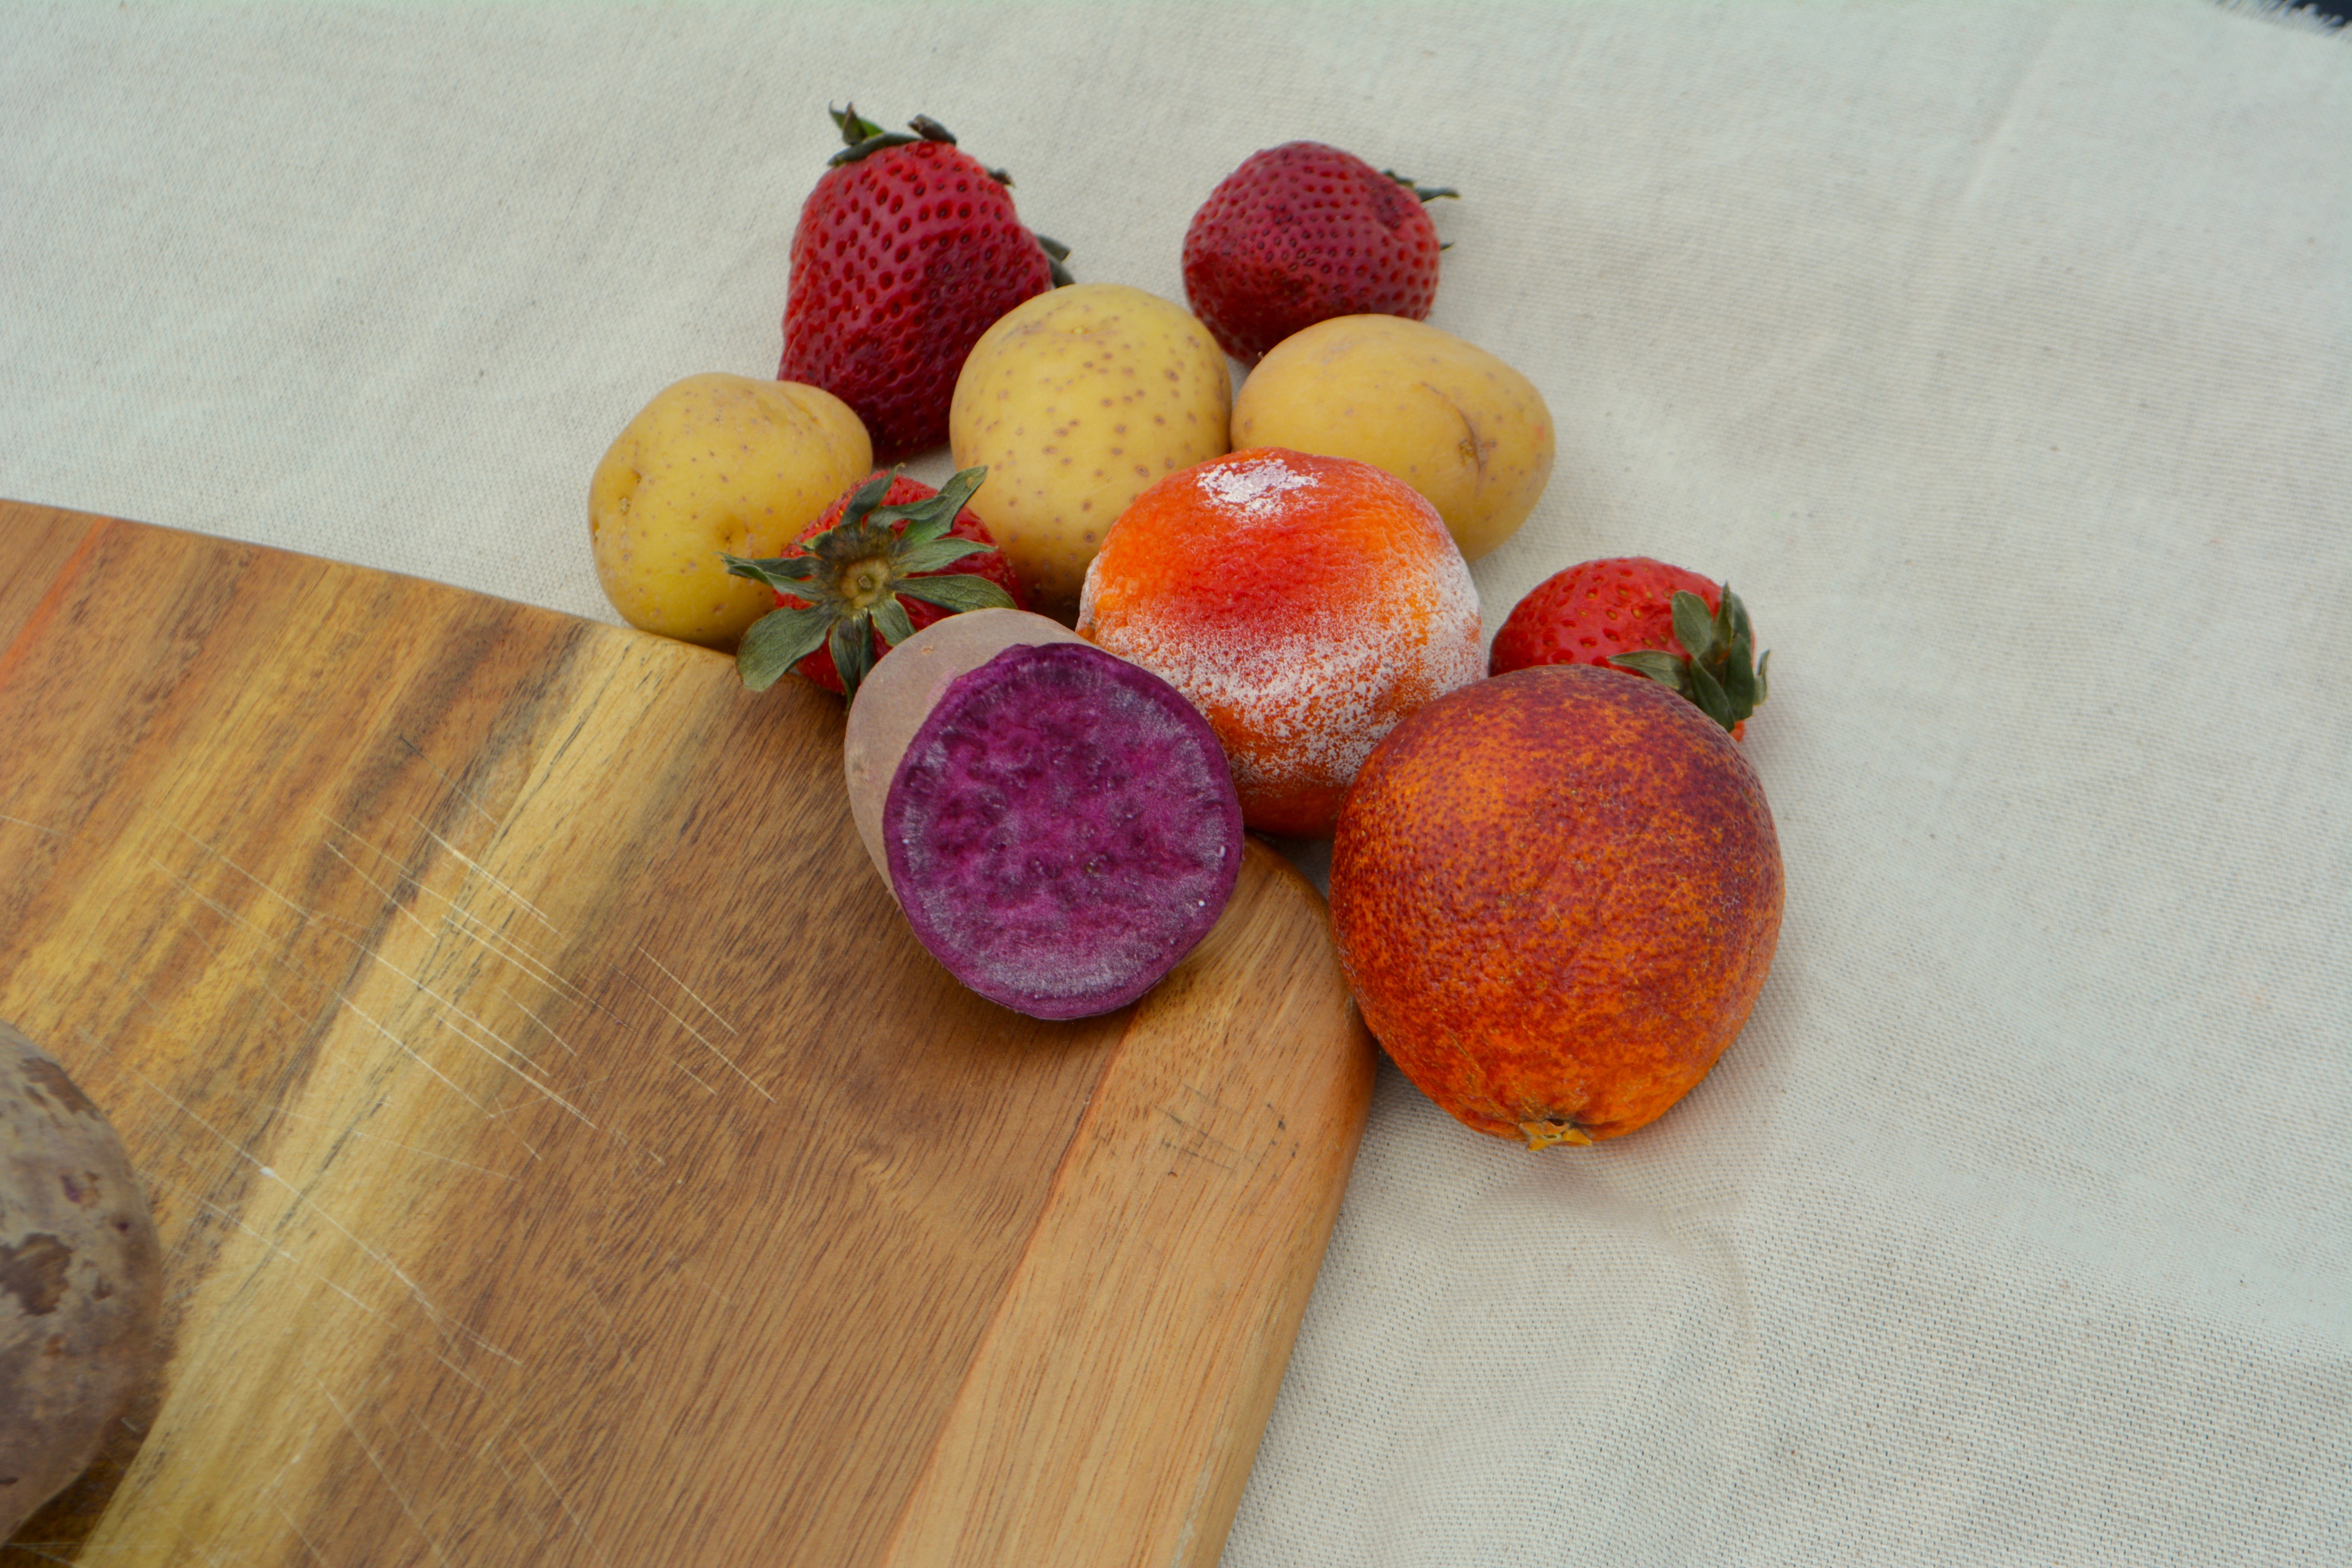
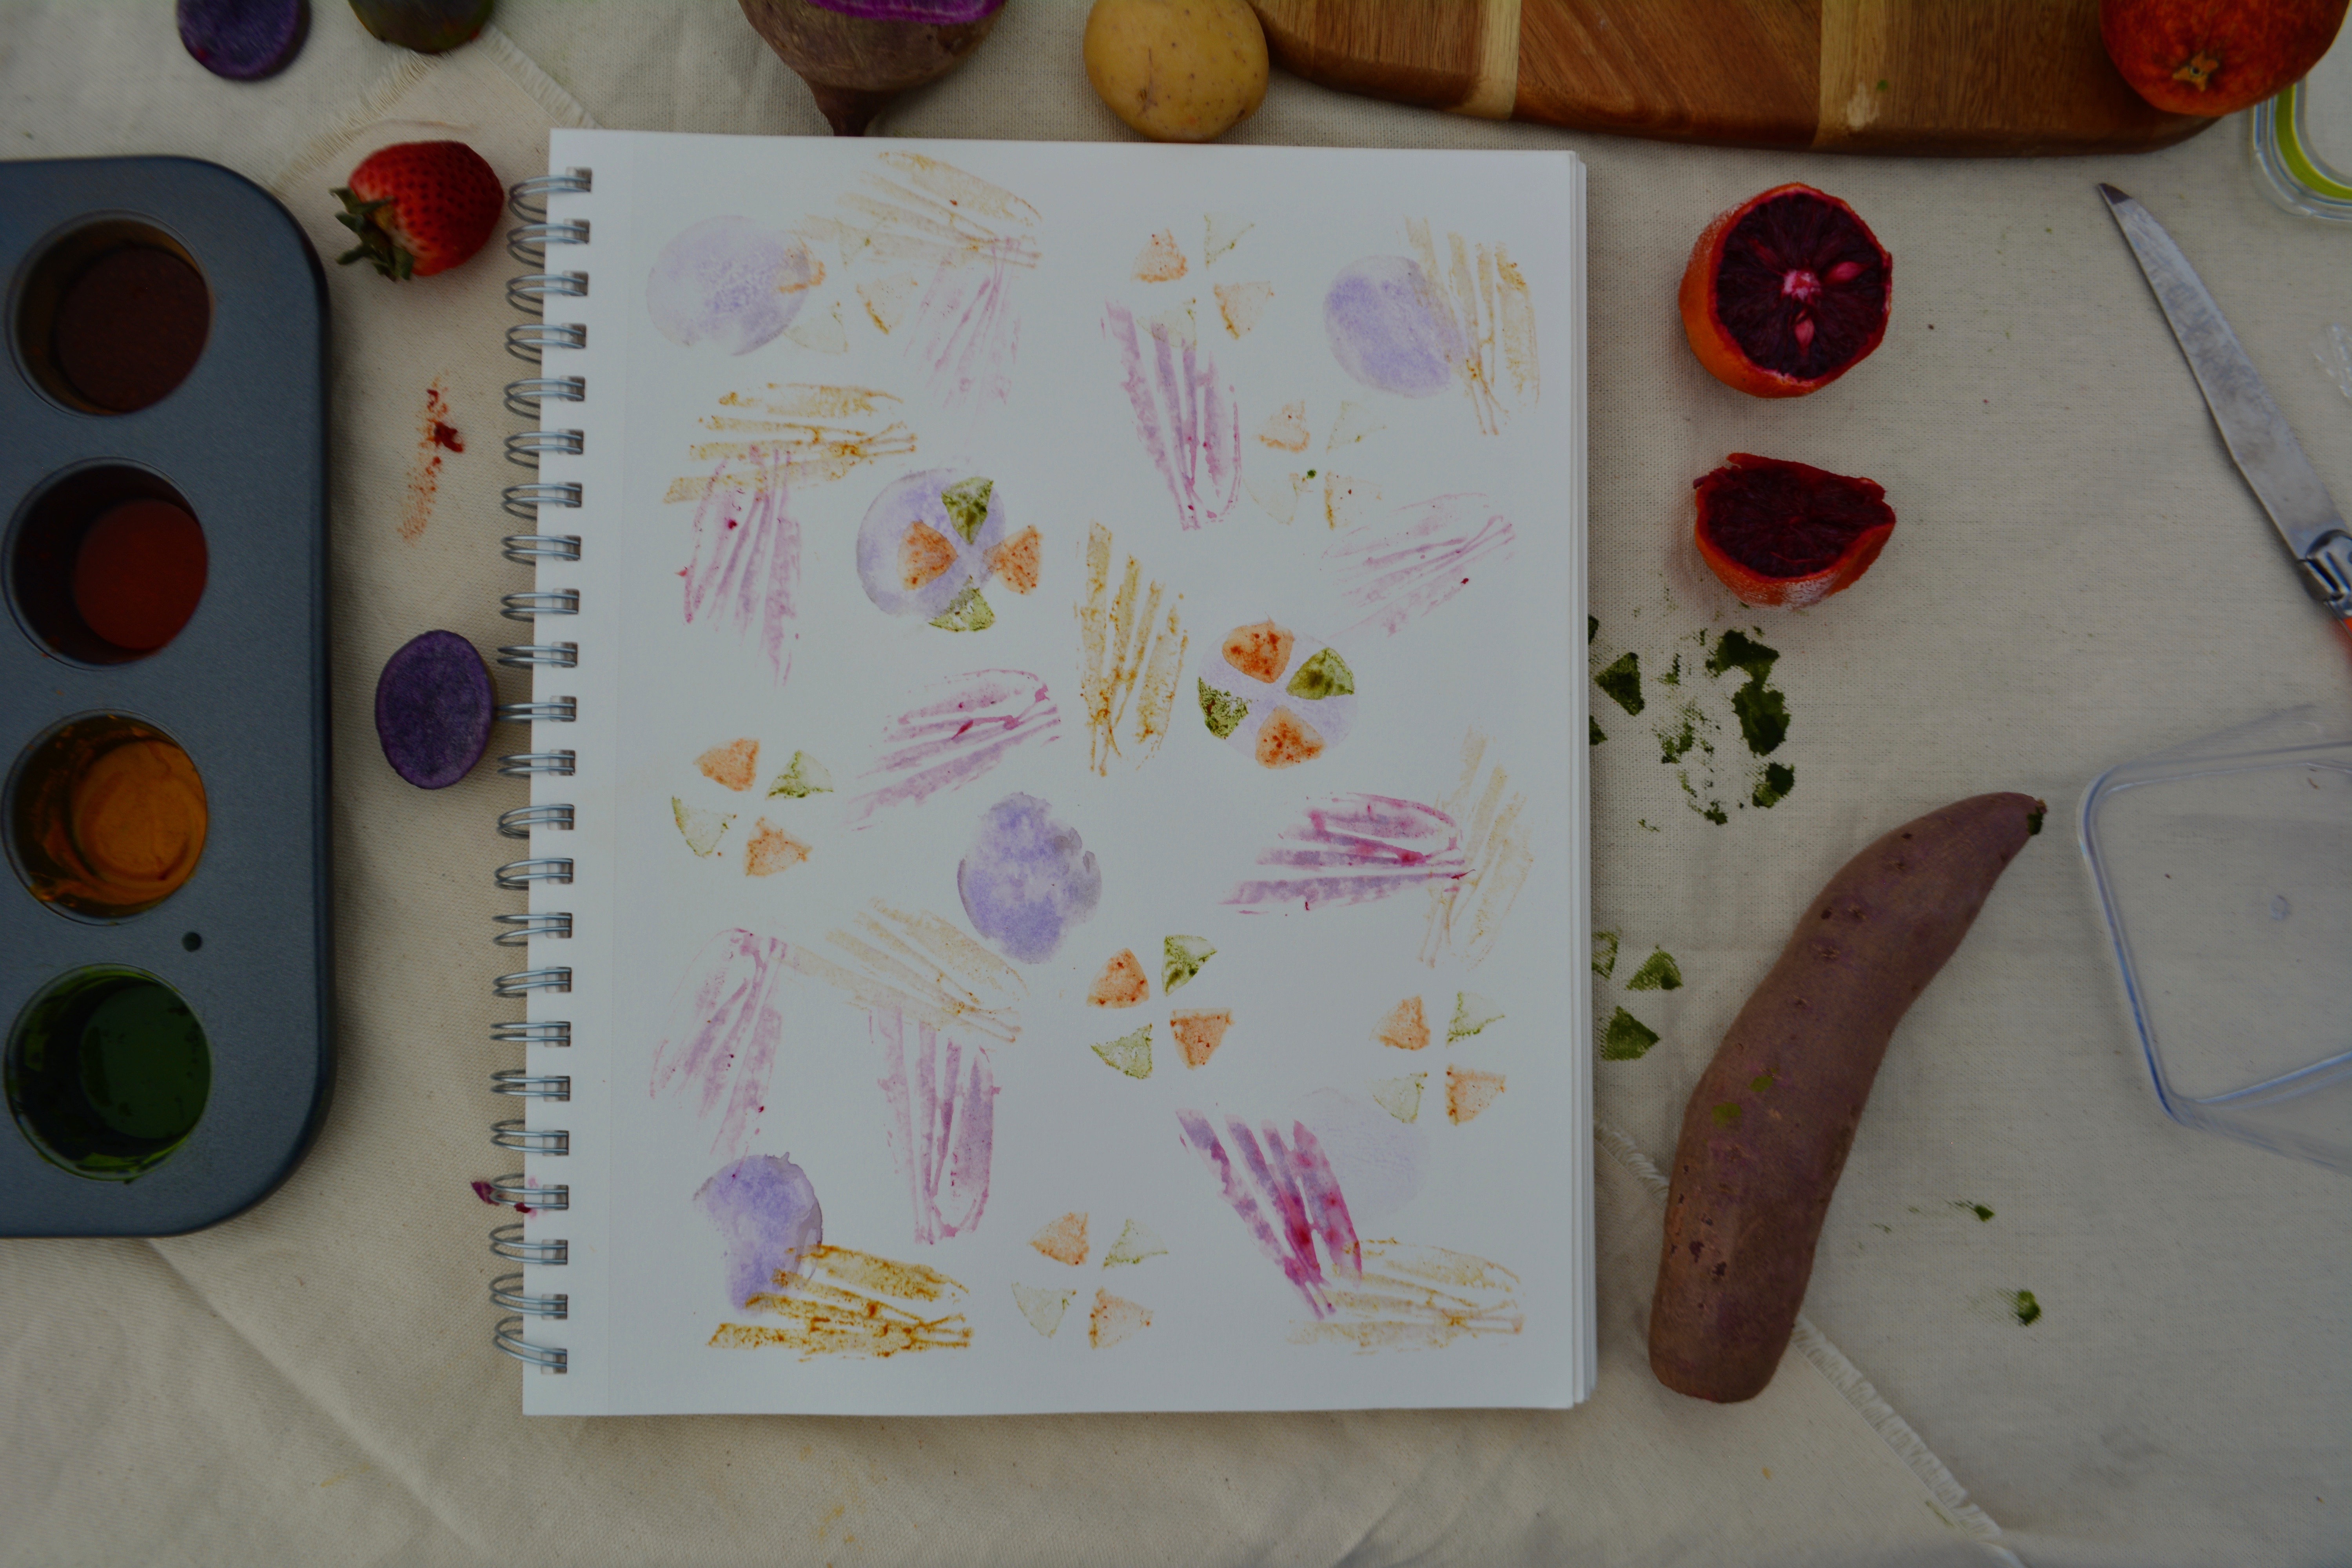
Pigments (red: chili powder/paprika; orange: blood oranges; yellow: turmeric; green: matcha; purple: potato; brown: cinnamon/coffee; pink: strawberries) OR whatever paint / ink you have laying around or accessible to you!
Cutting surface
Cups/bowls (to hold/mix pigments with water)
Pigment applicator(s) (paintbrushes, sponges, brayer, or fingers)
Towel / cloth (optional, but can lay under print surfaces for more even application)
Cloth/rag/towel (to clean potato stamps when needed)
Application surface (porous/absorbent paper or fabric, pale color)

1 // Natural paints—
Mix any powder pigments with water to create your own paints.
2 // Cut potatoes—
Cut potatoes into halves (at least). Optional: carve relief design into the exposed surface of the potato for more intricate and detailed prints.3 // Optional technique for a more even application to printing surface—
Lay application surface (your paper or fabric) over a towel/cloth for a more even application of paint.
4 // Apply paint to the potato stamp—
Unless you desire only to use the existing pigment from the potatoes. Apply using a sponge, brush, your fingers, or solely by dunking into the container holding your paints.
You may want to dab excess paint onto a separate cloth.
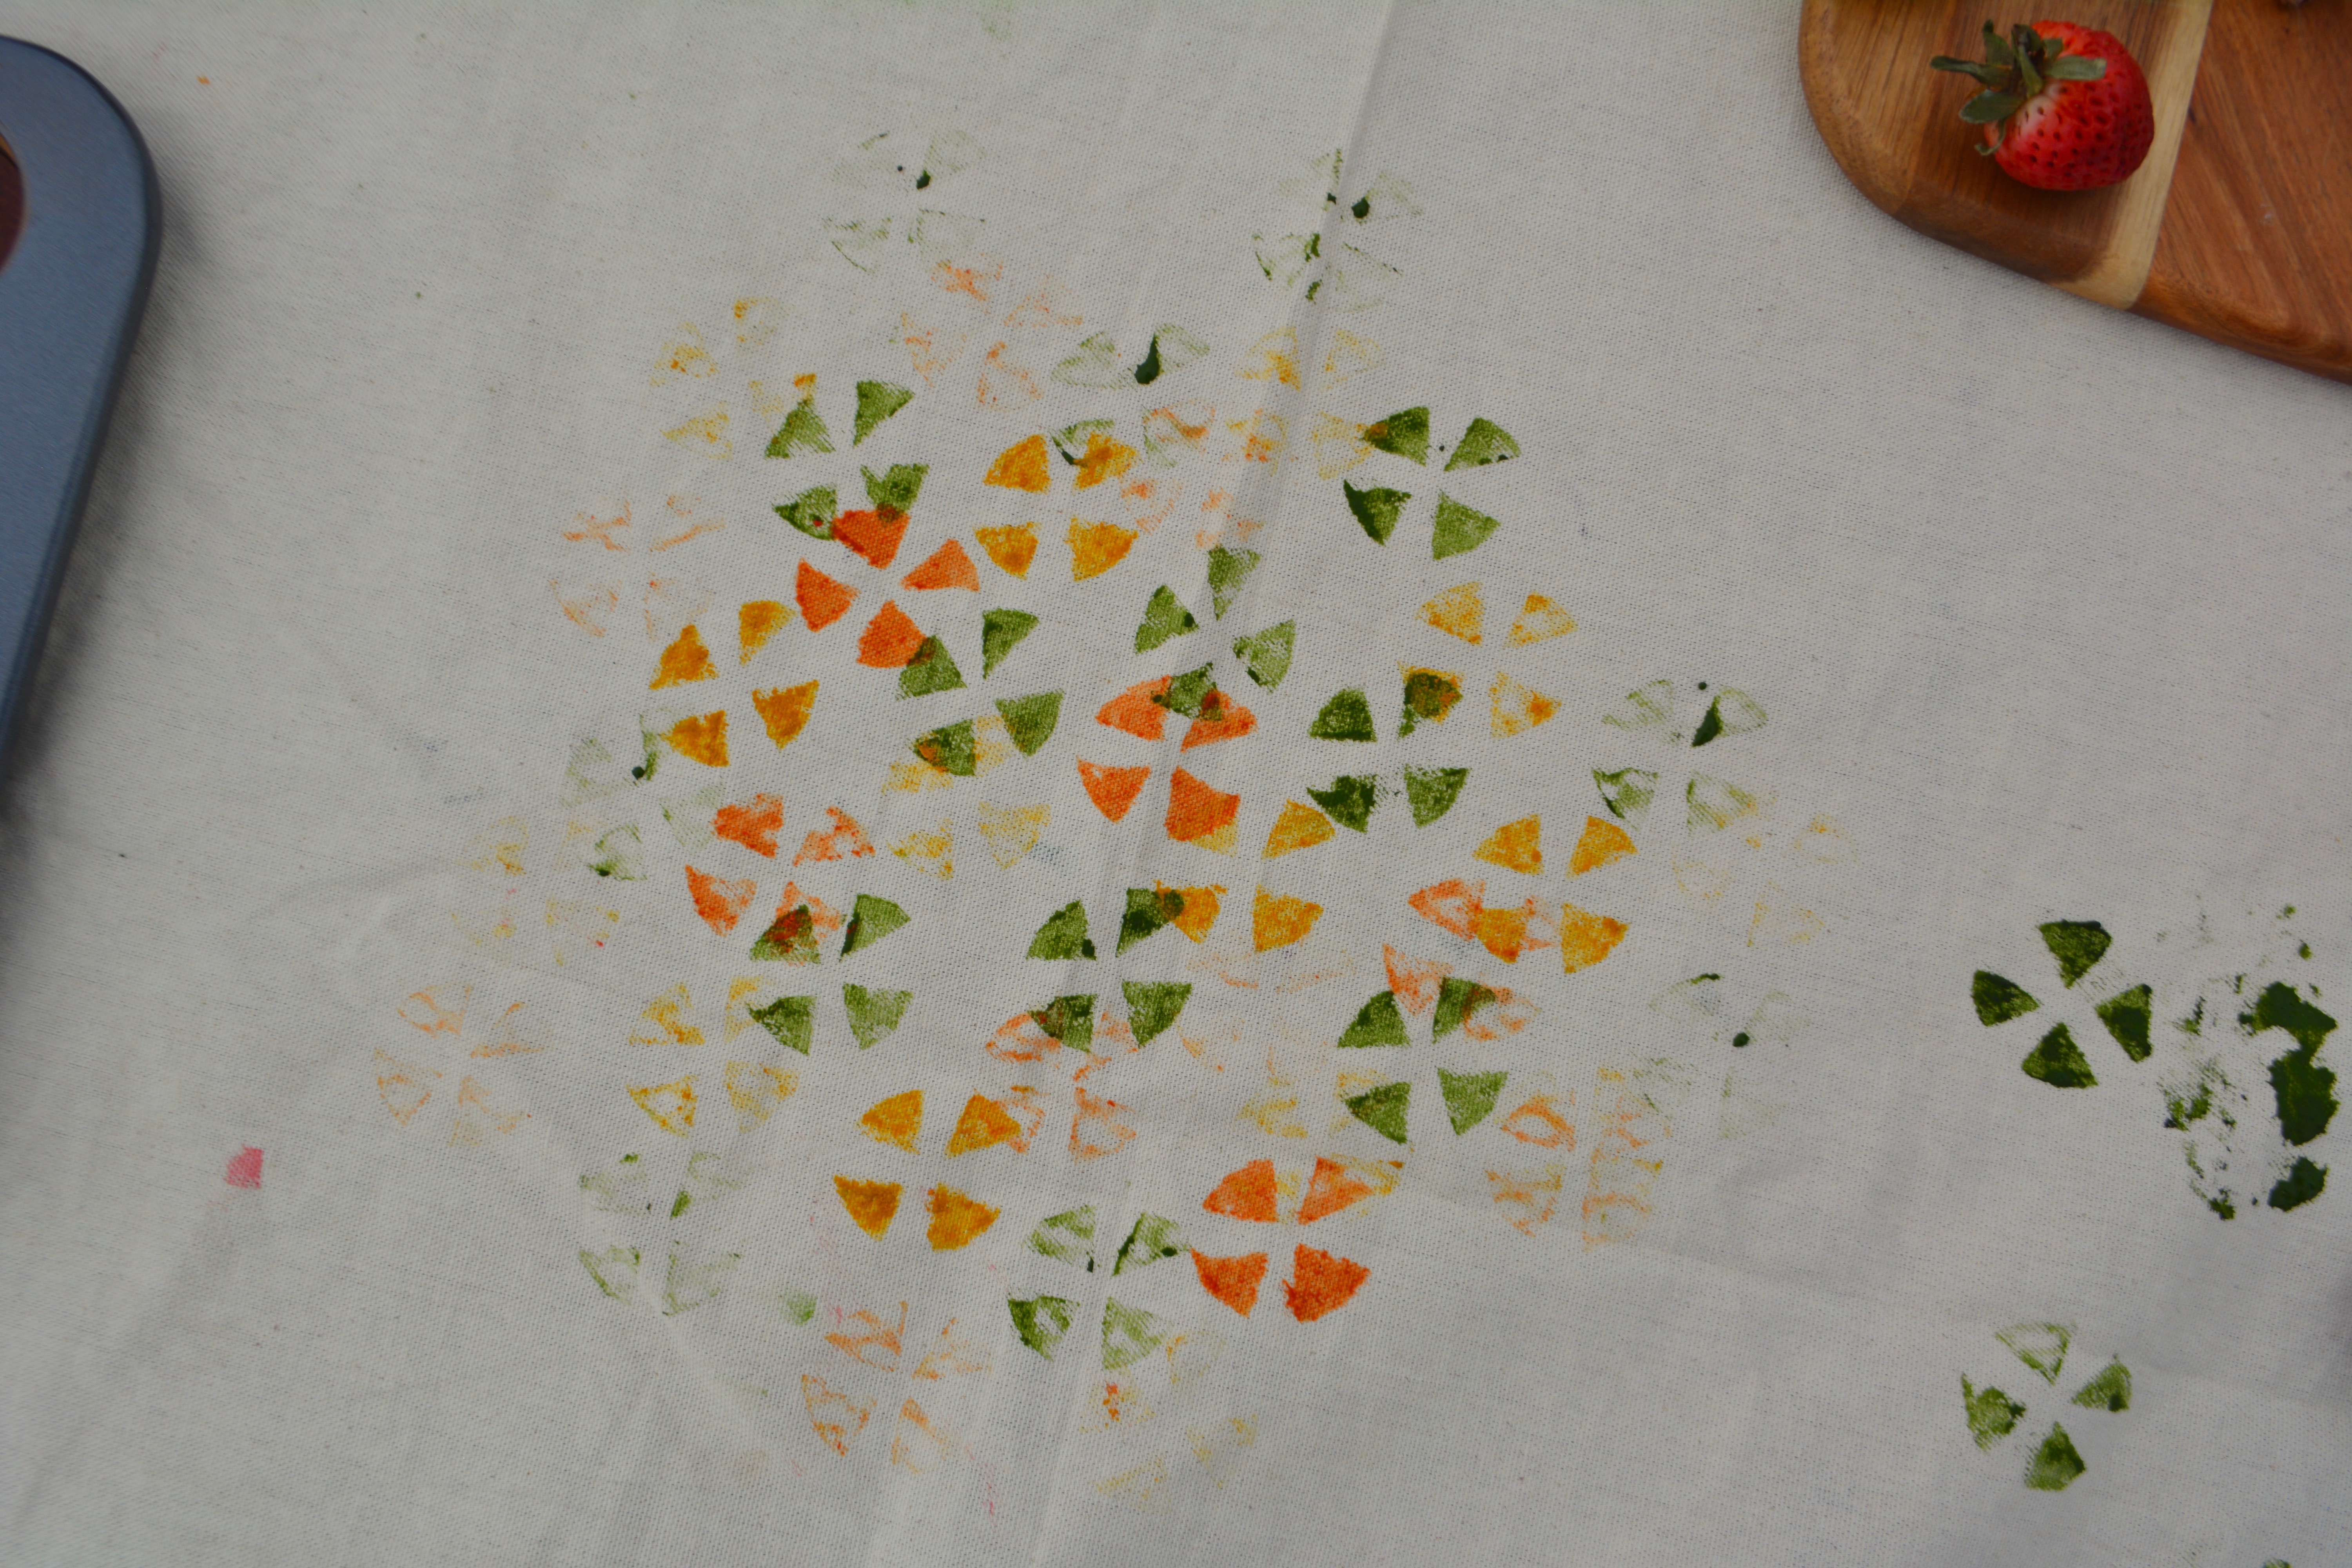
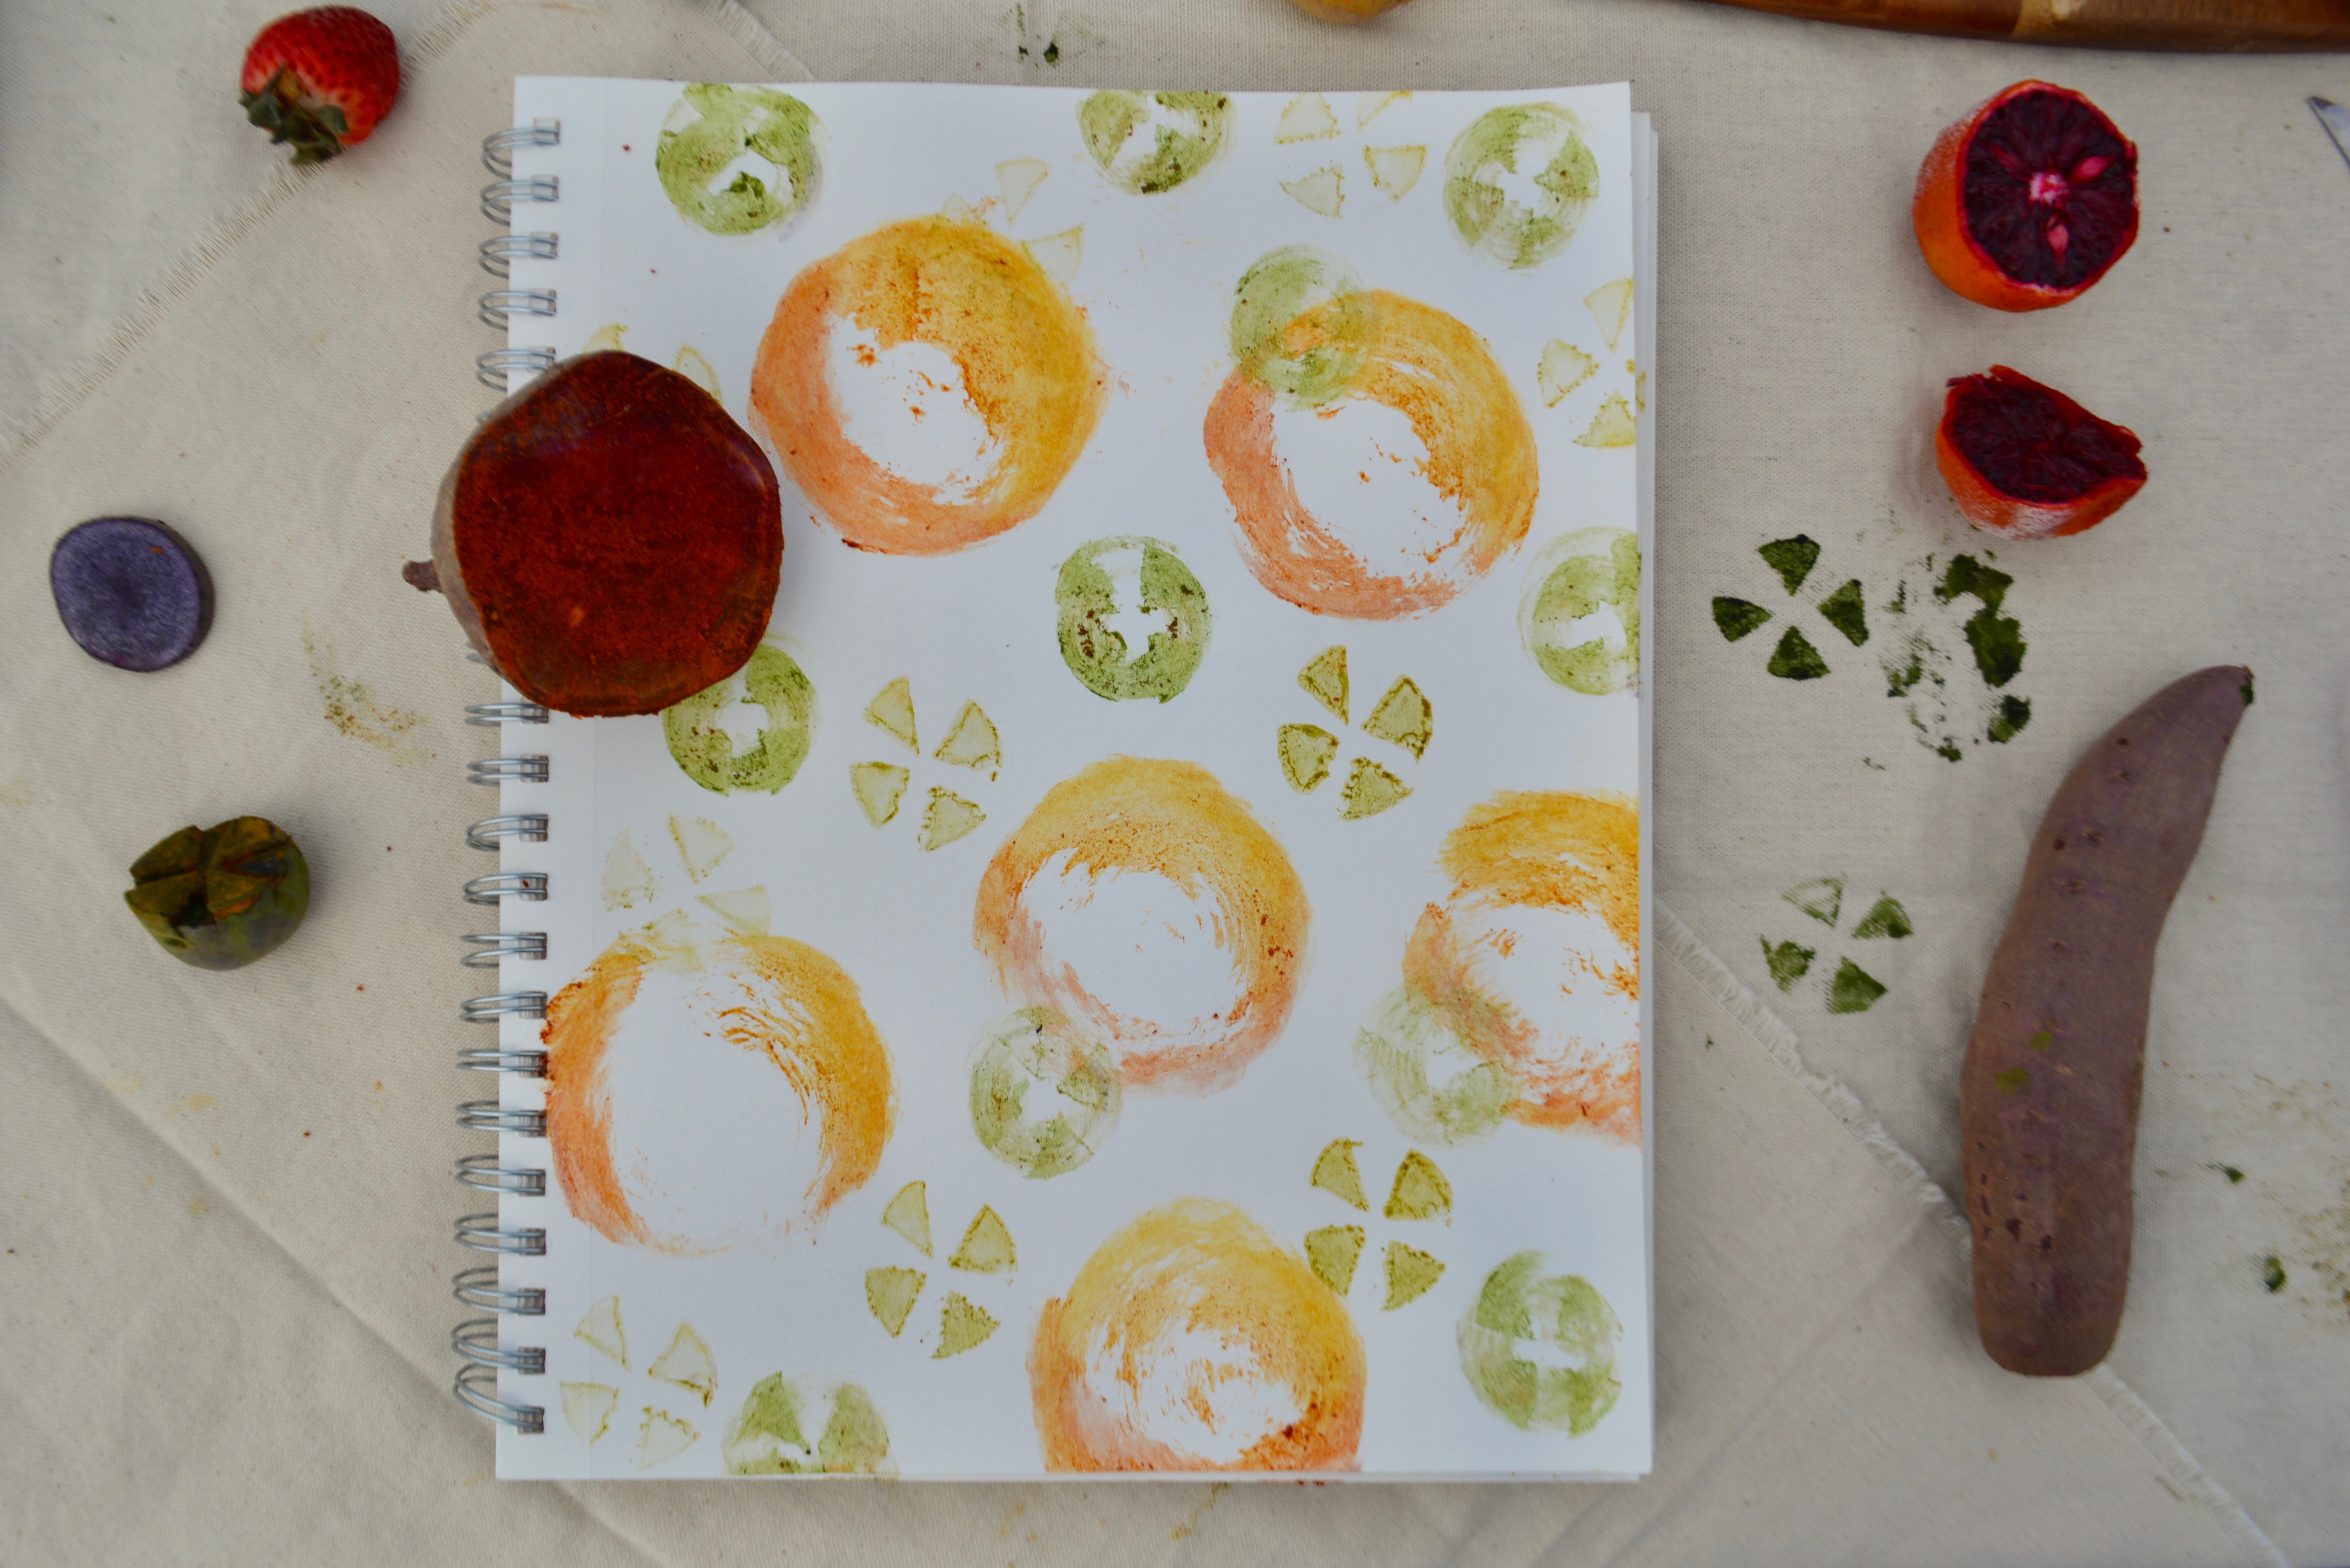
5 // Stamp!
Firmly press the potato stamp surface to your paper or fabric, pressing down more intensely for thinner paints.
Optional: drag/spin/move potato stamp on surface to create additional patterns and textures.
6 // Let your piece dry.
Once dry, gently brush off excess food/spice particles if needed.
You’re all done!


7 tea bags of your choice (I used black tea)
White distilled vinegar
Dissolved cornstarch (cornstarch with water)
Measuring cups
Tablespoon
Fork (optional)
2 small bowls
Plate
Medium size pot
Printer paper
Printer
Tape

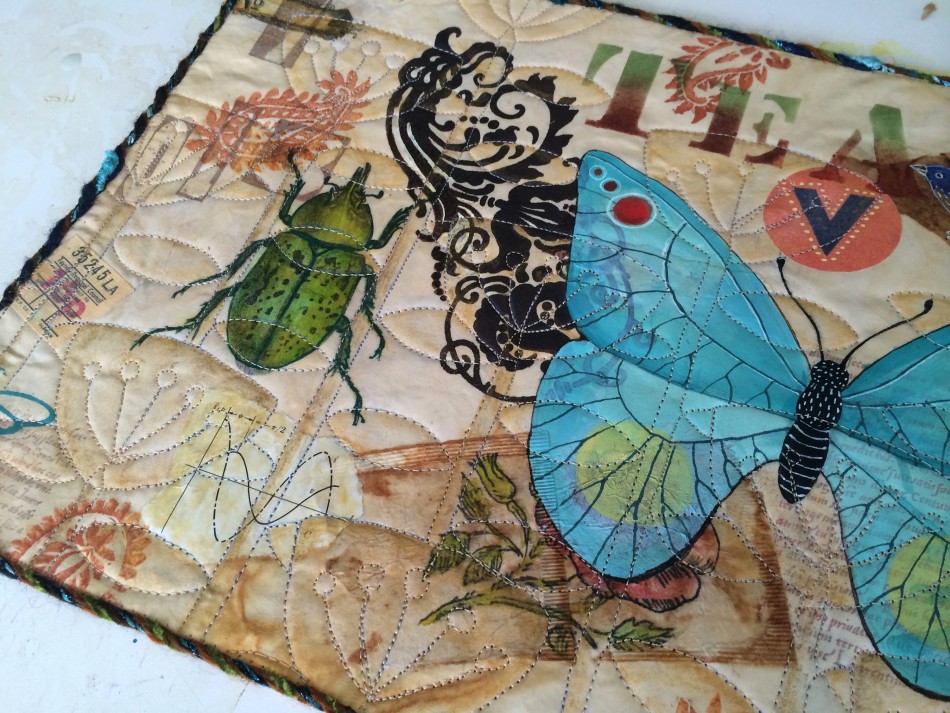
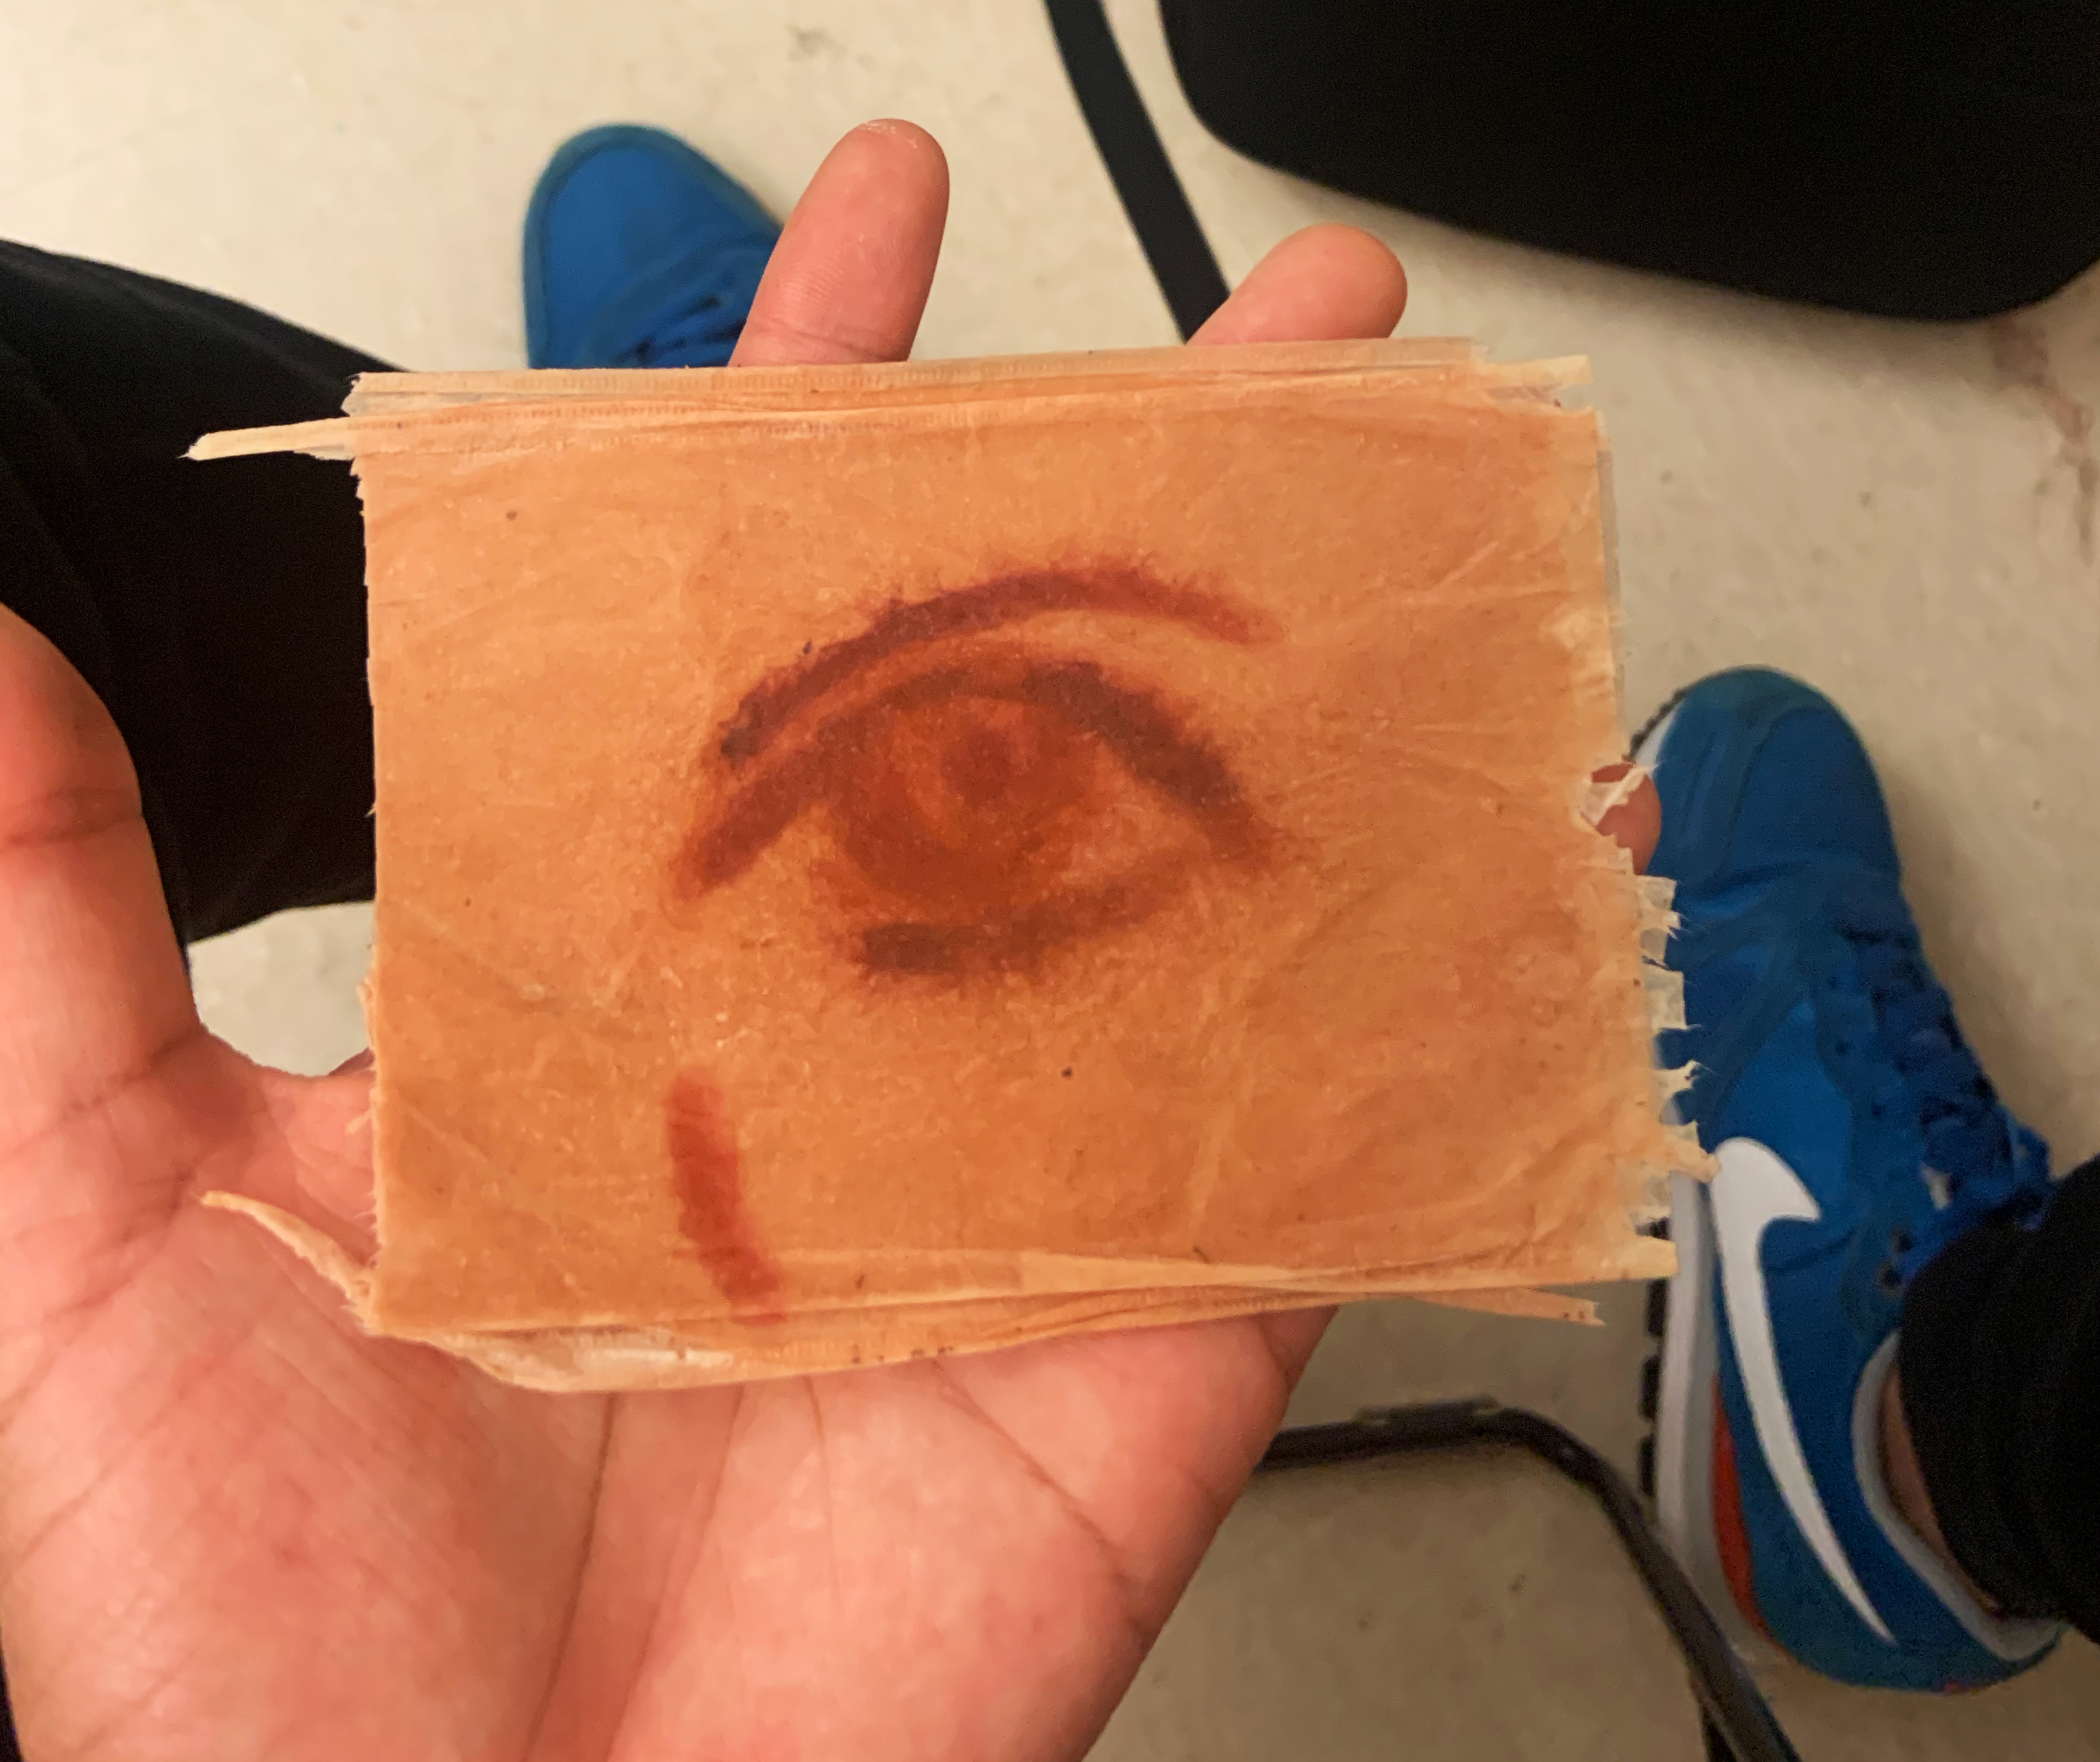
Tea Bag Printing
[click for instruction video]
1 // Prepare tea bags—
After collecting (used) tea bags for your collage, open each one and dump out the contents. I personally don’t mind the little tears when opening the tea bag; I think it adds to the distressed aesthetic that I’m going for. But if you’re going for a cleaner aesthetic then I would be extra careful with this step.
2 // Scanning—
Scan a high-resolution image onto your computer.
3 // Print—
Print the photo onto a piece of printer paper.
4 // Apply tea bag—
Place the flattened tea bag over the image and tape each corner. Make sure everything is smooth and flat so there won’t be a paper jam in the printer.
5 // Printing—
Place the paper face down in the paper tray so that it’s ready to be printed. Print!
That’s all!
Making Tea Ink
[click for instruction video]
1 // Boil water Turn on the stove and set it to medium high. Pour 1 1⁄2 cups of water into the pot, and let it boil.
2 // Boil tea When the water starts boiling, add your 7 tea bags. Grab a fork or a spoon and push down on the tea bags to extract more color as they boil.
3 // Remove the bags After 6-8 minutes, remove the tea bags from the pot and place them aside. Turn your stove onto the ‘low’ setting.
4 // Vinegar and cornstarch Add 1 tablespoon of vinegar and approximately 3 tablespoons of the dissolved cornstarch into the pot, and stir continuously. This will thicken the ink. Keep stirring until the consistency is to your liking, then turn your stove off.
5 // Pour the ink Remove the pot from the stove and pour the mixture into a small bow. Let it cool for 25-30 minutes before using it for creative purposes. Voila!