

7 tea bags of your choice (I used black tea)
White distilled vinegar
Dissolved cornstarch (cornstarch with water)
Measuring cups
Tablespoon
Fork (optional)
2 small bowls
Plate
Medium size pot
Printer paper
Printer
Tape


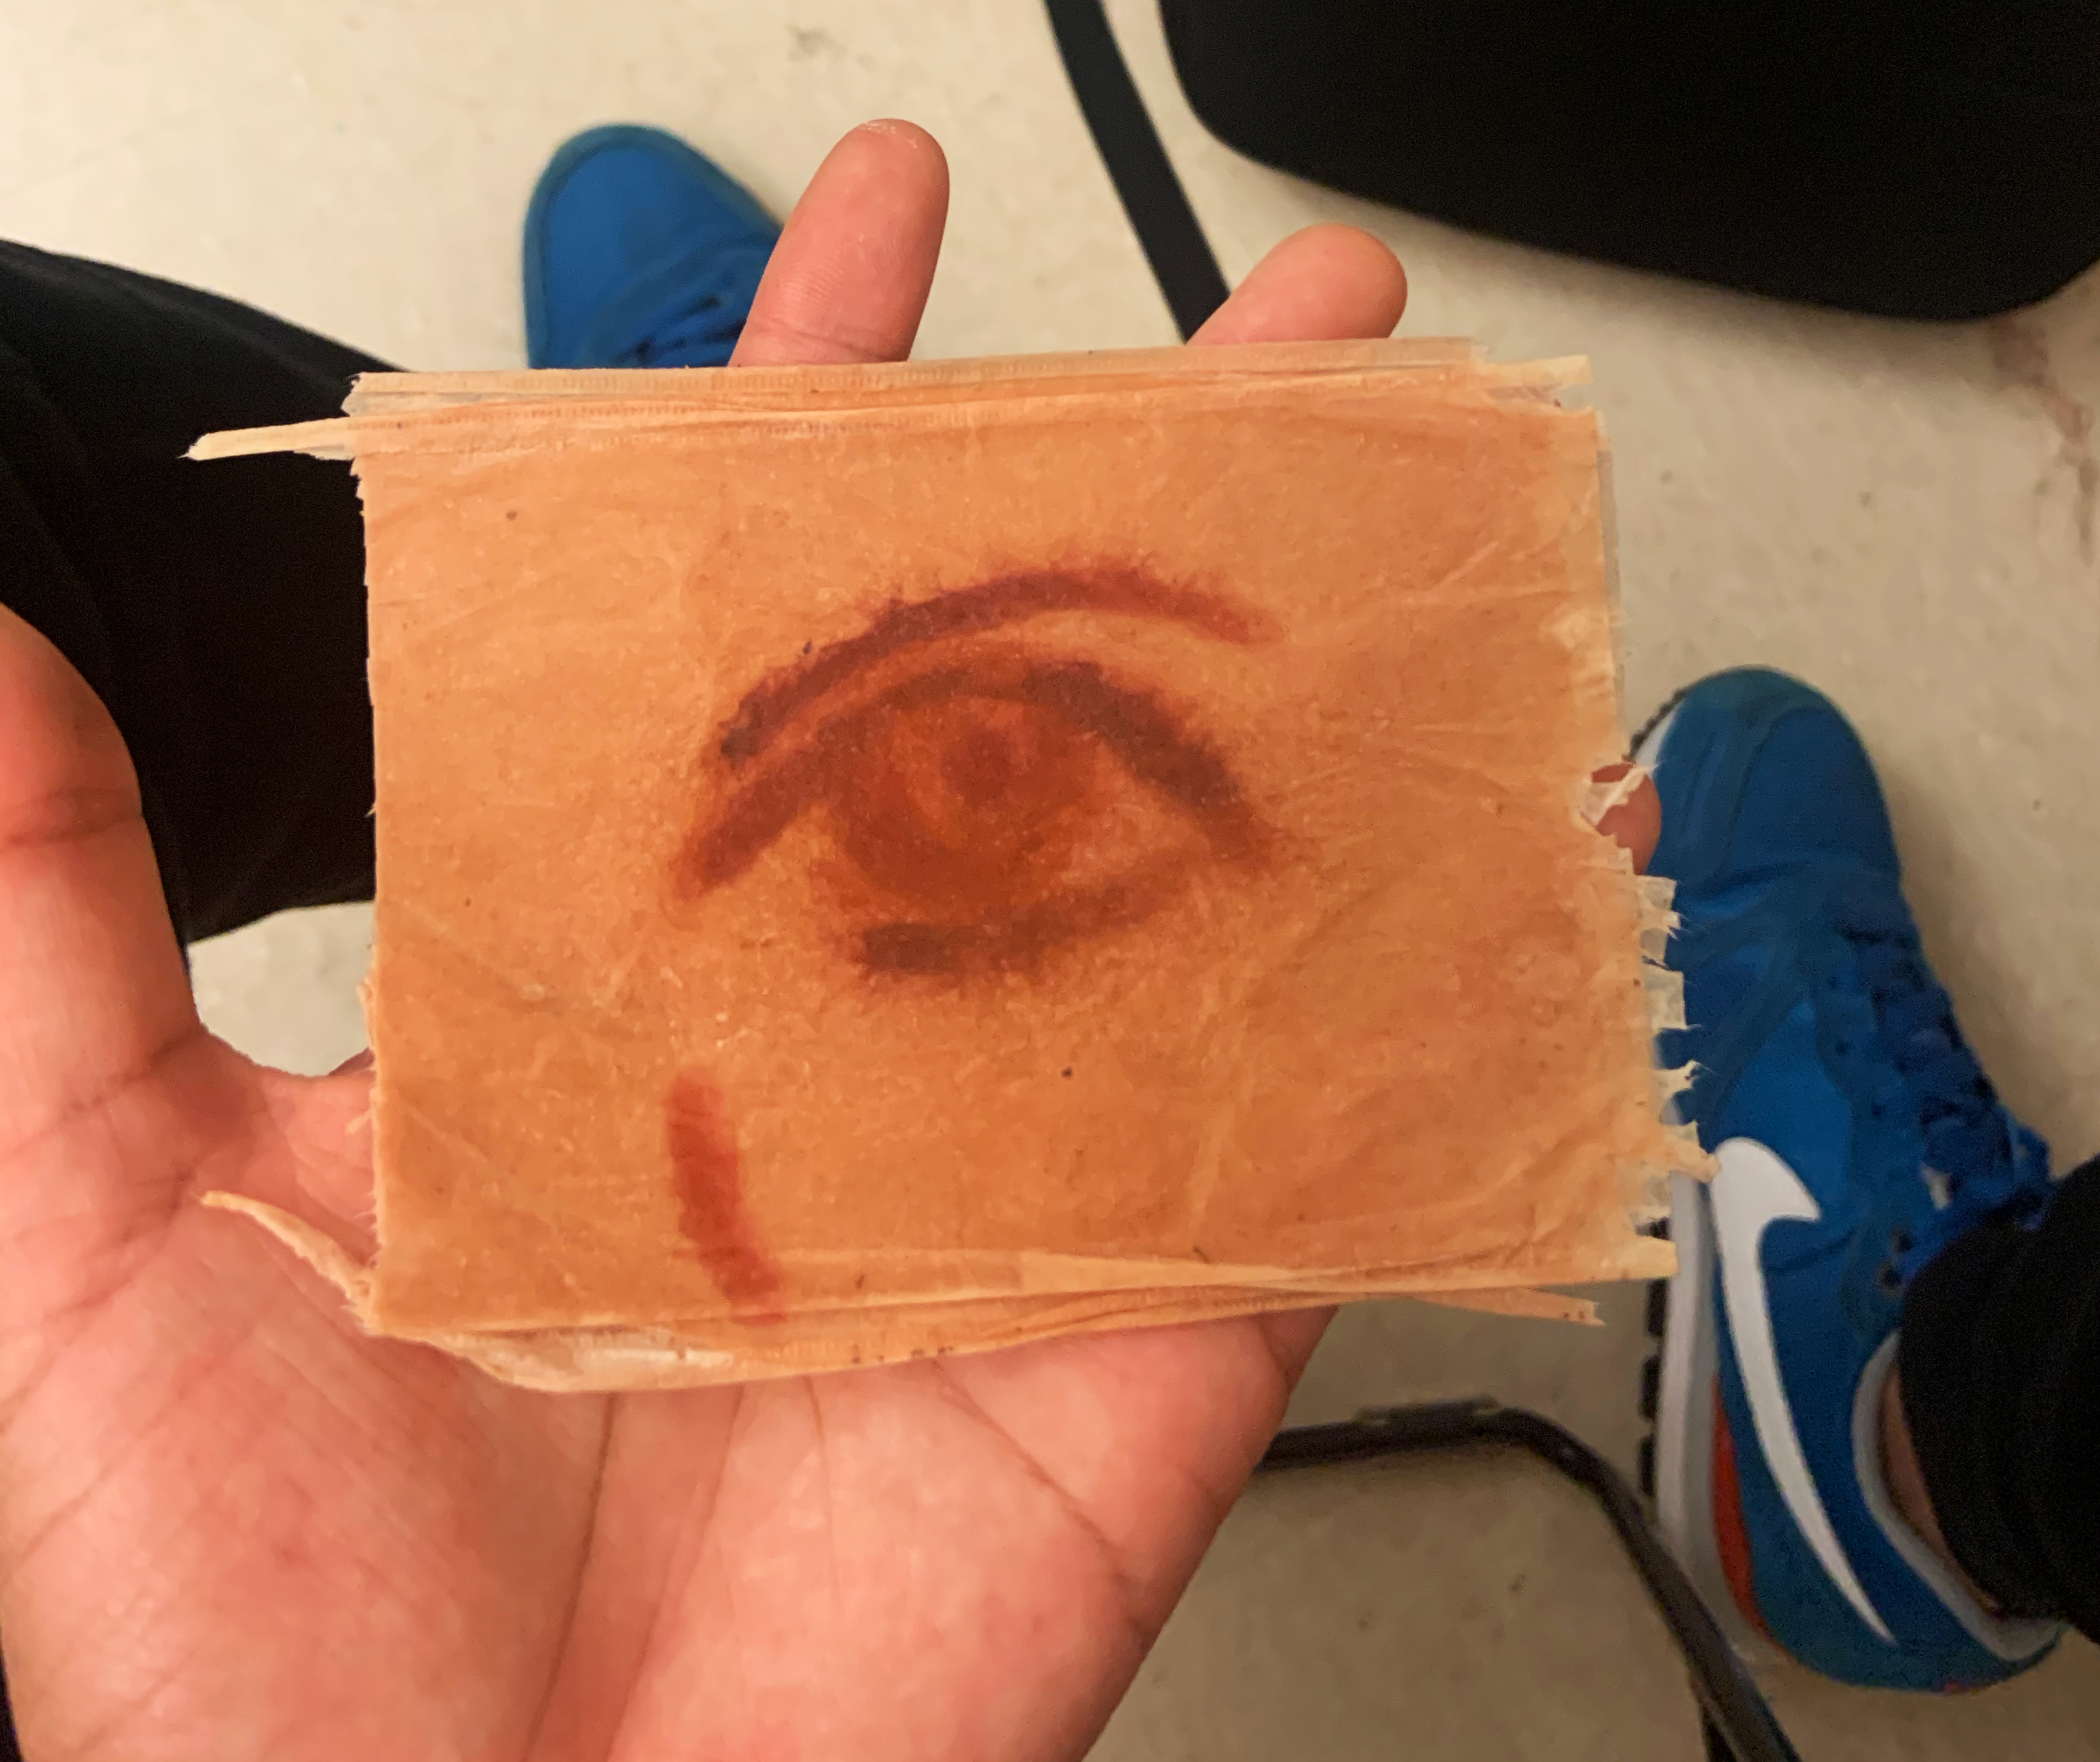
Tea Bag Printing
[click for instruction video]
1 // Prepare tea bags—
After collecting (used) tea bags for your collage, open each one and dump out the contents. I personally don’t mind the little tears when opening the tea bag; I think it adds to the distressed aesthetic that I’m going for. But if you’re going for a cleaner aesthetic then I would be extra careful with this step.
2 // Scanning—
Scan a high-resolution image onto your computer.
3 // Print—
Print the photo onto a piece of printer paper.
4 // Apply tea bag—
Place the flattened tea bag over the image and tape each corner. Make sure everything is smooth and flat so there won’t be a paper jam in the printer.
5 // Printing—
Place the paper face down in the paper tray so that it’s ready to be printed. Print!
That’s all!
Making Tea Ink
[click for instruction video]
1 // Boil water Turn on the stove and set it to medium high. Pour 1 1⁄2 cups of water into the pot, and let it boil.
2 // Boil tea When the water starts boiling, add your 7 tea bags. Grab a fork or a spoon and push down on the tea bags to extract more color as they boil.
3 // Remove the bags After 6-8 minutes, remove the tea bags from the pot and place them aside. Turn your stove onto the ‘low’ setting.
4 // Vinegar and cornstarch Add 1 tablespoon of vinegar and approximately 3 tablespoons of the dissolved cornstarch into the pot, and stir continuously. This will thicken the ink. Keep stirring until the consistency is to your liking, then turn your stove off.
5 // Pour the ink Remove the pot from the stove and pour the mixture into a small bow. Let it cool for 25-30 minutes before using it for creative purposes. Voila!